This section contains all the documentation and guides for PersonalMediaVault.
If you have any question you cannot solve with the provided documentation, feel free to start a discussion on GitHub.
This is the multi-page printable view of this section. Click here to print.
This section contains all the documentation and guides for PersonalMediaVault.
If you have any question you cannot solve with the provided documentation, feel free to start a discussion on GitHub.
PersonalMediaVault is an open source tool you can use to create an encrypted, easy to backup and easy to access media gallery.
PersonalMediaVault is a solution to store your personal media files in a secure way, while being able to easily access them from a web browser.
You can use PersonalMediaVault to store and organize your media files, being able to securely backup them in the cloud, thanks to them being encrypted.
You can run the server in local, or in a remote server.
If you run it in a server, you can access it from multiple devices, only requiring a modern web browser.
PersonalMediaVault has many useful features. Here is a list of them.
Your media files are encrypted with your password.
PersonalMediaVault uses the AES encryption algorithm, with a key length of 256 bits.
Only you, and who you allow, can access the vault. Use a strong password, combined with a password manager for more security.
The vault is stored in a folder, and always in a consistent status.
You can easily make a backup of the vault by making a copy of the folder.
You can safely store your vault in any cloud service without worrying your files being accessed, since they are encrypted.
PersonalMediaVault is implemented as a web application. You can run the server in local, or in a security-hardened server depending on your needs.
You can access the vault from any modern web browser, using the user-friendly and feature-rich web interface it provides.
You can upload videos, audios or pictures to the vault.
They are automatically classified, given a thumbnail if possible, and encoded for the playback in the browser.
Each kind of media has its own player interface, with both generic and specific features.
You can give each media file a title, description and classify it with tags.
You can then make searches using those parameters to easily find your media files.
You can create ordered lists of media files by creating albums.
Albums are the perfect way to easily accessing your favorite media files, or keeping a list of media files in order.
For example a series, a music playlist or a collection of photos of a particular event.
The web video player the tool provides has many features, including timeline previews, support for subtitles, support for multiple audio tracks, support for multiple resolutions and event timeline slices.
The audio player also has many of these features, including a sound wave animation to fill the blank space.
The web image viewer has also many features, including scaling, multiple resolutions and image annotations.
With image annotations, you can add a text that appears on hovering or clicking a zone of the image. It’s very useful for translations or any extra information to add to the image.
You can attach any file to a media file.
The attachment will also be encrypted with the same level of security and stored into the media vault, within the media file.
This can be very useful to store related documents, or original media files you don’t want to be encoded, but stored raw.
PersonalMediaVault is made to be fast and performant.
The server and main tools are built with the Go programming language. The web interface has very small bundle sizes. Multiple caches are in place to further reduce latency.
PersonalMediaVault provides a Docker image, so you can easily run a server in the cloud without worrying about dependencies or installations.
You can find the images both on Docker Hub and in GitHub Packages.
PersonalMediaVault provides a command line interface client for PersonalMediaVault, so you can access your vault even from a terminal.
This CLI tool can be also used to make automated scripts, in case you need them for advanced tasks.
PersonalMediaVault is not an end-to-end encryption storage service. The server is meant to be run by the owner of the media files, either in local or into a personal server.
In this section we explain how to download, install and run PersonalMediaVault for the first time.
Running the vault in an isolated container is the most secure way of running it, gives access to all the features and allows for a fine-grained configuration:
However, this may be a bit complex for non technical users. So, if you only need a local vault, go to the Installation section instead.
Check out the Releases section on GitHub to find pre-compiled installation packages.
Depending on your operating system, we offer you the following installation guides:
The installation guides also explain how to create a vault and run it in your system.
If you do not find any suitable package for your system, or you prefer to compile the project yourself, you can:
After installing and creating your first vault, you may want to check out the Tutorials section for more guides and tutorial on how to use PersonalMediaVault.
This guide explains how to compile PersonalMediaVault from source code.
You will need the following tools installed on your system to compile PersonalMediaVault:
PersonalMediaVault uses FFmpeg as a dependency to encode media, generate thumbnails among other things.
Download it from the official website and install it into your system.
Make sure the ffmpeg and ffprobe binaries are located inside /usr/bin. If they are not, please, set up the following environment variables in your system:
| Variable Name | Description |
|---|---|
| FFMPEG_PATH | Path to ffmpeg binary |
| FFPROBE_PATH | Path to ffprobe binary |
Clone the PersonalMediaVault repository with the following command:
git clone https://github.com/AgustinSRG/PersonalMediaVault
cd PersonalMediaVault
Navigate to the backend folder and run the compilation script:
cd backend
./build-production.sh
cd ..
The result will be a binary named pmvd. Copy it into /usr/bin
Navigate to the backup-tool folder and run the compilation script:
cd backup-tool
./build-production.sh
cd ..
The result will be a binary named pmv-backup. Copy it into /usr/bin
Navigate to the launcher folder and run the compilation script:
cd launcher
./build-production.sh
cd ..
The result will be a binary named pmv. Copy it into /usr/bin
Navigate to the launcher-gui folder and run the compilation script:
cd launcher-gui
./build-production.sh
cd ..
The result will be a binary named pmv-gui. Copy it into /usr/bin
Navigate to the frontend folder and run the compilation script:
cd frontend
npm install
npm run build
cd ..
The result will be a folder named dist. Copy its contents into /usr/lib/pmv/www
If you prefer to store the frontend into another path, make sure to set the following environment variable in your system:
| Variable Name | Description |
|---|---|
| FRONTEND_PATH | Path to static frontend to serve it. |
In order to create, or open a vault, run the launcher command:
pmv ./my_vault
This command will create a new vault on that folder, asking you for the initial username and password.
After it’s created, it will ask you for the port to run the server, and will start it, opening your default browser.
This guide explains how to download and install PersonalMediaVault on a Linux system, using one of the provided installation packages
Depending on your Linux distribution, we offer several packages.
For Debian-based Linux distributions, download the DEB package (personalmediavault_{VERSION}_amd64.deb) from Releases.
Install the package, with apt or with your graphical package manager.
You can also install it directly from the PPA repository (built automatically with GitHub actions):
# Download the public key
curl -s --compressed "https://agustinsrg.github.io/PersonalMediaVault/KEY.gpg" | gpg --dearmor | sudo tee /etc/apt/trusted.gpg.d/pmv.gpg >/dev/null

# Add the APT list file
sudo curl -s --compressed -o /etc/apt/sources.list.d/pmv.list "https://agustinsrg.github.io/PersonalMediaVault/pmv.list"

# Update APT lists
sudo apt update

# Install the package
sudo apt install personalmediavault
After it’s installed, you can run the launcher with pmv /path/to/vault or the graphical launcher by searching for “PersonalMediaVault” in your application menu.
For Fedora-based Linux distributions, download the RPM package (personalmediavault-{VERSION}.x86_64.rpm) from Releases.
Install the package, with dnf or with your graphical package manager.
After it’s installed, you can run the launcher with pmv /path/to/vault or the graphical launcher by searching for “PersonalMediaVault” in your application menu.
For Arch-based Linux distributions, download the PKG.TAR.ZST package (personalmediavault-{VERSION}-x86_64.pkg.tar.zst) from Releases.
Install the package, with pacman:
sudo pacman -U personalmediavault-{VERSION}-x86_64.pkg.tar.zst
After it’s installed, you can run the launcher with pmv /path/to/vault or the graphical launcher by searching for “PersonalMediaVault” in your application menu.
For any other Linux distribution, you can download the TAR.GZ package (personalmediavault_{VERSION}_amd64.tar.gz) from Releases.
Uncompress it, and run the installation script (install.sh) with administration privileges:
sudo ./install.sh
After it’s installed, you can run the launcher with pmv /path/to/vault or the graphical launcher by searching for “PersonalMediaVault” in your application menu.
If you are using a Linux distribution, and KDE as your desktop environment, you can get the same context menu options to open vaults that are installed in the Windows package.
Create the file ~/.local/share/kio/servicemenus/pmv-open.desktop with the following contents:
[Desktop Entry]
Name=Open with PersonalMediaVault
Type=Service
ServiceTypes=KonqPopupMenu/Plugin
MimeType=inode/directory
Actions=openWithPmv

[Desktop Action openWithPmv]
Name=Open with PersonalMediaVault
Name[es]=Abrir con PersonalMediaVault
Terminal=false
Icon=pmv
StartupWMClass=pmv
Exec=pmv-gui .
If you prefer to use the console launcher instead, use the following desktop entry:
[Desktop Entry]
Name=Open with PersonalMediaVault (Console)
Type=Service
ServiceTypes=KonqPopupMenu/Plugin
MimeType=inode/directory
Actions=openWithPmvConsole

[Desktop Action openWithPmvConsole]
Name=Open with PersonalMediaVault (Console)
Name[es]=Abrir con PersonalMediaVault (Consola)
Terminal=false
Icon=pmv
StartupWMClass=pmv
Exec=konsole --separate -e 'pmv .'
This guide explains how to download and install PersonalMediaVault on a Windows system.
Download the MSI installer (PersonalMediaVault-{VERSION}-x64.msi) from Releases.
The file should have a name formatted similar to PersonalMediaVault-A.B.C-x64.msi, replacing A, B and C for the major, minor and patch version number respectively.
Make sure to check the file hash with Powershell and compare it to the provided hash on GitHub.
Once downloaded, run the installer and follow the steps.
The installer should take care of everything for you, installing all the dependencies and placing the binaries in the Program Files folder.
The installer will add an option to the file explorer to open a folder with PersonalMediaVault.
Create a new folder, and use that option to open with PersonalMediaVault.
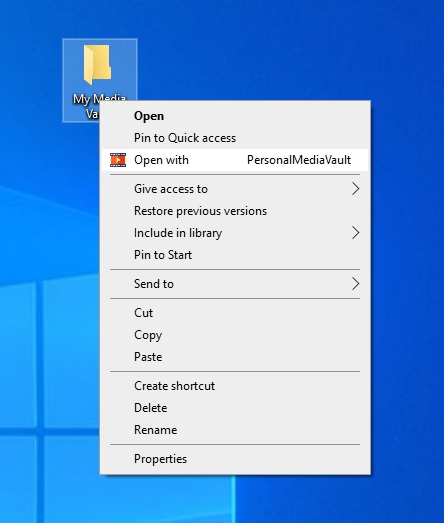
That will open the launcher, asking you for an initial username and password for your vault.
After the vault is created, it will ask you for a port to run the server, and will start it, opening your default browser.
This guide explains how to run PersonalMediaVault with Docker.
First, select a Docker repository and pull the image
Here is an example, if you choose Docker Hub:
docker pull asanrom/pmv
Create a folder where you wish to install the vault, and create a file named docker-compose.yml, with the following content:
services:
  pmvd:
    hostname: "pmvd"
    image: "asanrom/pmv"
    ports:
      - "${VAULT_PORT}:8000"
    restart: unless-stopped
    volumes:
      - ${VAULT_PATH:-./vault}:/vault
      - ${VAULT_SSL_PATH:-./ssl}:/ssl:ro
    environment:
      - USING_PROXY=${USING_PROXY:-NO}
      - VAULT_INITIAL_USER=${VAULT_INITIAL_USER:-admin}
      - VAULT_INITIAL_PASSWORD=${VAULT_INITIAL_PASSWORD:-changeme}
      - SSL_CERT=${SSL_CERT:-}
      - SSL_KEY=${SSL_KEY:-}
    command: --daemon
      --clean
      --port 8000
      --skip-lock
      --vault-path /vault
      --cache-size ${VAULT_CACHE_SIZE:-1024}
      ${VAULT_EXTRA_OPTIONS:-}
Also, create a .env file, with the following content (modify the configuration depending on your needs):
####################################
# PersonalMediaVault configuration #
####################################

# Listening port
VAULT_PORT=8000

# Path where the vault will be stored
VAULT_PATH=./vault

# SSL (recommended)
#
# Running the vault with HTTP is the most secure option
# Obtain a key and a certificate for your domain
#
# Set VAULT_SSL_PATH to the path where the key and the certificate are stored
# This path will be mapped to /ssl in the container
# Set SSL_KEY and SSL_CERT to the key and certificate chain files respectively
# The files must be in the /ssl path (eg: /ssl/certificate.pem) and in PEM format

VAULT_SSL_PATH=./ssl

#SSL_KEY=/ssl/key.pem
#SSL_CERT=/ssl/certificate.pem

# Reverse proxy
#
# Sometimes is better to use a reverse proxy (line NGINX)
# as the frontend and forward the requests to the daemon
#
# If you are using it, set USING_PROXY to YES in order for
# the daemon to change the way it resolves the IP addresses of clients

USING_PROXY=NO

# Initial vault user
#
# If the vault has no users, an initial user will be created
#
# Set VAULT_INITIAL_USER and VAULT_INITIAL_PASSWORD
# for the username and password respectively
#
# Make sure to change them the first time you log into the vault.

VAULT_INITIAL_USER=admin
VAULT_INITIAL_PASSWORD=changeme

# Cache size
# You can modify it to accelerate the read speed
# but will also result in higher memory usage
# The recommended value is 1024

VAULT_CACHE_SIZE=1024

# Extra options
#
# You can set the following extra options,
# separating them with spaces:
#
#   --log-requests - Enables request logging
#   --debug - Enables debug logging (useful for troubleshooting)
#   --recover - Recovers non-indexed media assets.
#   --check-trash - Checks the vault (at startup) in order to find trash files. This option requires the vault credentials passed in the environment variables 'VAULT_USER' and 'VAULT_PASSWORD', in order to decrypt the vault files.
#   --remove-trash - Removes the trash files. Combine this option with '--check-trash'.
VAULT_EXTRA_OPTIONS=--log-requests
Check the server options for more information of all the available options to run the server.
In order to run the vault, run Docker compose:
docker compose up -d
Go to http://localhost to check out your vault. You can login with the credentials you specified in VAULT_INITIAL_USER and VAULT_INITIAL_PASSWORD.
Change your password, and possibly username, and start using your vault.
If you want to upgrade the image in order to use the latest version, wun:
docker compose pull
Then, to restart the vault, run:
docker compose up -d
If you want to stop the vault server, run the following command:
docker compose down
This guide explains how to run PersonalMediaVault with Docker, enabling the available AI features (semantic search and search by image).
By default, PersonalMediaVault runs without AI features. You must add the missing components and configuration settings in order to enable them.
This opt-in approach has been chosen due to the high cost of the dependencies to enable the features, versus the actual utility of the features:
If you enable AI features, you’ll get the following features:
For this Docker Compose setup, you will need the following images:
To pull them, type:
docker pull asanrom/pmv
docker pull asanrom/pmv-ai-service
docker pull qdrant/qdrant
Create a folder where you wish to install the vault, and create a file named docker-compose.yml, with the following content:
services:

  # Qdrant vector database
  pmv_qdrant:
    hostname: "pmv-qdrant"
    image: qdrant/qdrant
    networks:
      - pmv_with_ai_network
    ports:
      - '6334'
    volumes:
      - ./qdrant-db:/qdrant/storage
    restart: unless-stopped
    environment:
      - QDRANT__LOG_LEVEL=${QDRANT_LOG_LEVEL:-INFO}
      - QDRANT__SERVICE__API_KEY=${QDRANT_API_KEY:-change_me}
      - QDRANT__GRPC_PORT=6334

  # AI service for encoding text and images into vectors
  pmv_ai:
    hostname: "pmv-ai"
    image: asanrom/pmv-ai-service
    networks:
      - pmv_with_ai_network
    ports:
      - '8080'
    volumes:
      - ./ai-models:/home/app/.data
    restart: unless-stopped
    environment:
      - LOGLEVEL=${AI_SERVICE_LOG_LEVEL:-INFO}
      - API_AUTHORIZATION=${AI_SERVICE_AUTH_TOKEN:-}
      - CLIP_MODEL_NAME=${CLIP_MODEL_NAME:-ViT-B/32}

  # PersonalMediaVault daemon
  pmvd:
    hostname: "pmvd"
    image: "asanrom/pmv"
    networks:
      - pmv_with_ai_network
    ports:
      - "${VAULT_PORT}:8000"
    restart: unless-stopped
    volumes:
      - ${VAULT_PATH:-./vault}:/vault
      - ${VAULT_SSL_PATH:-./ssl}:/ssl:ro
    environment:
      - USING_PROXY=${USING_PROXY:-NO}
      - VAULT_INITIAL_USER=${VAULT_INITIAL_USER:-admin}
      - VAULT_INITIAL_PASSWORD=${VAULT_INITIAL_PASSWORD:-changeme}
      - SSL_CERT=${SSL_CERT:-}
      - SSL_KEY=${SSL_KEY:-}
      - SEMANTIC_SEARCH_ENABLED=YES
      - QDRANT_HOST=pmv-qdrant
      - QDRANT_PORT=6334
      - QDRANT_API_KEY=${QDRANT_API_KEY:-change_me}
      - QDRANT_USE_TLS=NO
      - QDRANT_INITIAL_SCAN=YES
      - CLIP_API_BASE=http://pmv-ai:8080/clip
      - CLIP_API_AUTH=${AI_SERVICE_AUTH_TOKEN:-}
      - CLIP_IMAGE_SIZE_LIMIT_MB=25
    command:
      --daemon
      --clean
      --port 8000
      --skip-lock
      --vault-path /vault
      --cache-size ${VAULT_CACHE_SIZE:-1024}
      ${VAULT_EXTRA_OPTIONS:-}

networks:
  pmv_with_ai_network:
Also, create a .env file, with the following content (modify the configuration depending on your needs):
####################################
# PersonalMediaVault configuration #
####################################

# Listening port
VAULT_PORT=8000

# Path where the vault will be stored
VAULT_PATH=./vault

# SSL (recommended)
#
# Running the vault with HTTP is the most secure option
# Obtain a key and a certificate for your domain
#
# Set VAULT_SSL_PATH to the path where the key and the certificate are stored
# This path will be mapped to /ssl in the container
# Set SSL_KEY and SSL_CERT to the key and certificate chain files respectively
# The files must be in the /ssl path (eg: /ssl/certificate.pem) and in PEM format

VAULT_SSL_PATH=./ssl

#SSL_KEY=/ssl/key.pem
#SSL_CERT=/ssl/certificate.pem

# Reverse proxy
#
# Sometimes is better to use a reverse proxy (line NGINX)
# as the frontend and forward the requests to the daemon
#
# If you are using it, set USING_PROXY to YES in order for
# the daemon to change the way it resolves the IP addresses of clients

USING_PROXY=NO

# Initial vault user
#
# If the vault has no users, an initial user will be created
#
# Set VAULT_INITIAL_USER and VAULT_INITIAL_PASSWORD
# for the username and password respectively
#
# Make sure to change them the first time you log into the vault.

VAULT_INITIAL_USER=admin
VAULT_INITIAL_PASSWORD=changeme

# Cache size
# You can modify it to accelerate the read speed
# but will also result in higher memory usage
# The recommended value is 1024

VAULT_CACHE_SIZE=1024

# Extra options
#
# You can set the following extra options,
# separating them with spaces:
#
#   --log-requests - Enables request logging
#   --debug - Enables debug logging (useful for troubleshooting)
#   --recover - Recovers non-indexed media assets.
#   --check-trash - Checks the vault (at startup) in order to find trash files. This option requires the vault credentials passed in the environment variables 'VAULT_USER' and 'VAULT_PASSWORD', in order to decrypt the vault files.
#   --remove-trash - Removes the trash files. Combine this option with '--check-trash'.
VAULT_EXTRA_OPTIONS=--log-requests

# Qdrant log level
# Can be: ERROR, WARNING, INFO, DEBUG

QDRANT_LOG_LEVEL=INFO

# Qdrant API key
# Change it to a random string for security

QDRANT_API_KEY=change_me

# AI service log level
# Can be: ERROR, WARNING, INFO, DEBUG

AI_SERVICE_LOG_LEVEL=INFO

# AI service authorization token
# Change it to a random string for security

AI_SERVICE_AUTH_TOKEN=change_me

# CLIP model to use
# Available models: RN50, RN101, RN50x4, RN50x16, RN50x64, ViT-B/32, ViT-B/16, ViT-L/14 and ViT-L/14@336px

CLIP_MODEL_NAME=ViT-B/32
Check the server options for more information of all the available options to run the server.
In order to run the vault, run Docker compose:
docker compose up -d
Go to http://localhost to check out your vault. You can login with the credentials you specified in VAULT_INITIAL_USER and VAULT_INITIAL_PASSWORD.
Change your password, and possibly username, and start using your vault.
If you want to upgrade the image in order to use the latest version, wun:
docker compose pull
Then, to restart the vault, run:
docker compose up -d
If you want to stop the vault server, run the following command:
docker compose down
This section contains tutorials on varios aspects of PersonalMediaVault.
Check the list below in order to find what you are looking for.
If you can’t find what you’re looking for, feel free to start a discussion on GitHub.
After you launched the vault server, you will be given an URL to connect to the vault using a web browser.
Most modern browsers are supported, including Chromium-based browser, Firefox-based browsers or Webkit-based browsers.
The fist screen you will see is a login screen asking for your vault credentials to unlock the vault. You have to use the credentials you provide when creating the vault. If you didn’t specify any credentials, by default, the username is admin and the password is also admin.
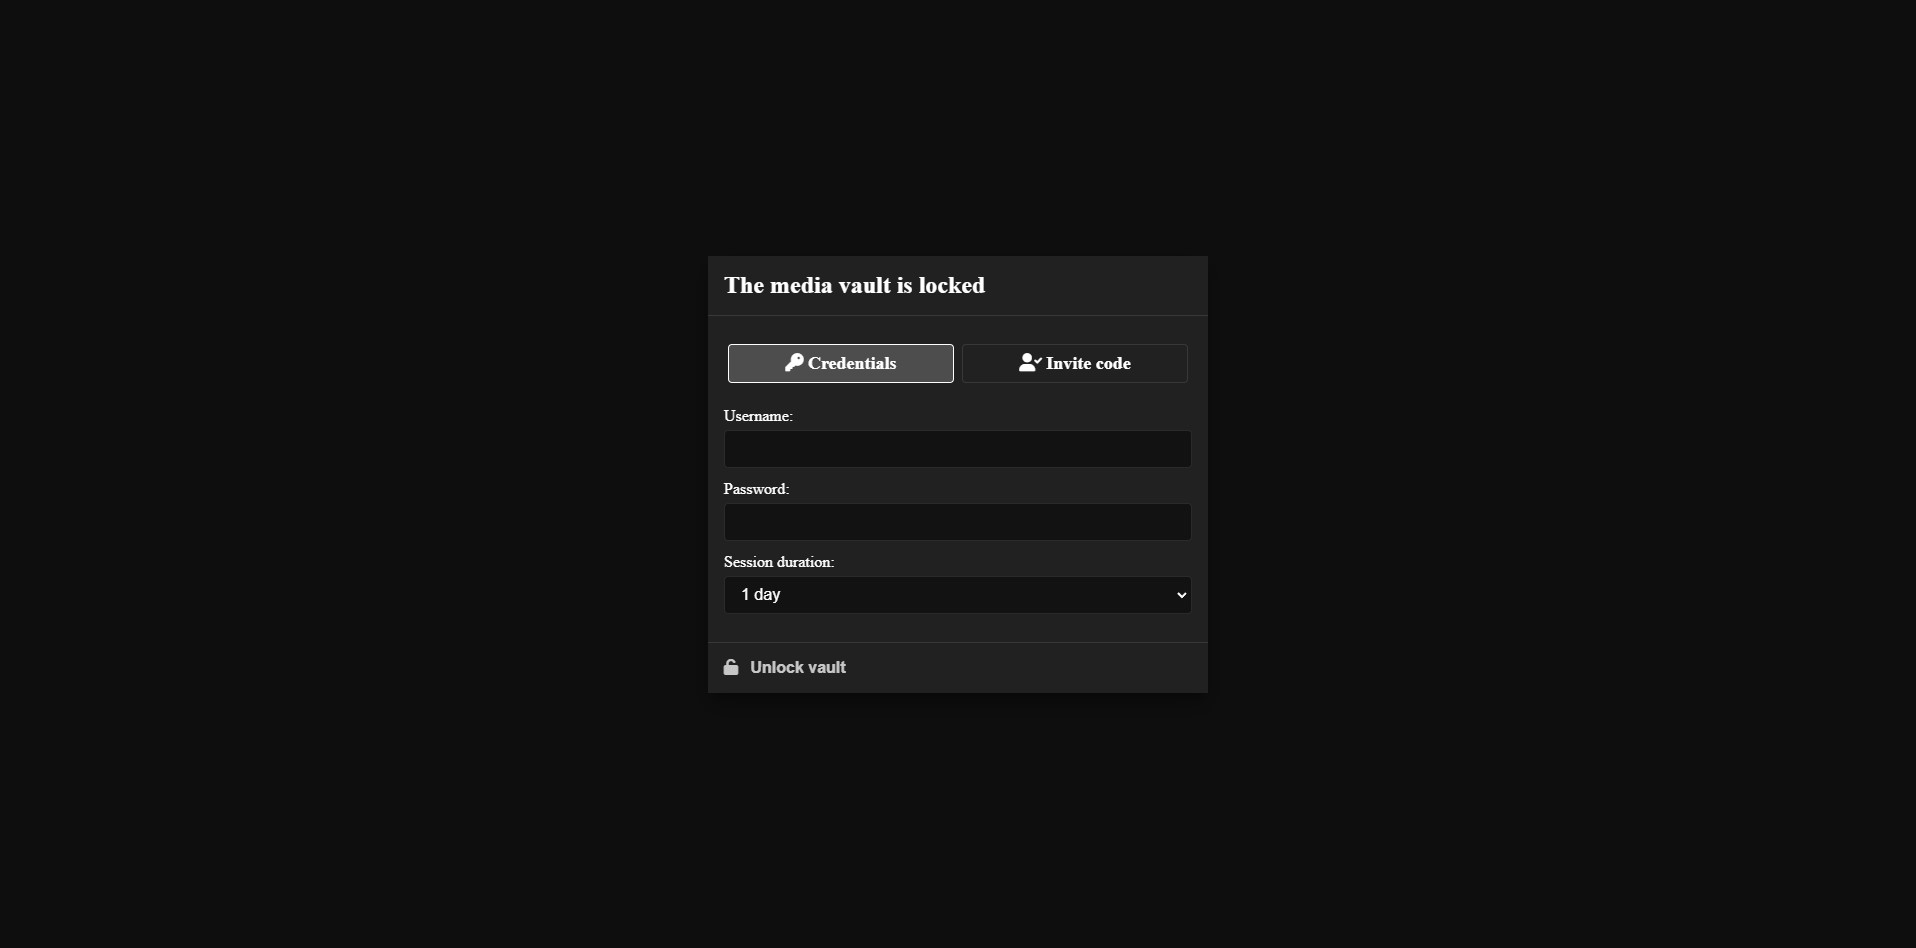
After you successfully log into your vault, you will be presented with the PersonalMediaVault main interface:
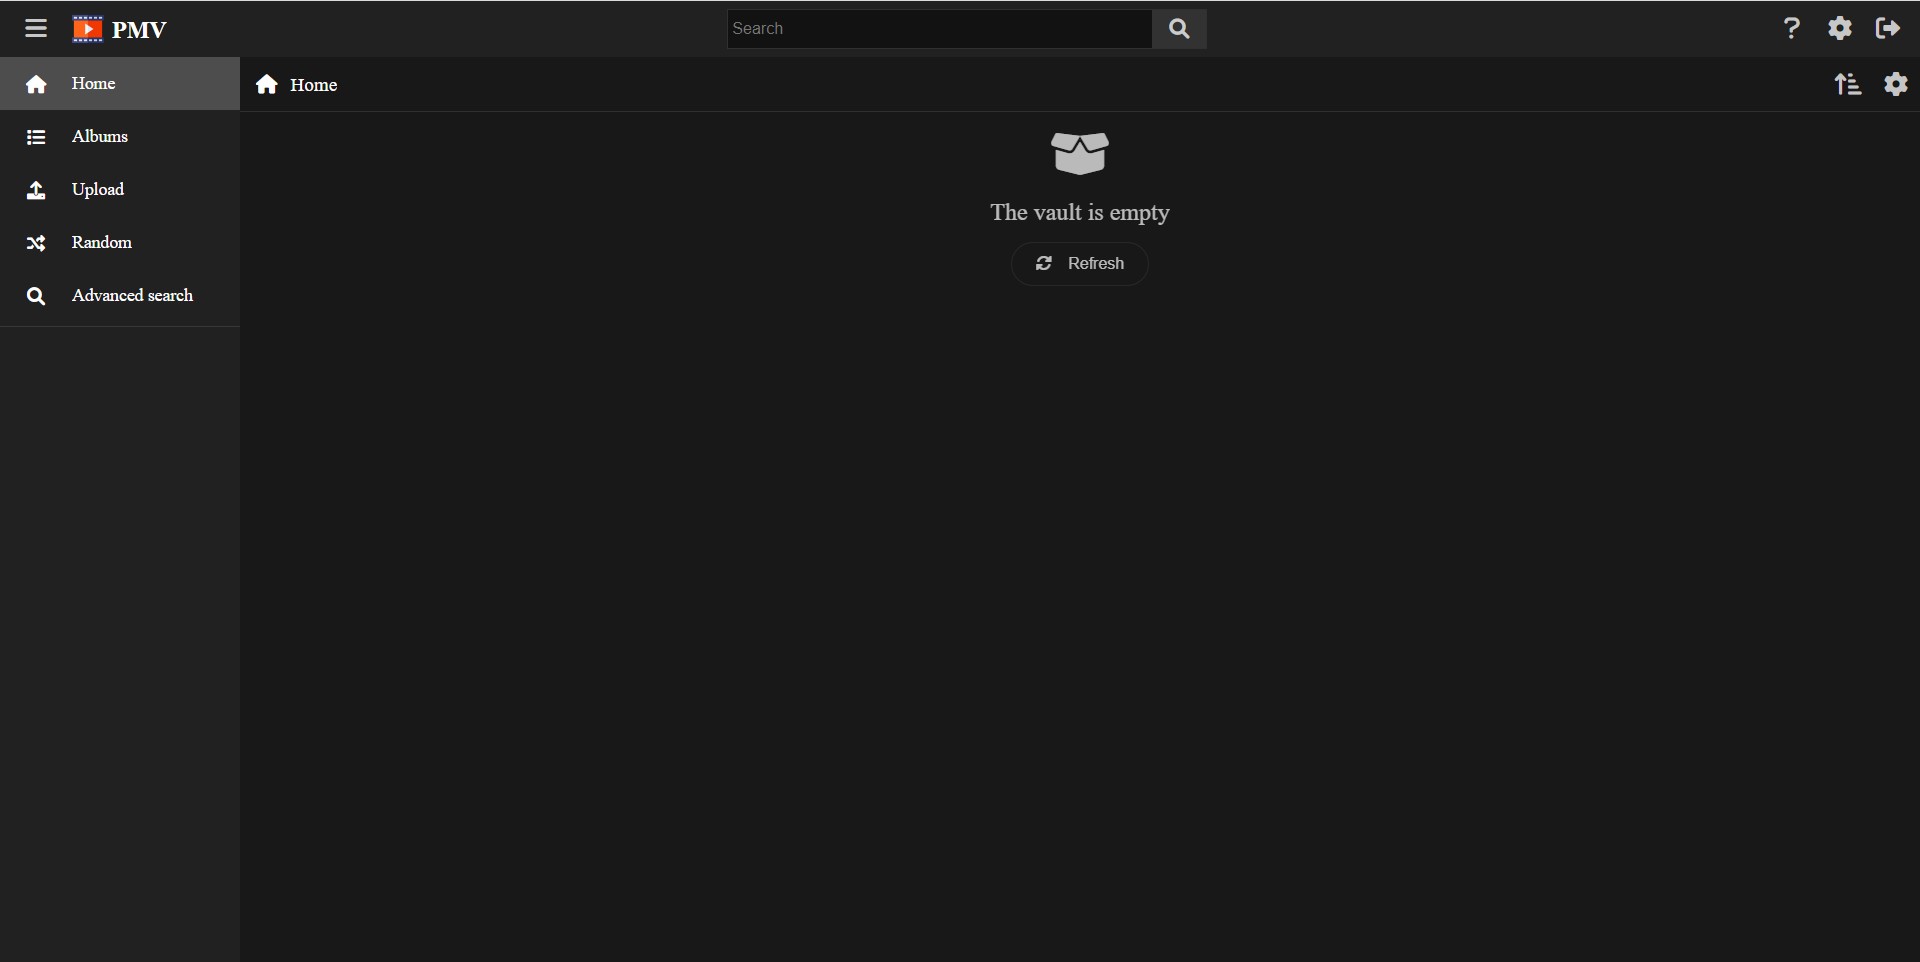
Let’s get familiar with the interface elements!
First, you have sidebar at the left. You can toggle its visibility with the button at the top left corner. The sidebar has the following elements:
Below the main options, a list of albums will be displayed, ordered by usage or preference.
In the top bar you will find a search bar, and three buttons.
The search bar lets you find tags and albums in your vault. You can type the name, or part of it, and filter by a tag or go into an album.
The top bar buttons are the following, from left to right:
The vault settings menu has all the options you need to set your vault up. Let’s dive into them and make the necessary actions.
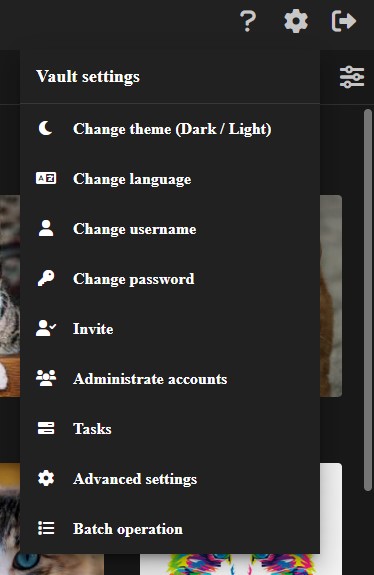
Click in the Change theme (Dark / Light) option in order to select the theme you prefer for the web interface.
By default, PersonalMediaVault will detect your browser theme.
By selecting your preferred theme, PersonalMediaVault will save that preference in the local storage of your browser. In order to remember it in future sessions.
Click in the Change language option to select your language.
By default, PersonalMediaVault will detect your browser language.
By selecting your preferred language, PersonalMediaVault will save that preference in the local storage of your browser. In order to remember it in future sessions.
Isn’t your language yet supported? Feel free to contribute with a pull request to add a new language. In order to add a new language, check the frontend/src/locales folder. Copy
locale-en.jsonand translate every key to your language.
The Tasks option will show you the list of current tasks running for the vault. These tasks and encoding or resizing tasks. They will be created the moment you upload media to your vault.
This option is rarely used, but it can give you a global view of all the tasks running, in case you need to know.
Click in the Advanced settings option to configure your vault advanced settings. This option will show a modal with 3 tabs.
The first tab, called General will allow you to configure the following:
Personal Media Vault.0, meaning it will use as many as optimal. You can set it in order to restrict the CPU usage.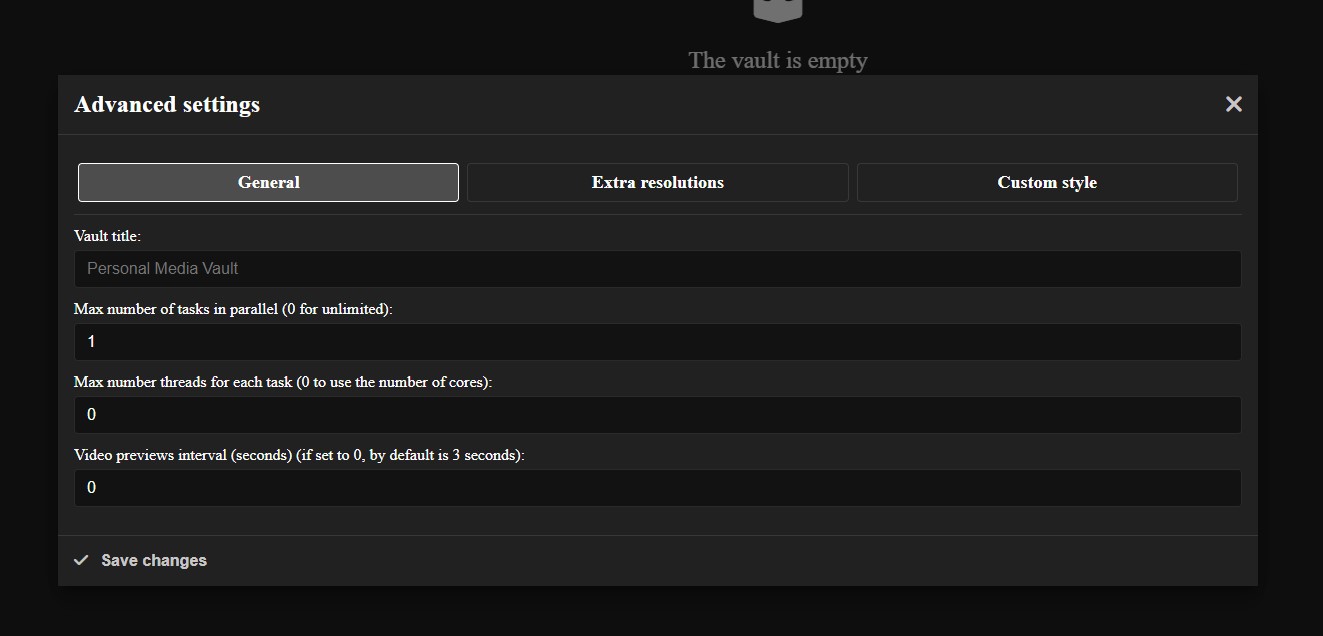
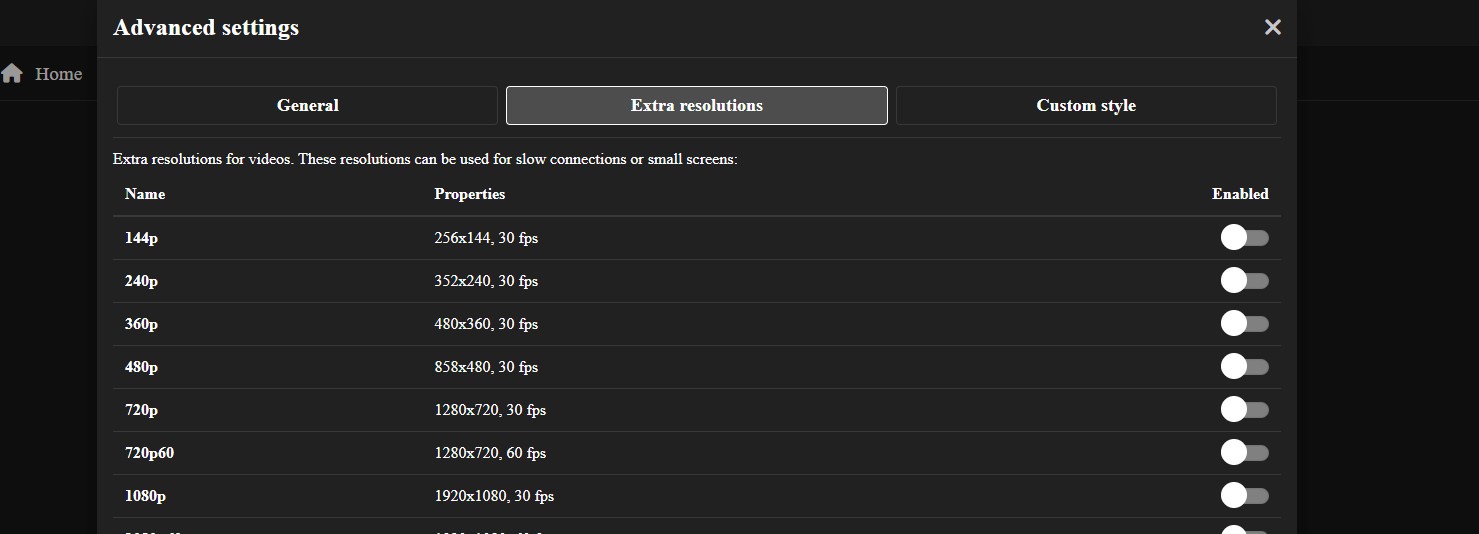
The second tab, called Extra resolutions will allow you to enable certain extra resolutions to use for small screens, in order to save memory and bandwidth. If you plan to use from a tablet or a mobile device, you may want to enable some of them.
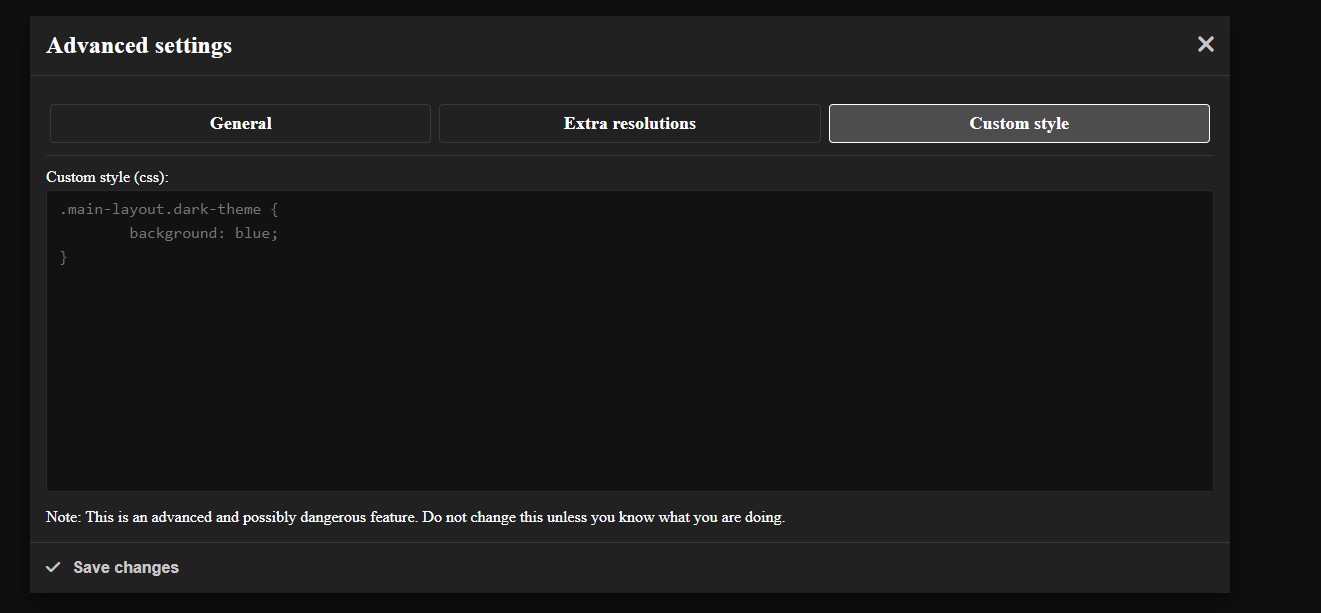
The third tab, called Custom style will let you specify custom CSS code to apply to the web interface. You can use this to make your own theme. However, this option is very advanced and requires CSS knowledge. If you do not have such knowledge or you are not interesting in a custom theme, just ignore this option.
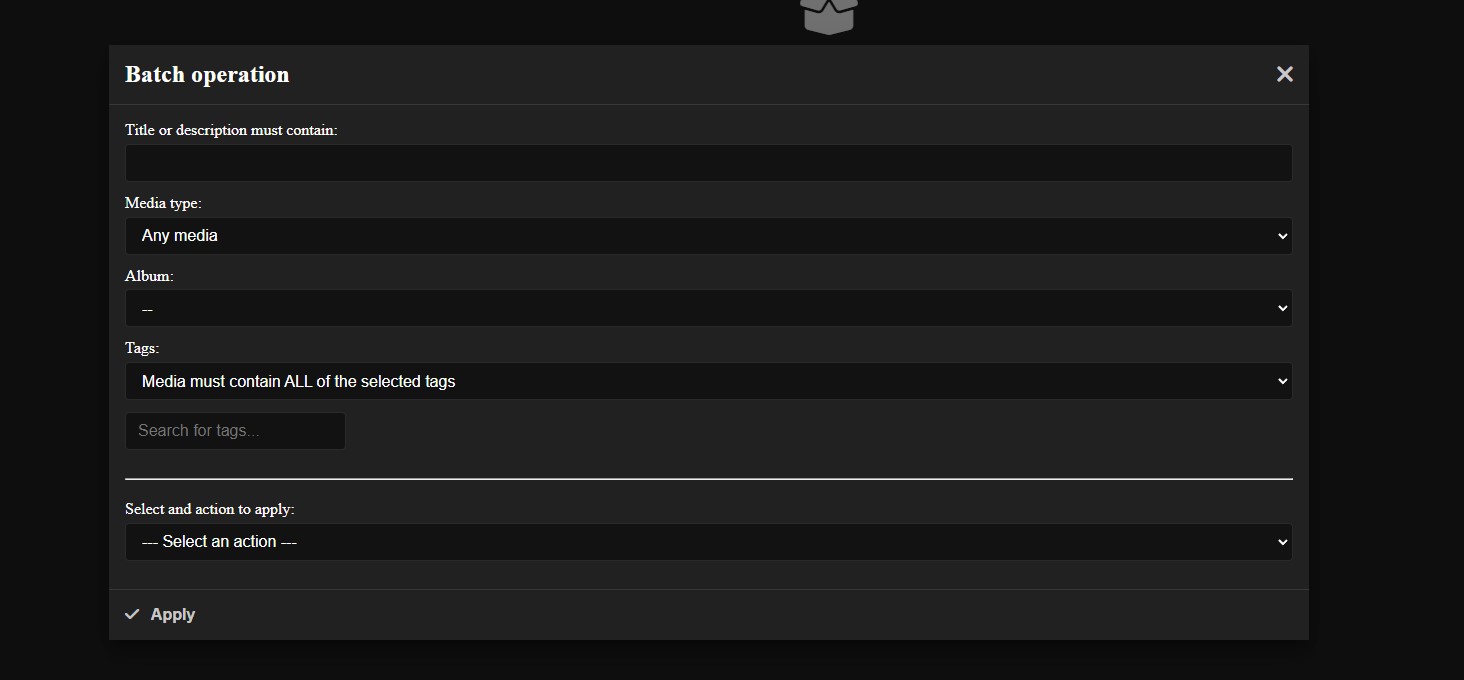
The Batch operation option will let you apply a batch operation to a subset of your vault media assets.
You can filter by title, description, tags or album.
You can apply any of the following operations:
This can be useful if you want to make a change to many media assets, saving you time.
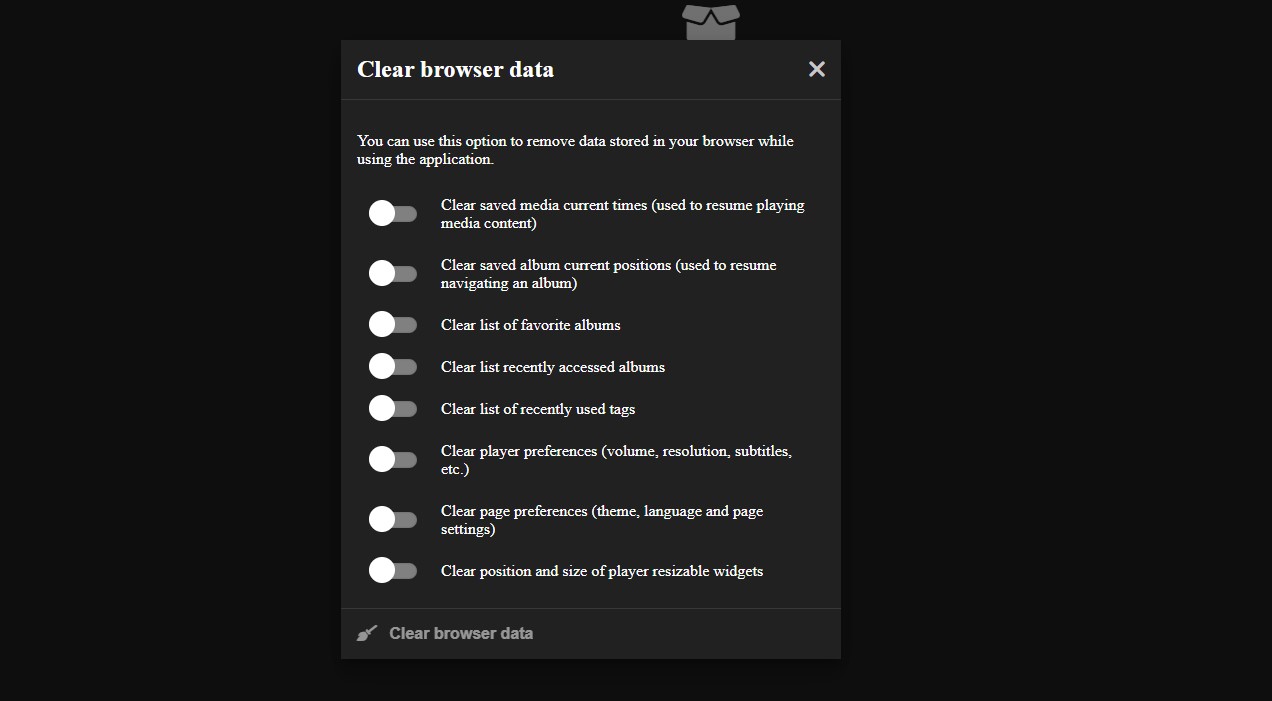
The Clear browser data option will let you clear the data stored in the browser by PersonalMediaVault.
This data is stored for convenience, in order to remember thing like your favorites list, the time you left a media playing at, or the preferences you set (theme, language, sizes, etc.).
You can clear this data in order to reset to the default values or to remove any track of your usage.
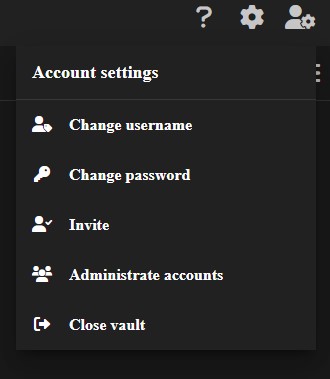
The account settings menu has all the options you need to manage the vault account.
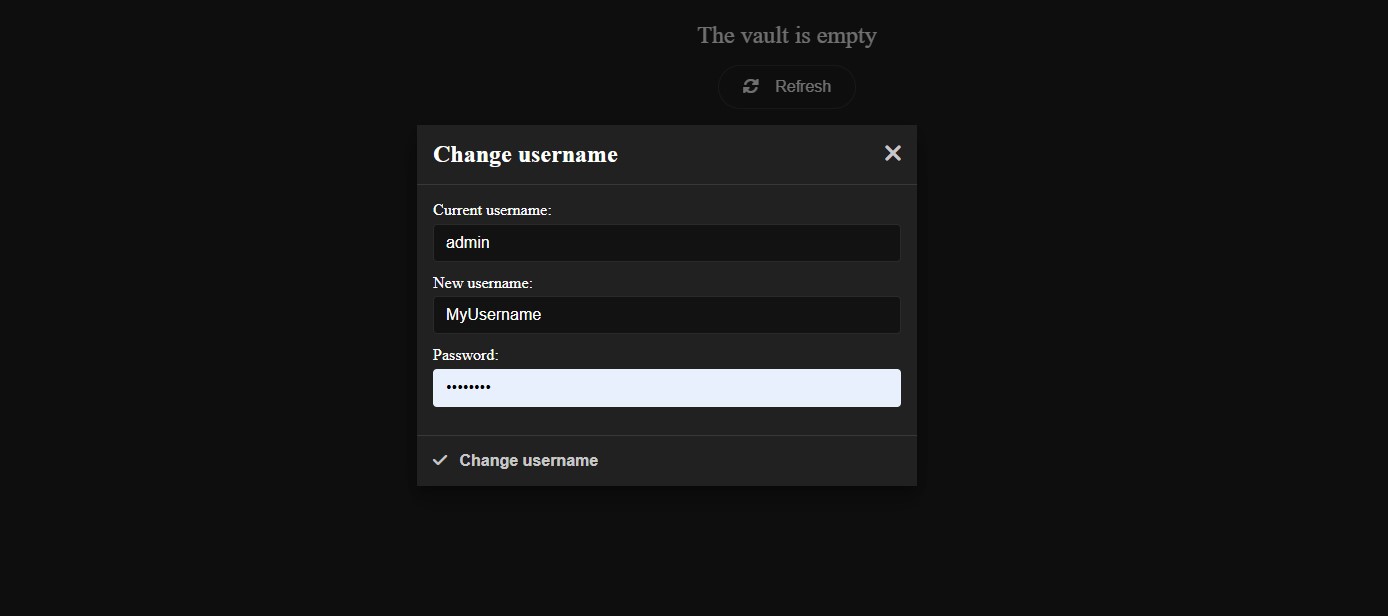
Click in the Change username option in order to change your username. This is the username you use to unlock the vault.
In order to change it, you must also provide your current password.
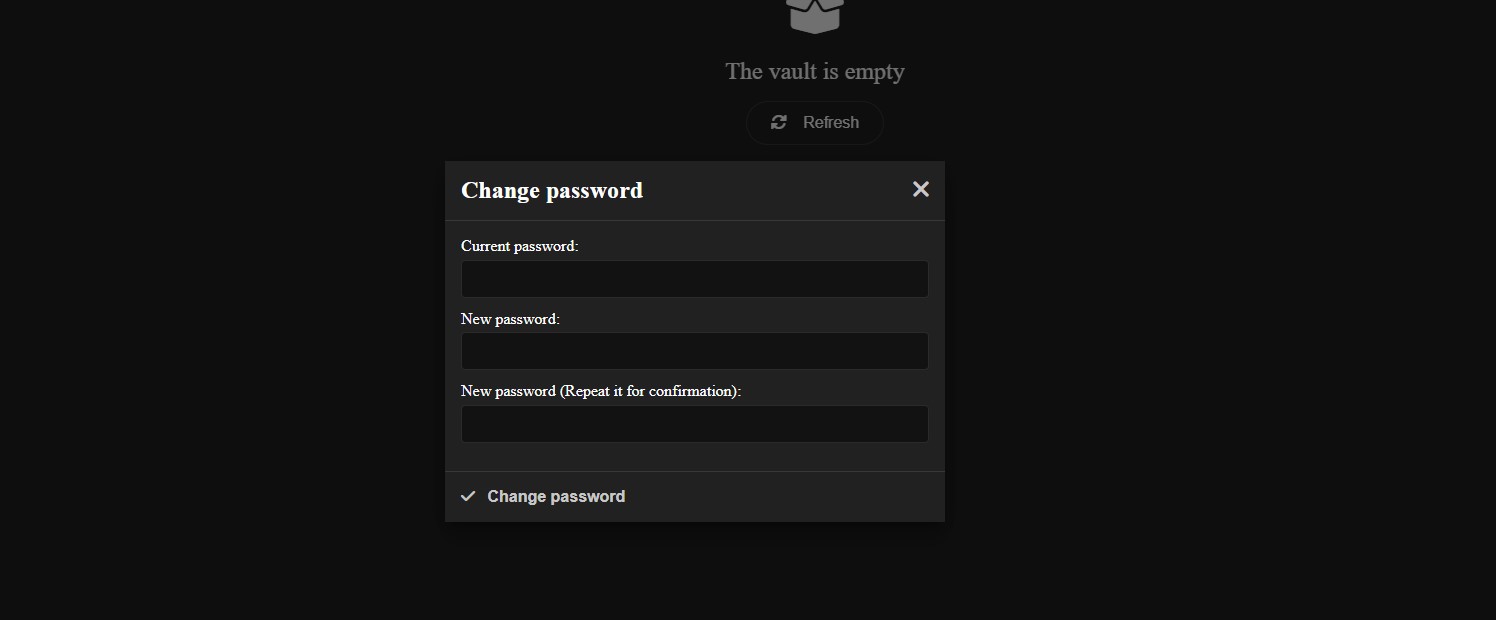
Click in the Change password option in order to change your password. This is the password you use to unlock the vault.
In order to change it, you must also provide your current password.
Make sure to use a very strong password, using letters (uppercase and lowercase), numbers and symbols.
Is it recommended to use a password manager, and making a backup of your password. If you lose your password, it will be impossible to recover the vault content, since it’s encrypted with that password.
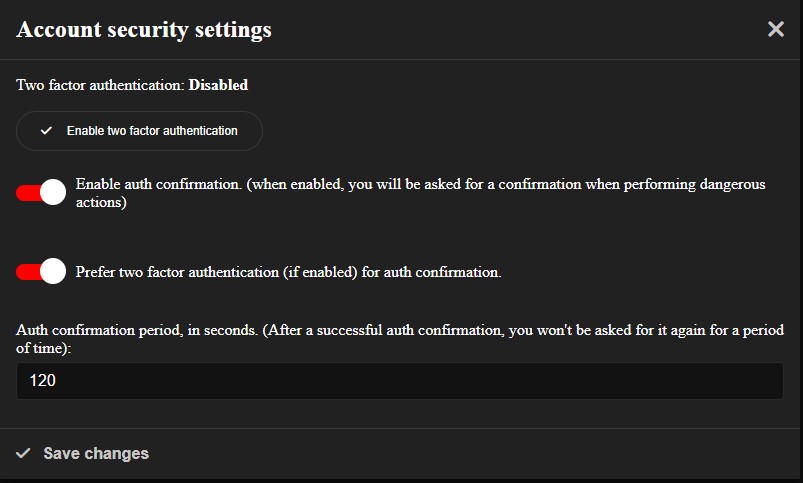
Click in the Account security option in order to change the security settings of your account.
You can configure the following settings:
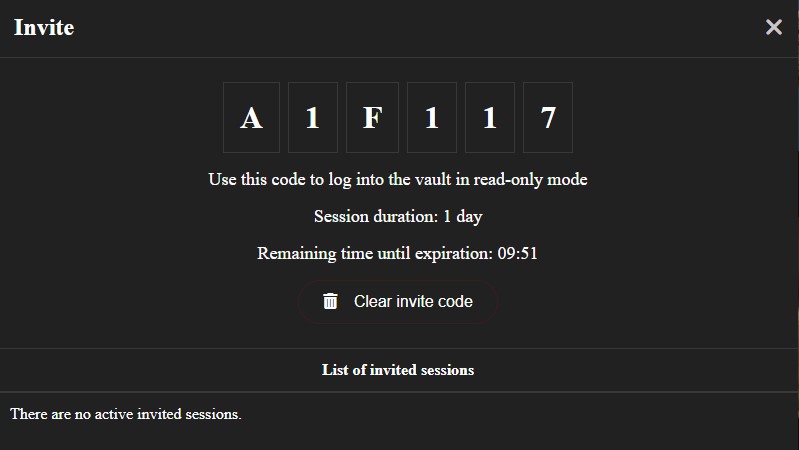
Click in the Invite option in order to invite users or devices to access the vault.
This feature will allow you to generate single-use codes that can be used to access the vault in read-only mode.
The Administrate accounts option will show you a list of extra accounts for your vault, allowing you to create new ones or delete existing ones.
This feature is useful when you have family or friend you want to share the vault with. You can make read-only accounts for them.
If this use case does not fit your needs, you can just ignore this option.
The Close vault option will close the current session, locking the vault and redirecting you to the login screen.
Close the vault when you are not using it to prevent unwanted access.
In order to add media files into your vault, you may use the Upload option in the main menu.
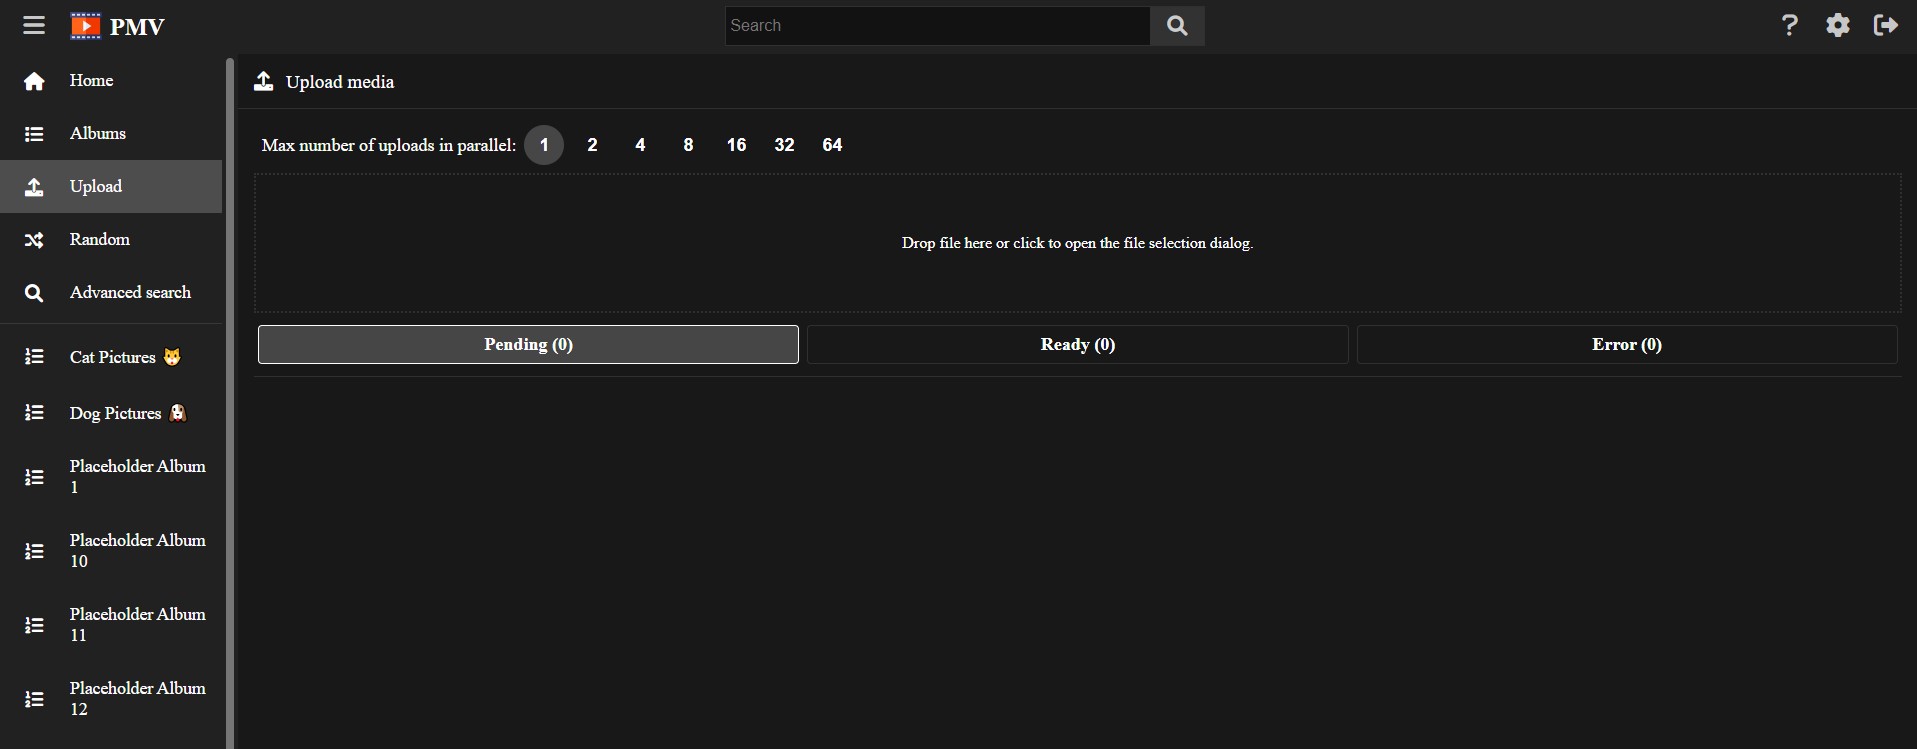
You can drag and drop files into the box with dotted border, or click it to open the file selector.
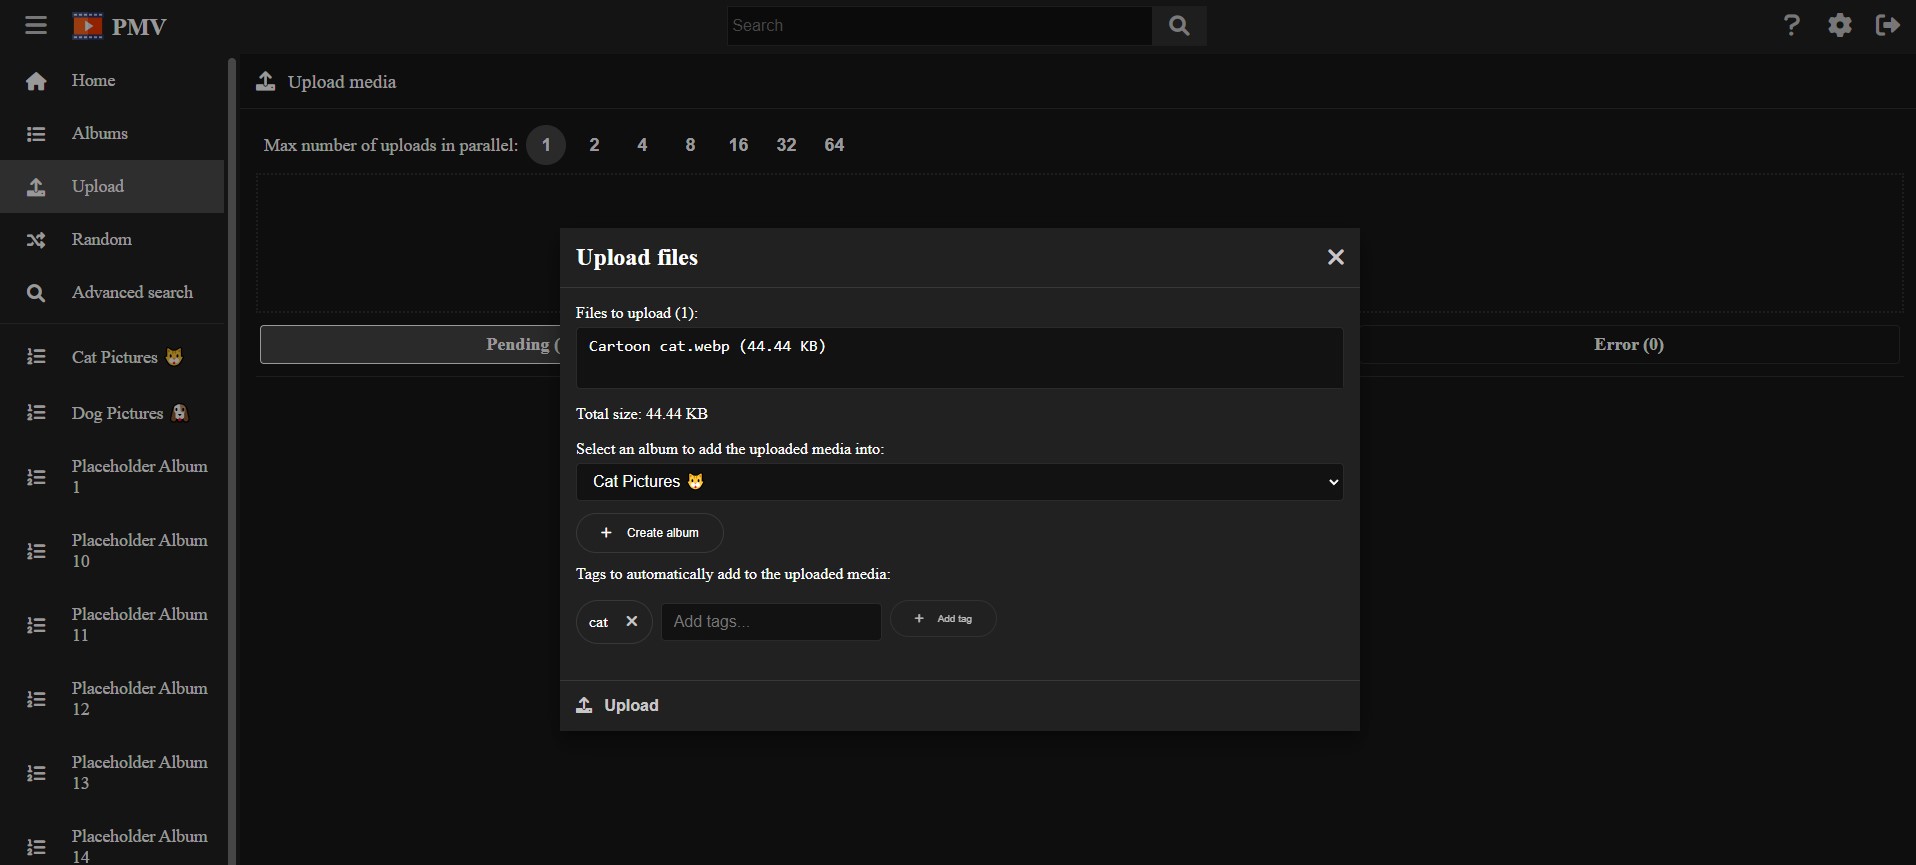
Once you select a file, a modal will open asking you to confirm it, while allowing you to add the media into an album, and add tags. This is very useful when you upload multiple times at once that share some tags.
When the upload process finishes, you can check the uploaded media in the Ready tab.
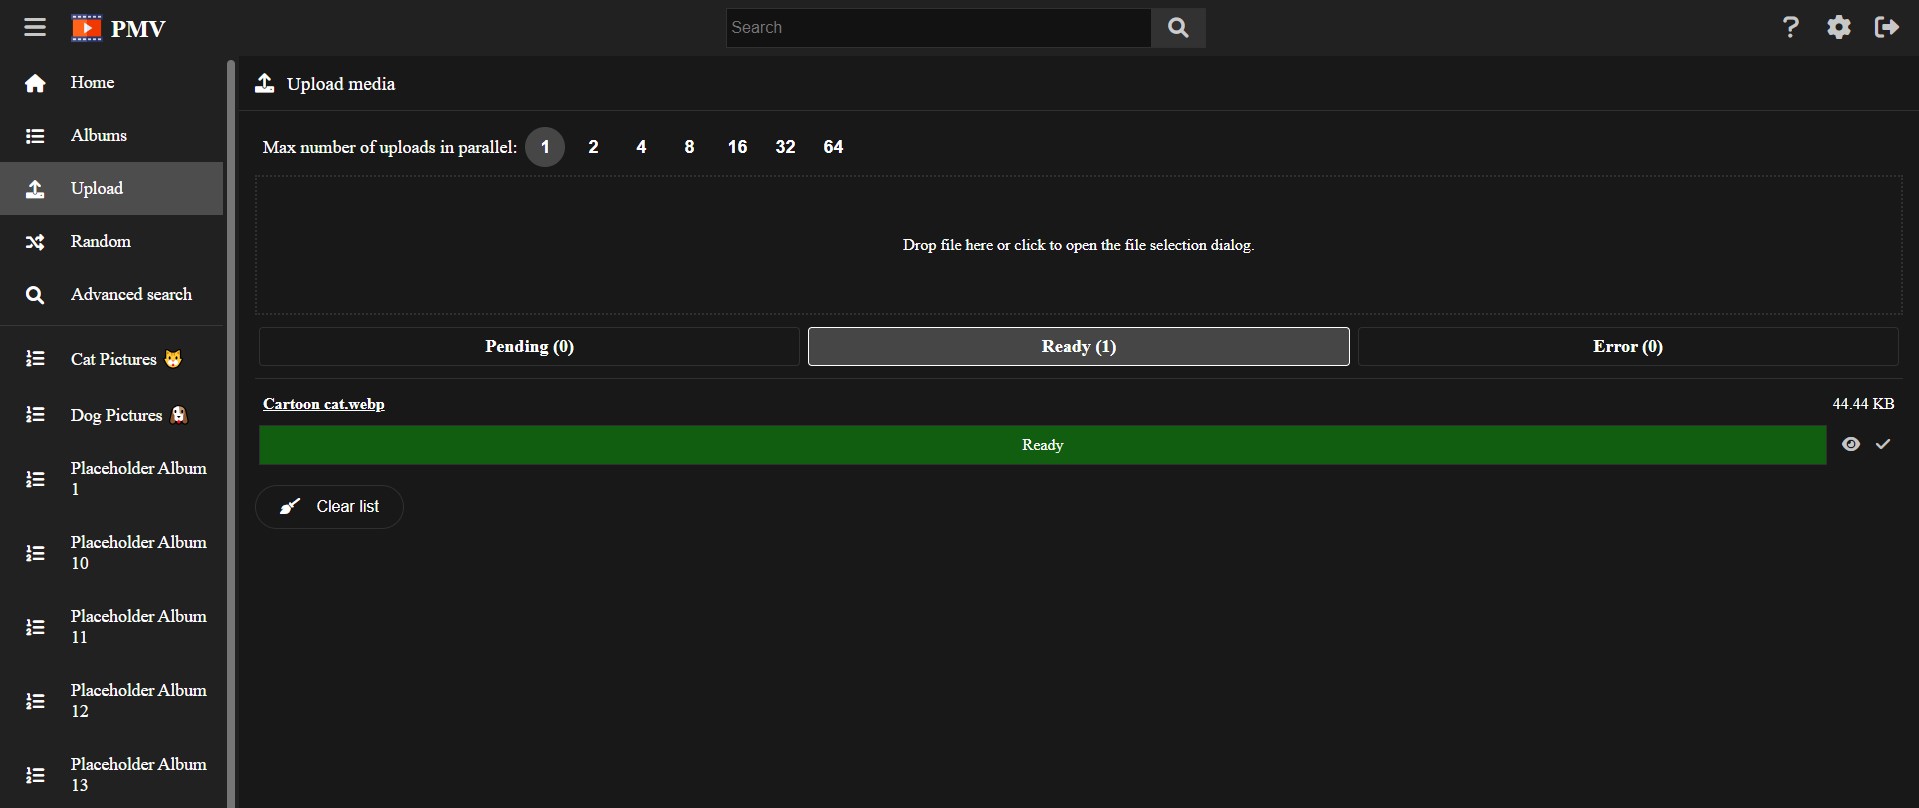
If the upload process fails for some reason, it will be placed in the Error tab.
You can easily change the max number of uploads in parallel to speed up an upload process of many items.
By default it is 1, but you can increase it up to 64, and it will take effect even in the middle of the upload process, so do not worry changing it to upload the speed if you need it.
There is a inconvenience when doing this, when adding into an album, parallel uploads will place the items in an arbitrary order, depending on how fast the upload finishes. Thats is why, when uploading items into an album in order, usually you will prefer uploading one by one.
When selecting a video in the media vault, the video player will be used in order to play it.
The PersonalMediaVault video player is a feature rich player based on the YouTube video player:

In order to play or pause, you can simply click the player at the center, use the play button in the player controls bar, or using a keyboard shortcut: Space Bar or K.

In order to change the volume, you can use the volume control in the player controls bar, which displays a slider when hovering it or clicking it. You can also use a keyboard shortcut, being the Up and Down arrow keys, which will change the volume by 5%. You can press Shift while using the vertical arrow keys in order to fine-tune the volume by changing it 1% each key press.
You can mute or un-mute the video by clicking on the volume control in the player controls bar, or using the key M.

By pressing the configuration button or the S key, you can open the video player configuration.

By pressing the full screen button, or the F key, you can toggle the full screen mode for the video player.

You can hover the timeline in order to get the timestamp you are hovering into, and an image preview, if available.

You can click the timeline in order to change the current time.
You can use the Home key to go to the beginning of the video. Also, you can use the End key to go to the end of the video.
You can also use the Left and Right arrow keys to go backward or forward by 5 seconds respectively.
Also, if the player is paused, you can use the dot and comma keys to go backward or forward by a single frame respectively.
You can open the player configuration by pressing the configuration button or the S key.
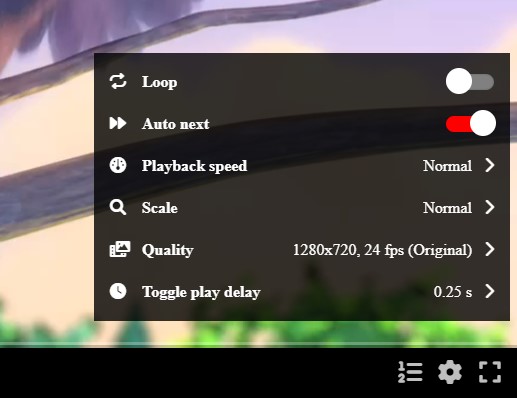
You can find several options:
When right clicking with a mouse, or with a long tap in touch devices, it will open the player context menu, with several options for fast access to them.
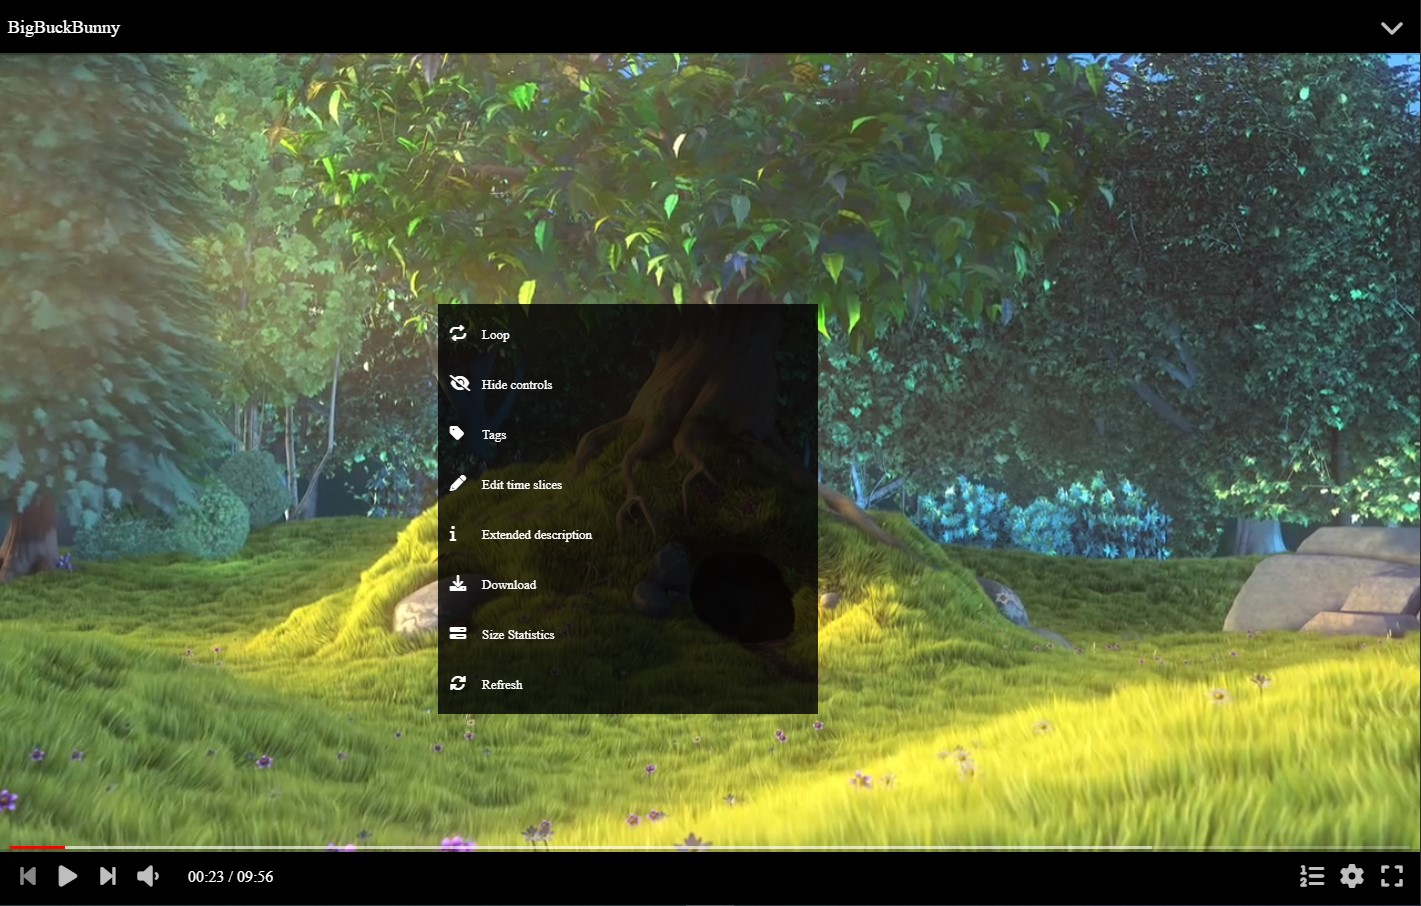
You can find several options:
You can open the player editor by clicking the expand button at the top right corner of the player. Also you can press the E key.
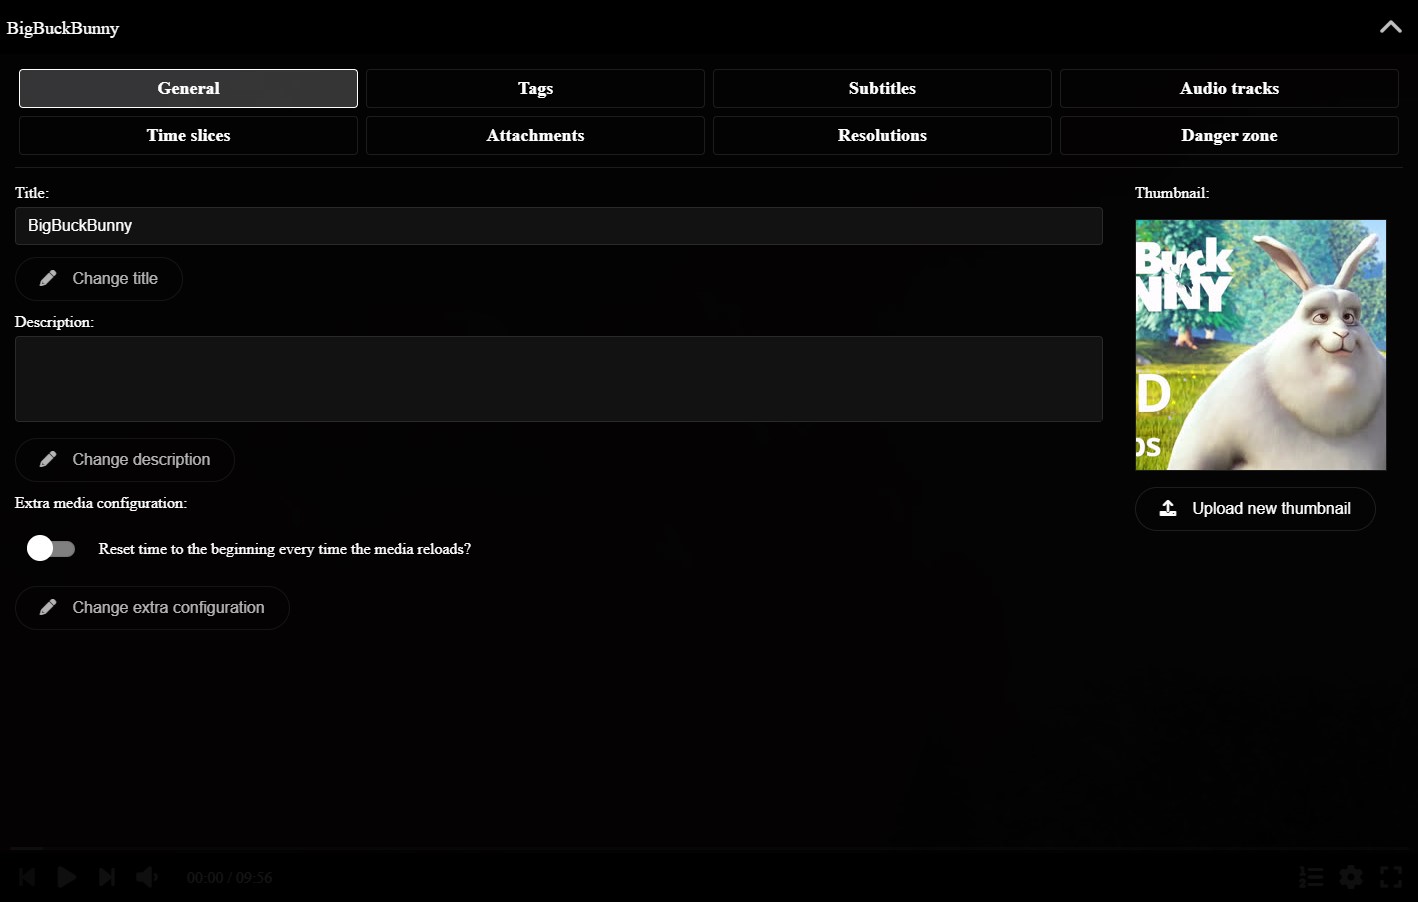
The player editor allows you to change any aspect of the video.
In the General tab you can change the title of the video, its description and thumbnail. You can also enable extra flags, like resetting the time when loading the video every time, instead of restoring the previous time.
In the Tags tab you can change the media tags. You can use the tags to find the media later when searching for it.
You also have other tabs we explain in detail in the sections below.
You can add subtitles to the video in the Subtitles tab of the player editor. You can add them by uploading SubRip files, with .srt extension.
If you upload a Matroska file (.mkv extension) to the vault, the available subtitles will be automatically extracted.
When a video has subtitles, you can select them at the player configuration menu, while also being able to customize their style.
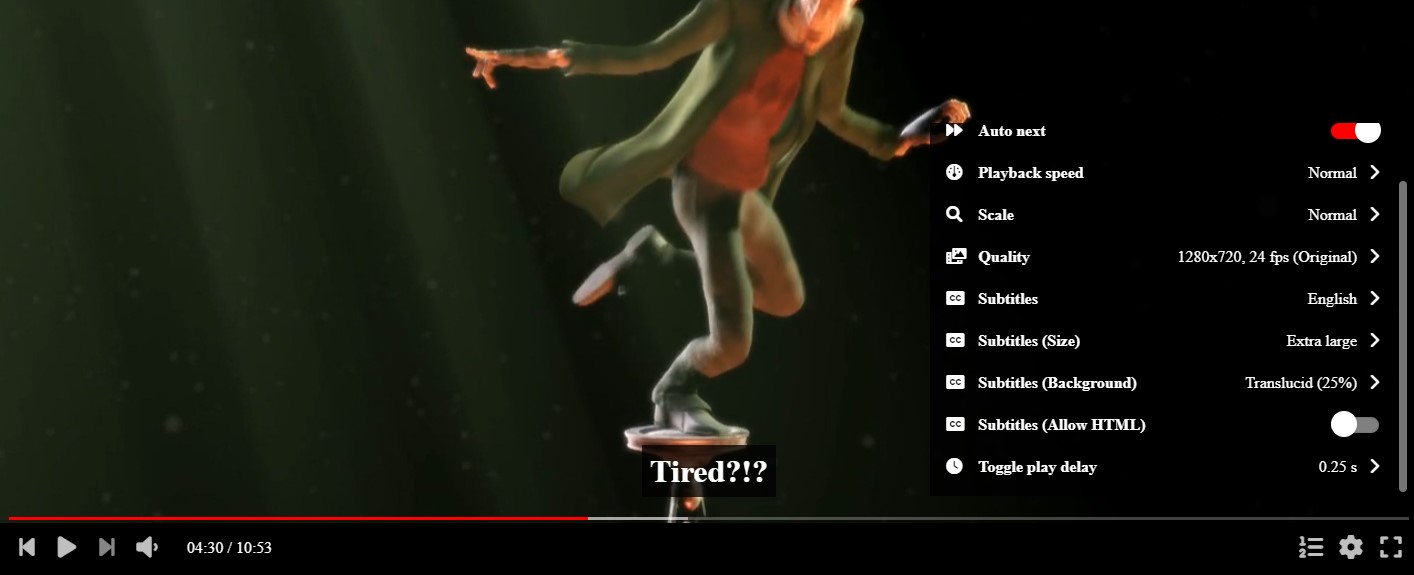
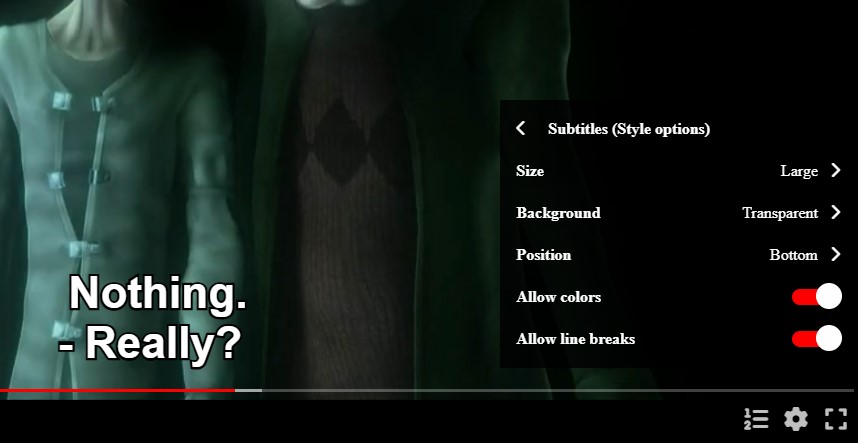
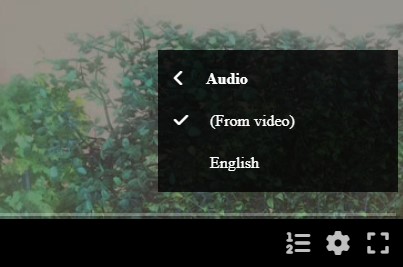
You can add extra audio tracks for the video in the Audio Tracks tab of the player editor. You can add them by uploading audio files, for example with .mp3 extension.
If you upload a Matroska file (.mkv extension) to the vault, the available audio tracks will be automatically extracted.
When a video has extra audio tracks, you can select the one that will play at the player configuration menu.
You can split the video in different slices by clicking the option in the context menu, or pressing the N key. This will open an editor where you can add time slices, specifying the start time, and a name.
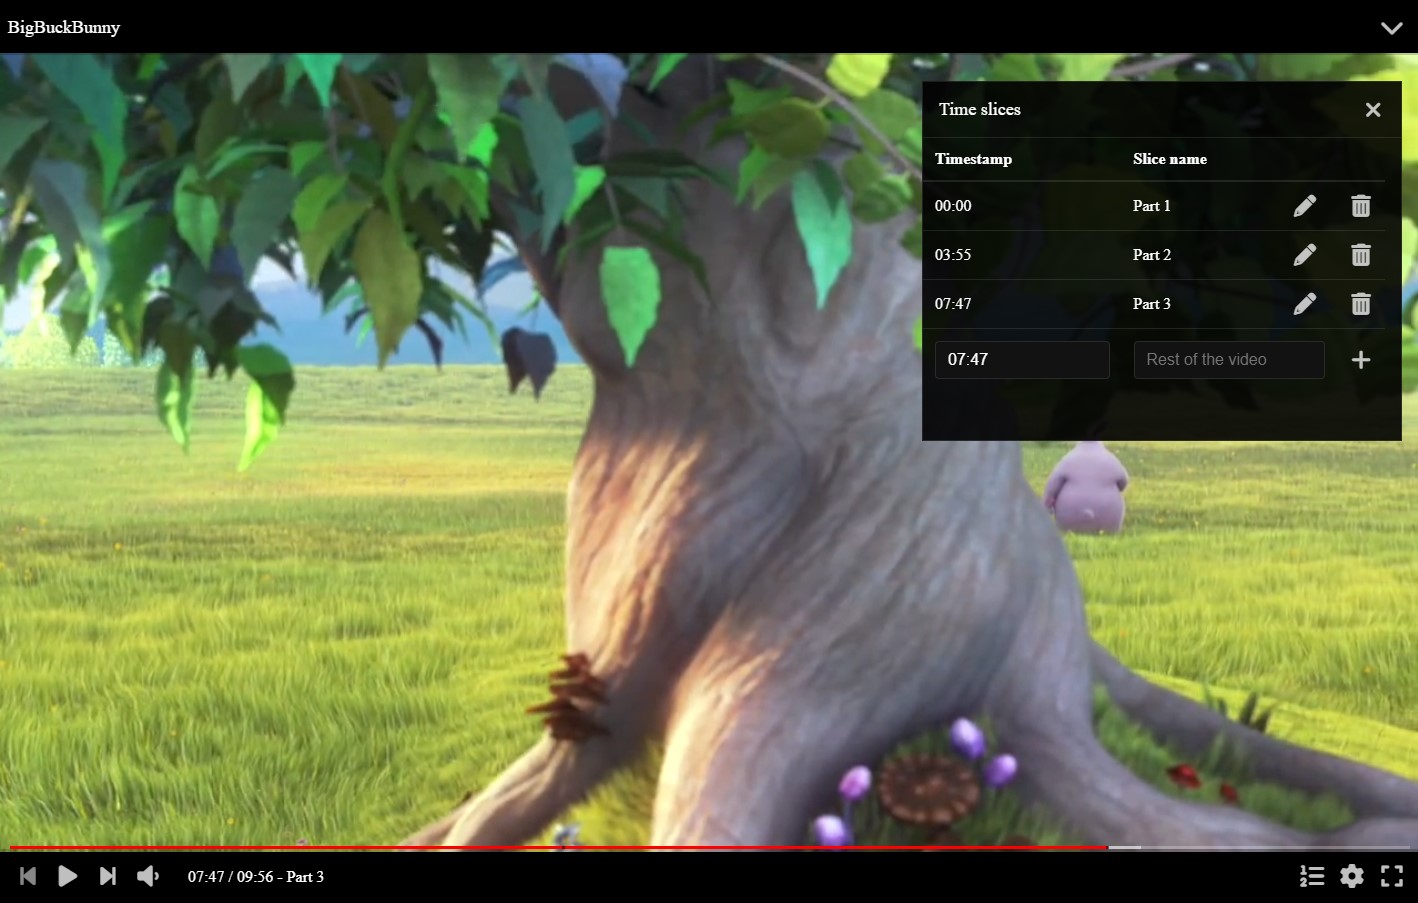
You can also change the time slices in text mode by going to the Time slices tab of the player editor.
You can add attachments to the video by going to the Attachments tab of the player editor.
Attachments are arbitrary files you can store in the vault along with the media file, for example the original uncompressed video or the assets used to make it.
In the Resolutions tab of the player editor, you will be able to resize the video to different resolutions, in order to play it in smaller screens without wasting bandwidth.
Once a resolution is available, you will be able to select it from the player configuration menu.
In the Danger zone tab of the player editor, you can:
When selecting an image in the media vault, the image viewer will be used in order to display it.
The PersonalMediaVault image viewer is very similar to the video player:
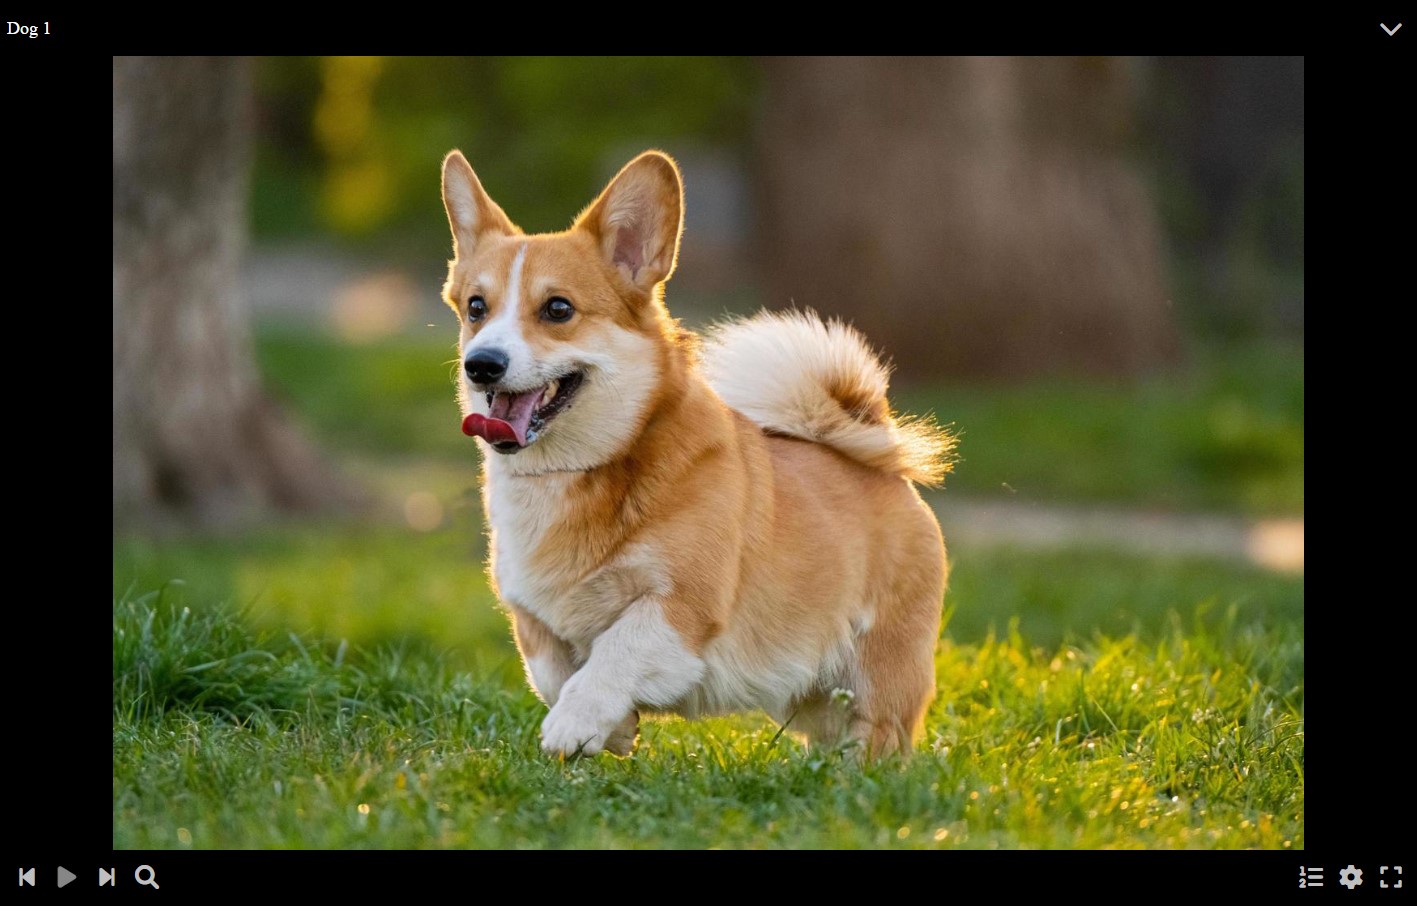
You can change the image scale with the scale control, which displays when hovering or clicking on it. The scale can be a percentage of the display width, or can be set to fit the image into the available space:

By pressing the configuration button or the S key, you can open the image viewer configuration.

By pressing the full screen button, or the F key, you can toggle the full screen mode for the image viewer.

You can open the viewer configuration by pressing the configuration button or the S key.
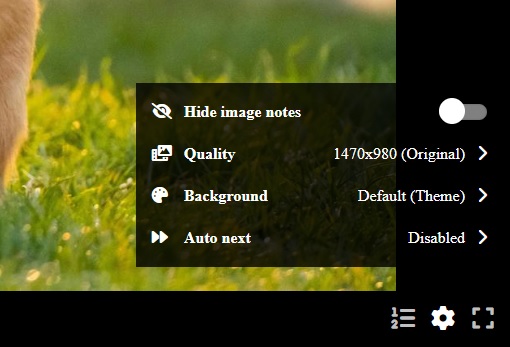
You can find several options:
When right clicking with a mouse, or with a long tap in touch devices, it will open the viewer context menu, with several options for fast access to them.
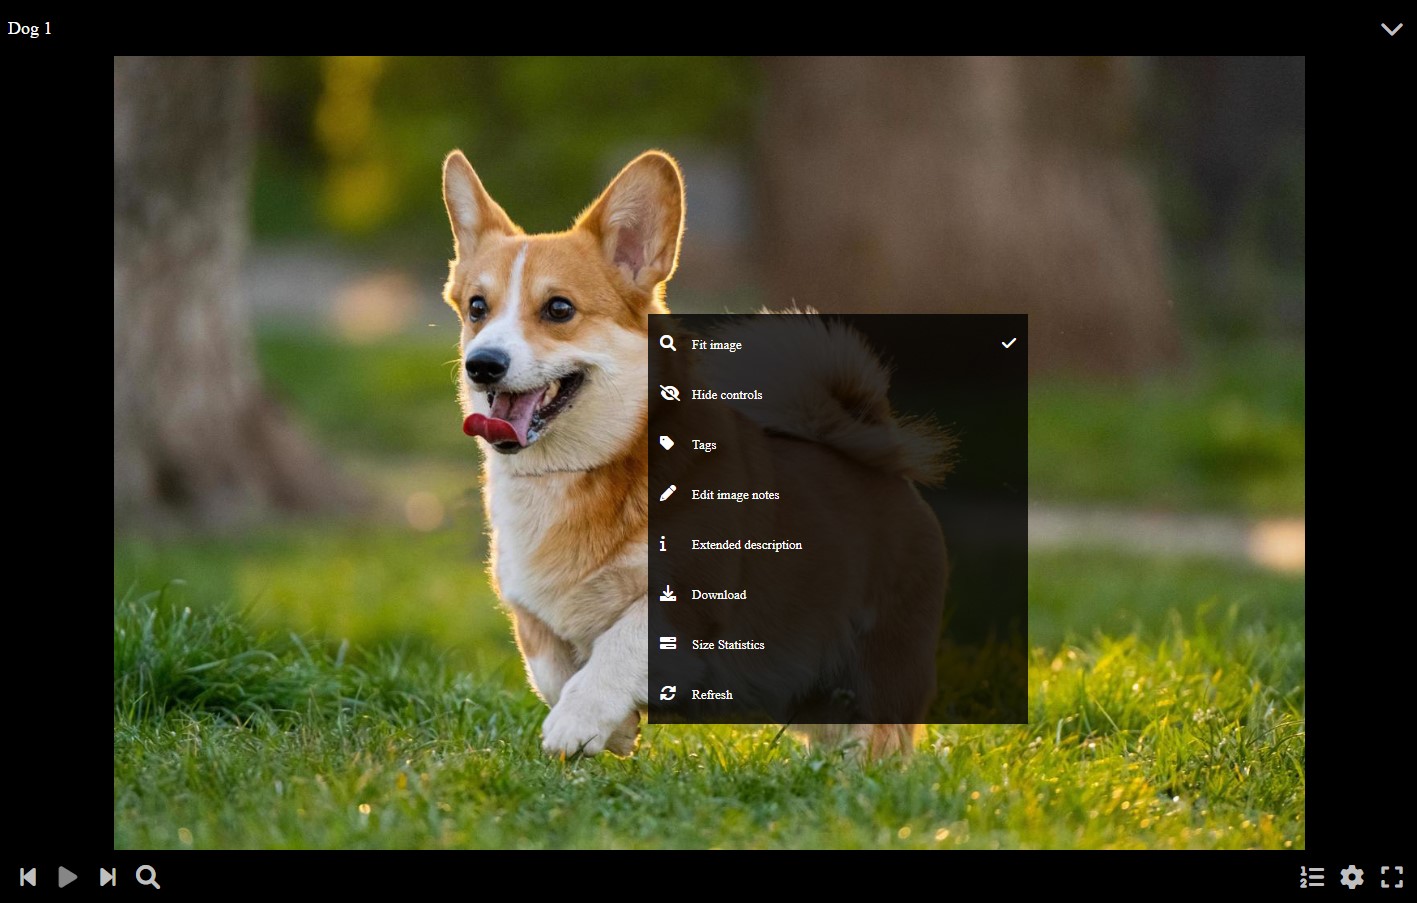
You can find several options:
You can open the viewer editor by clicking the expand button at the top right corner of the viewer. Also you can press the E key.
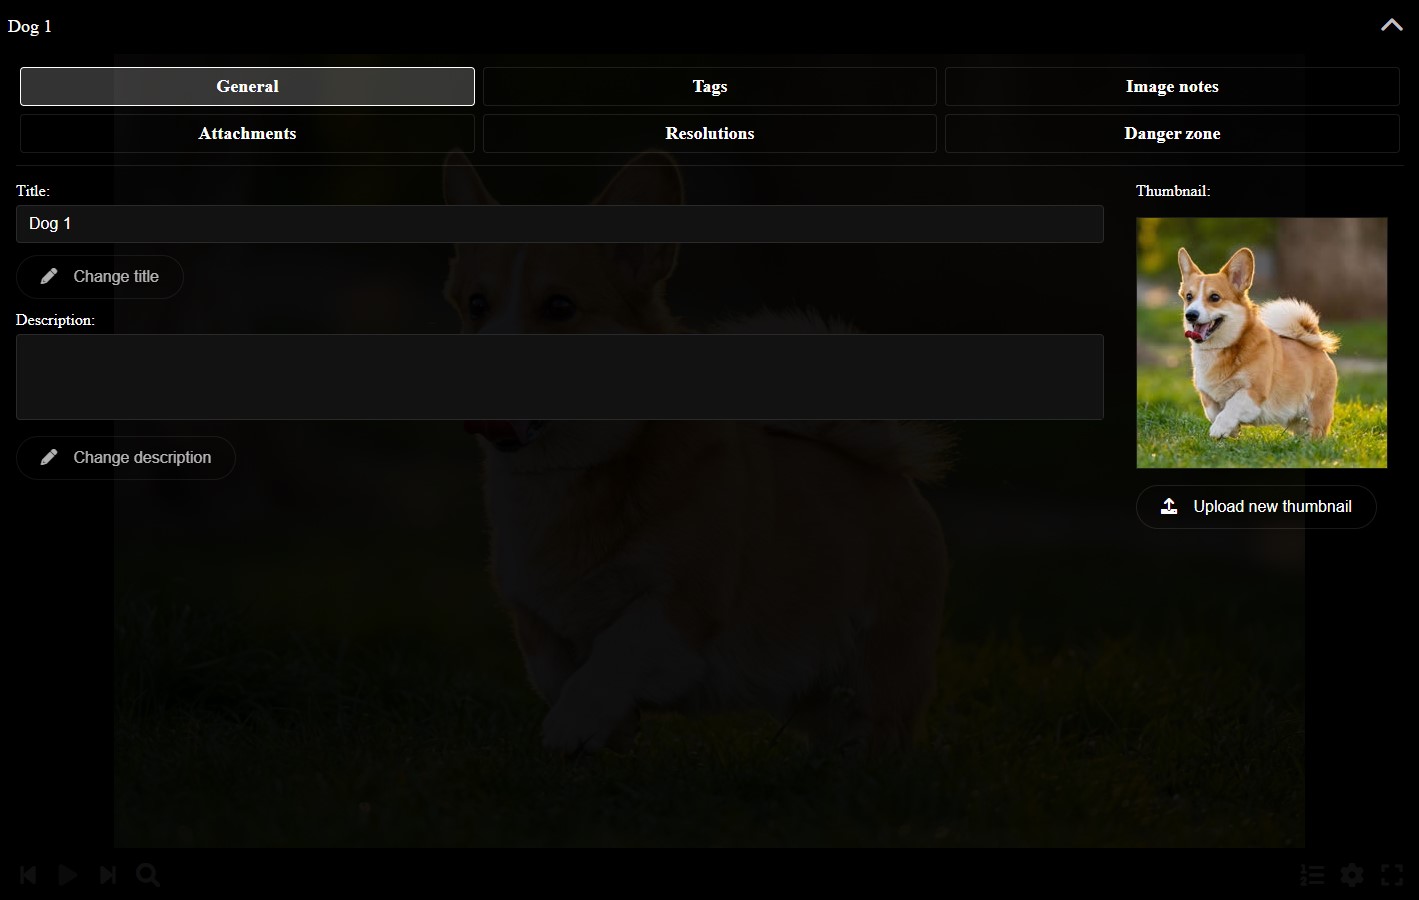
The viewer editor allows you to change any aspect of the image.
In the General tab you can change the title of the image, its description and thumbnail.
In the Tags tab you can change the media tags. You can use the tags to find the media later when searching for it.
You also have other tabs we explain in detail in the sections below.
You can add annotation to the image by clicking the option in the context menu, or pressing the N key. This will toggle a mode where you can drag in order to add notes to the image, while being able to move and resize the existing ones.
When out of the image notes editor mode, they will be displayed as translucid squares that will display its corresponding text by hovering or clicking on them.
You can use image notes, for example, to name elements of the image, add extra information or translate texts in a foreign language.
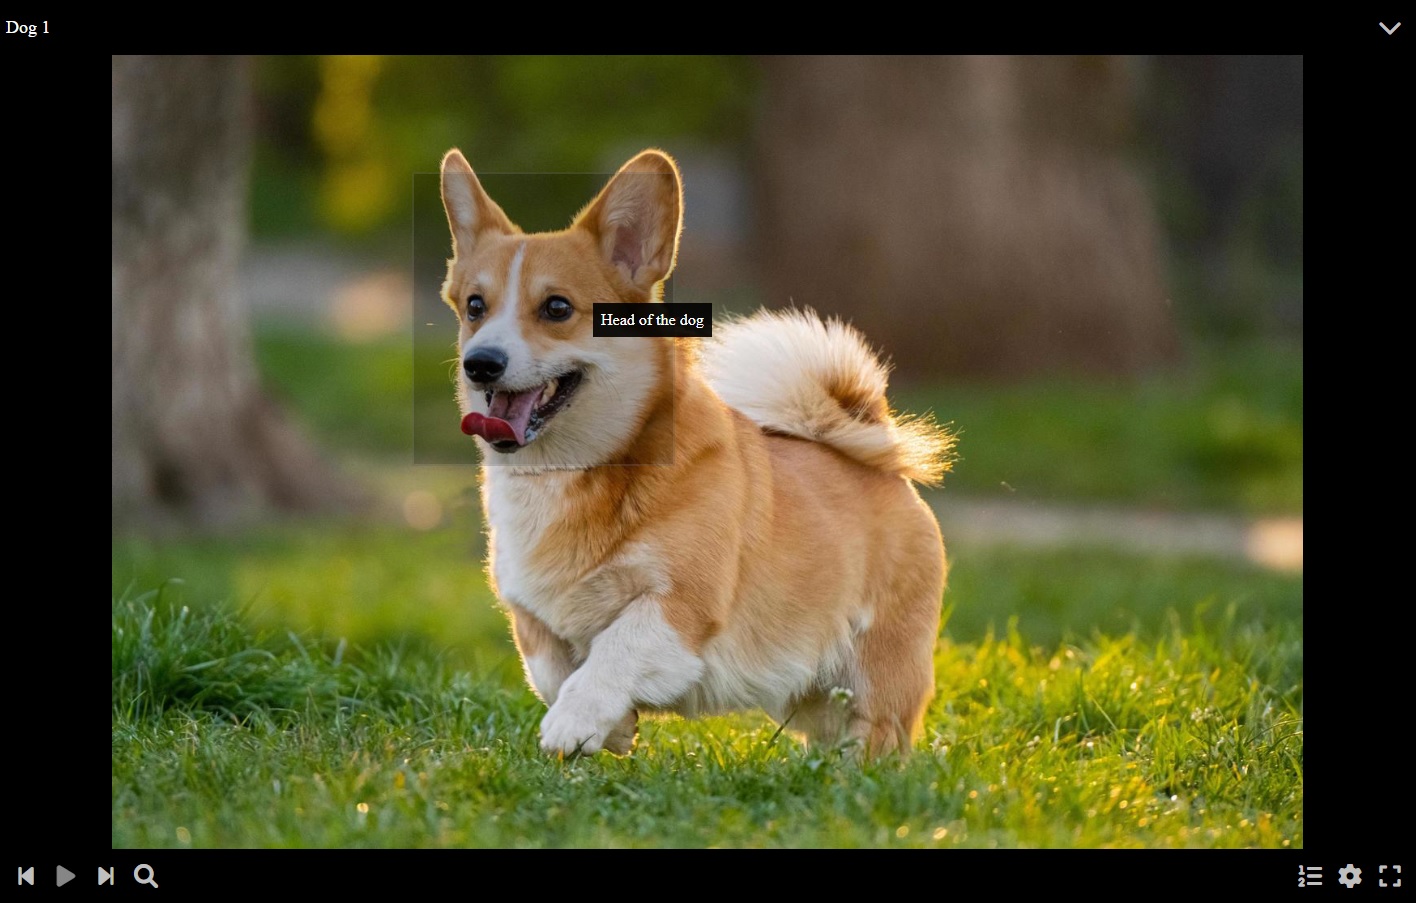
You can also change the image notes in text mode by going to the Image Notes tab of the viewer editor, very useful to import and export notes.
You can add attachments to the video by going to the Attachments tab of the viewer editor.
Attachments are arbitrary files you can store in the vault along with the media file, for example the original uncompressed image or the assets used to make it.
In the Resolutions tab of the viewer editor, you will be able to resize the image to different resolutions, in order to display it in smaller screens without wasting bandwidth.
Once a resolution is available, you will be able to select it from the viewer configuration menu.
In the Danger zone tab of the viewer editor, you can:
When selecting an audio in the media vault, the audio player will be used in order to play it.
The PersonalMediaVault video player is very similar to the video player, adapted for audio files:
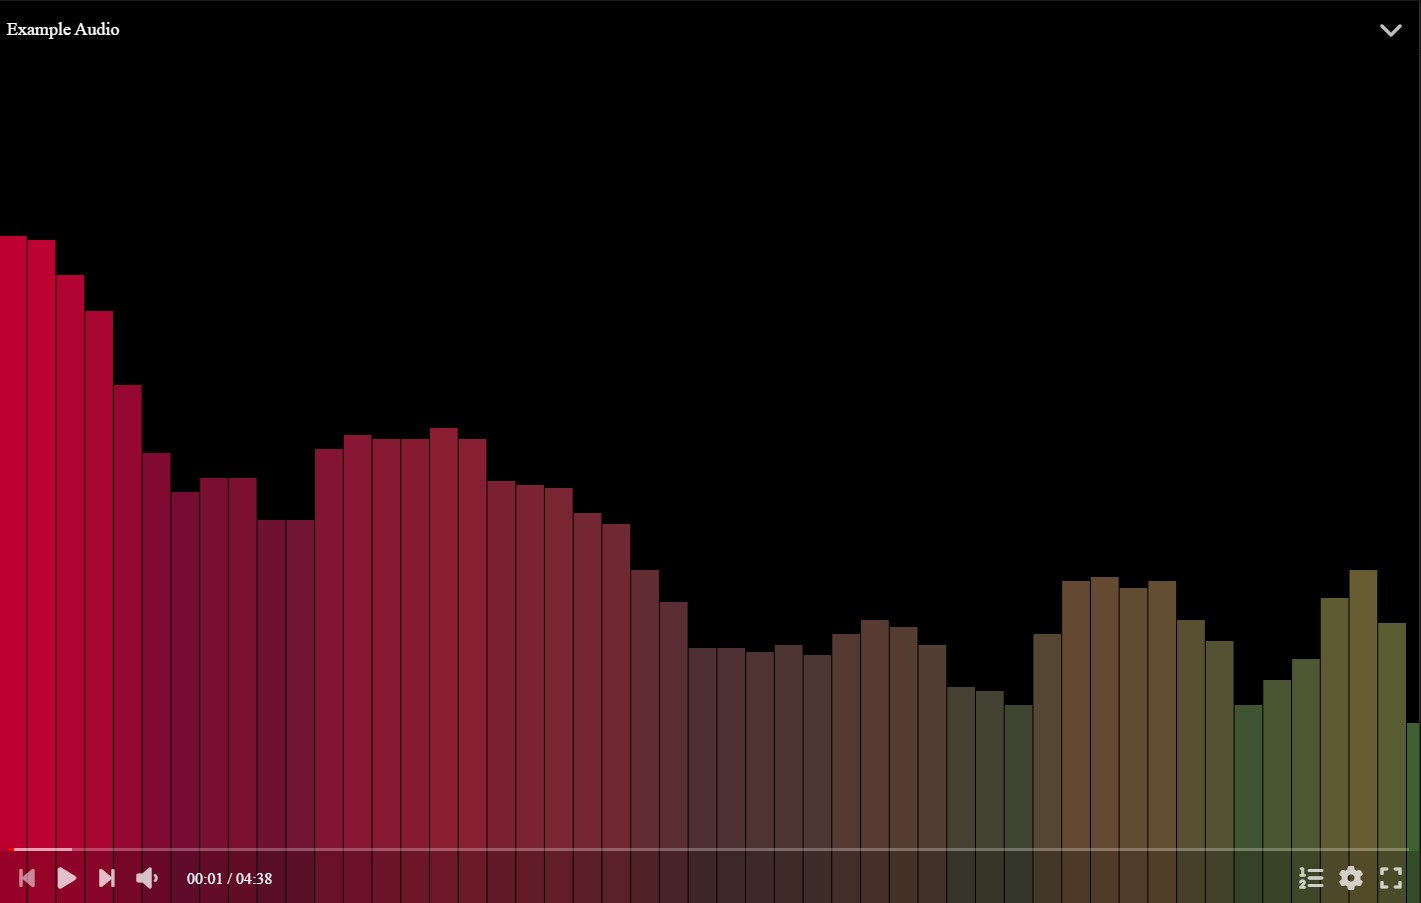
In order to play or pause, you can simply click the player at the center, use the play button in the player controls bar, or using a keyboard shortcut: Space Bar or K.

In order to change the volume, you can use the volume control in the player controls bar, which displays a slider when hovering it or clicking it. You can also use a keyboard shortcut, being the Up and Down arrow keys, which will change the volume by 5%. You can press Shift while using the vertical arrow keys in order to fine-tune the volume by changing it 1% each key press.
You can mute or un-mute the audio by clicking on the volume control in the player controls bar, or using the key M.

By pressing the configuration button or the S key, you can open the audio player configuration.

By pressing the full screen button, or the F key, you can toggle the full screen mode for the audio player.

You can hover the timeline in order to get the timestamp you are hovering into.

You can click the timeline in order to change the current time.
You can use the Home key to go to the beginning of the audio. Also, you can use the End key to go to the end of the audio.
You can also use the Left and Right arrow keys to go backward or forward by 5 seconds respectively.
Also, if the player is paused, you can use the dot and comma keys to go backward or forward by a single frame respectively.
You can open the player configuration by pressing the configuration button or the S key.
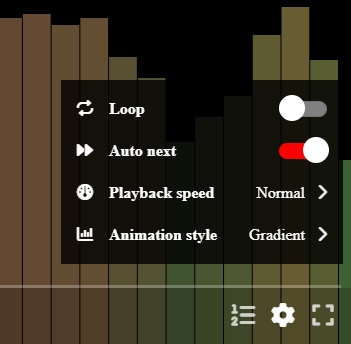
You can find several options:
When right clicking with a mouse, or with a long tap in touch devices, it will open the player context menu, with several options for fast access to them.
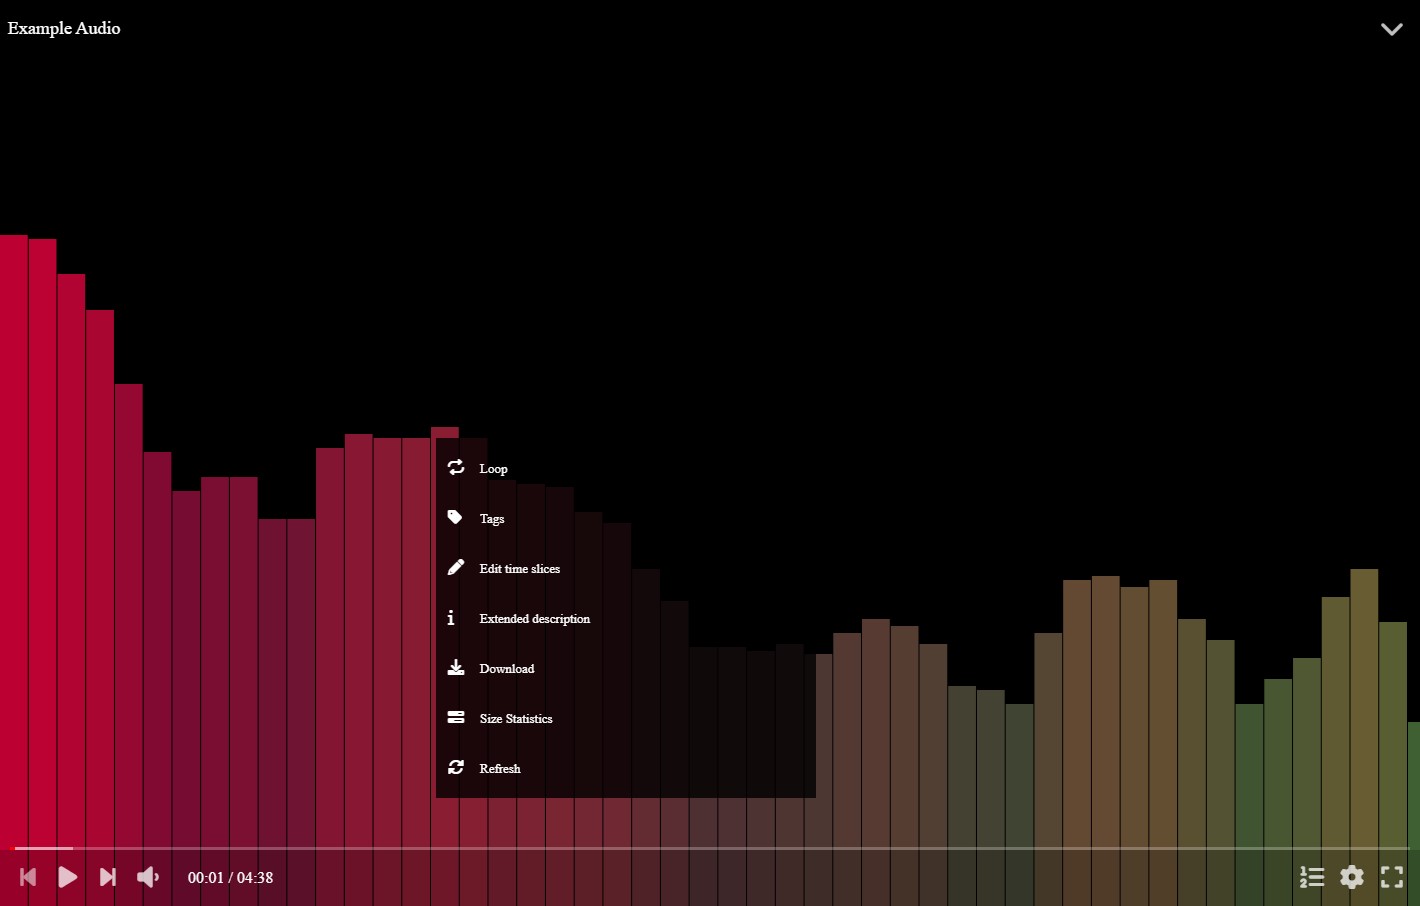
You can find several options:
You can open the player editor by clicking the expand button at the top right corner of the player. Also you can press the E key.
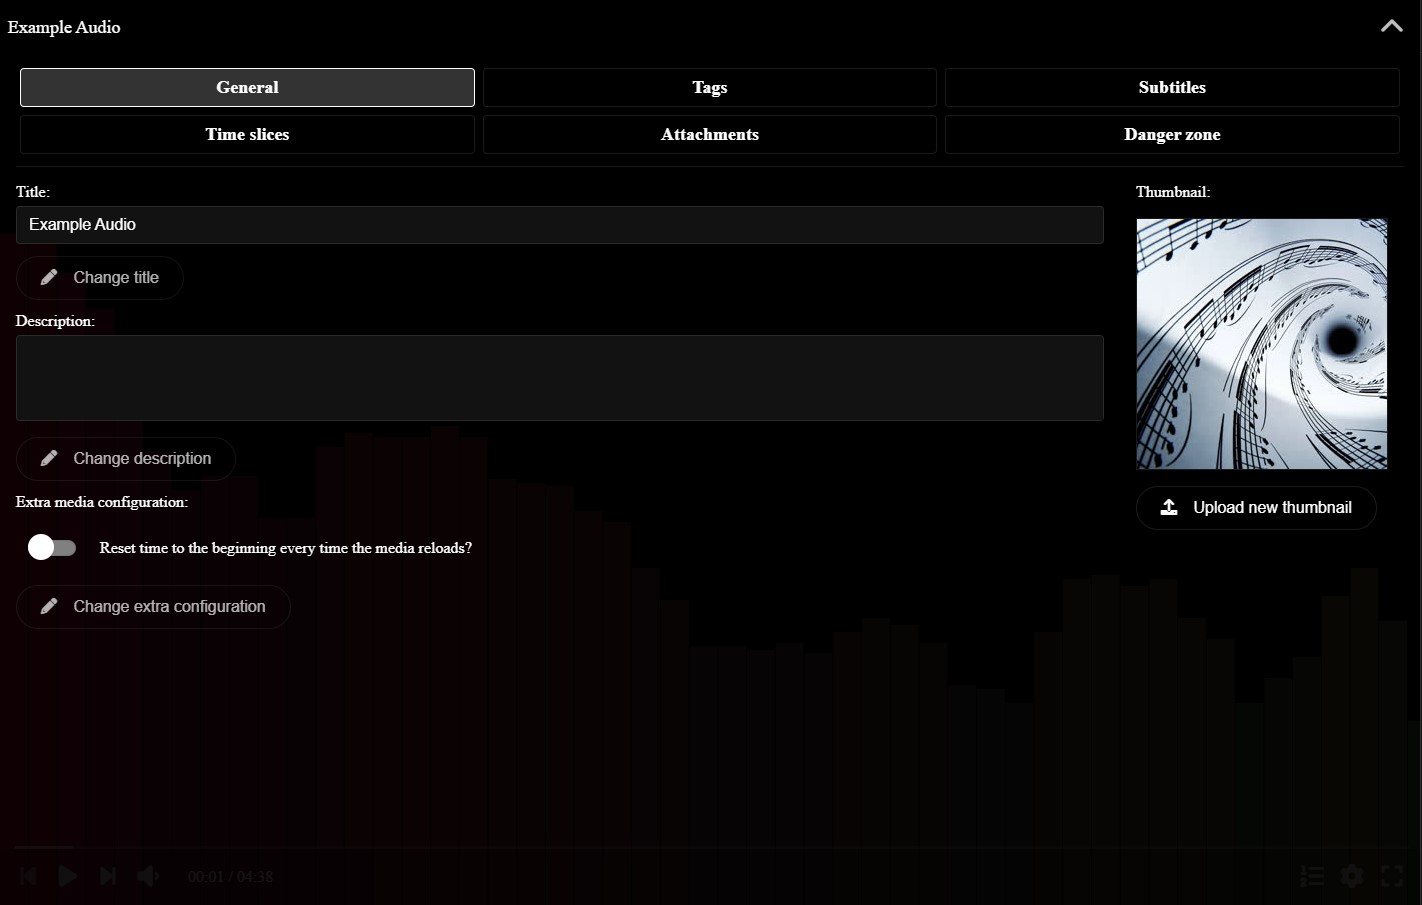
The player editor allows you to change any aspect of the audio.
In the General tab you can change the title of the audio, its description and thumbnail. You can also enable extra flags, like resetting the time when loading the audio every time, instead of restoring the previous time.
In the Tags tab you can change the media tags. You can use the tags to find the media later when searching for it.
You also have other tabs we explain in detail in the sections below.
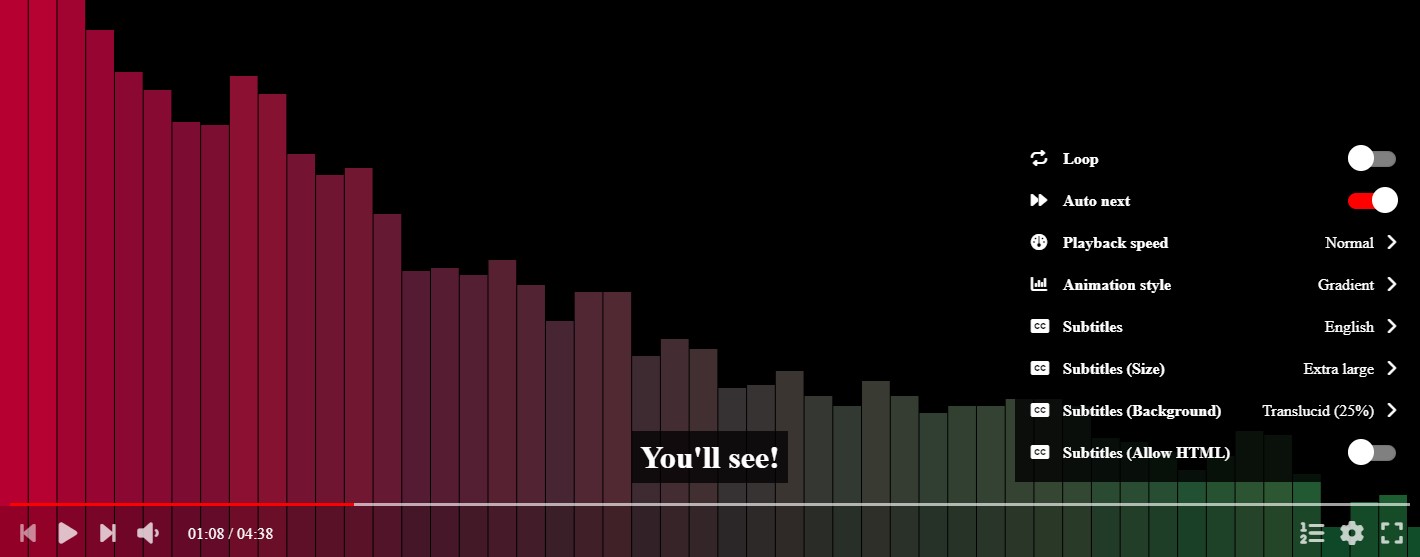
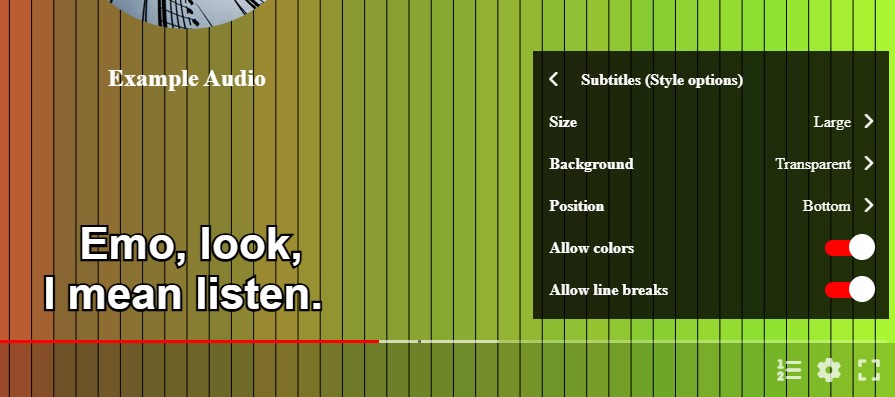
You can add subtitles to the audio in the Subtitles tab of the player editor. You can add them by uploading SubRip files, with .srt extension.
When an audio has subtitles, you can select them at the player configuration menu, while also being able to customize their style.
You can split the audio in different slices by clicking the option in the context menu, or pressing the N key. This will open an editor where you can add time slices, specifying the start time, and a name.
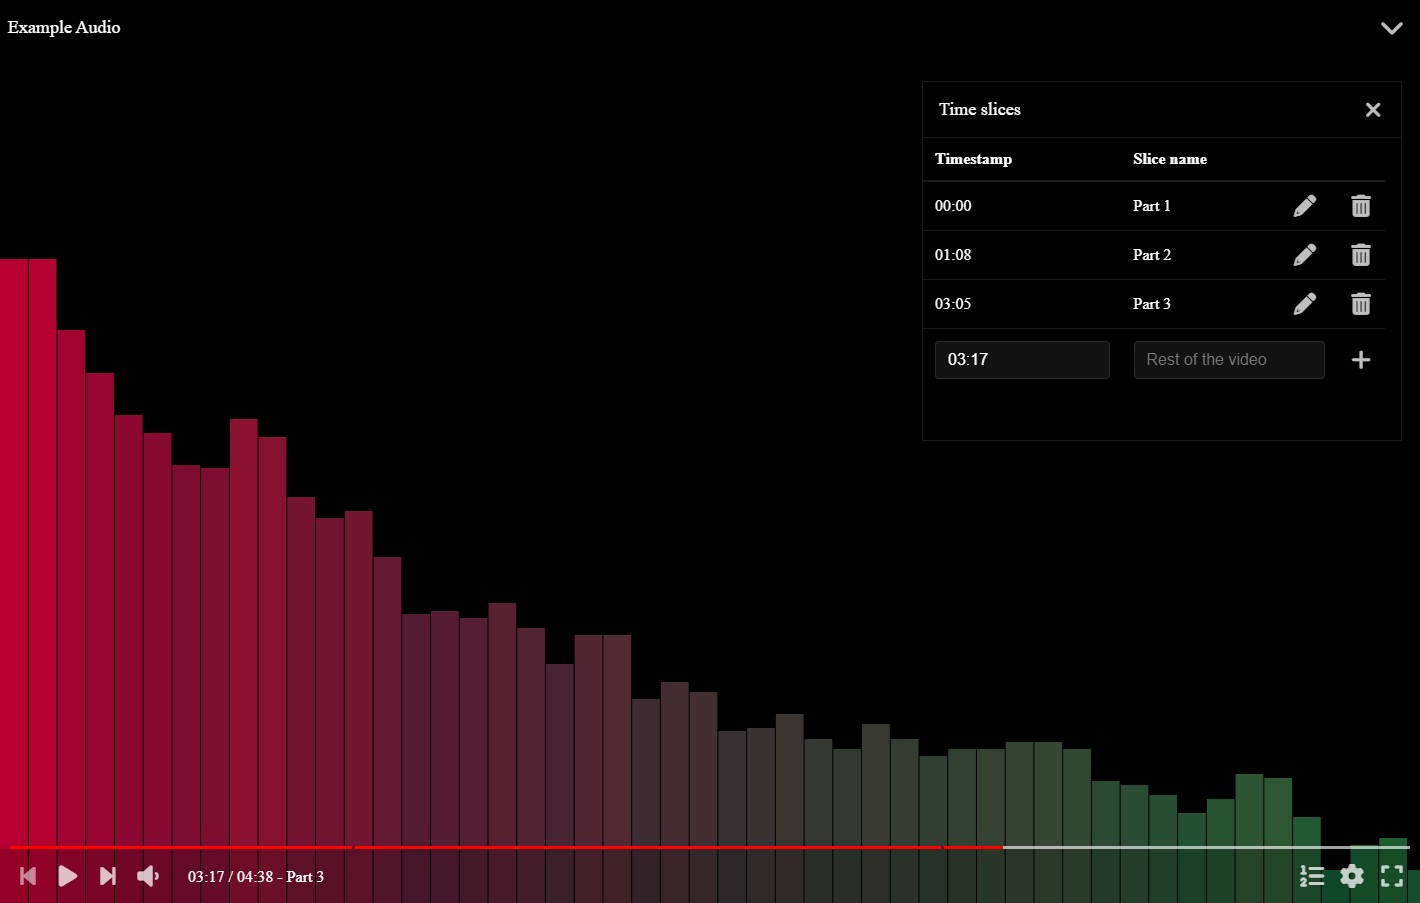
You can also change the time slices in text mode by going to the Time slices tab of the player editor.
You can add attachments to the audio by going to the Attachments tab of the player editor.
Attachments are arbitrary files you can store in the vault along with the media file, for example the original uncompressed audio or the assets used to make it.
In the Danger zone tab of the player editor, you can:
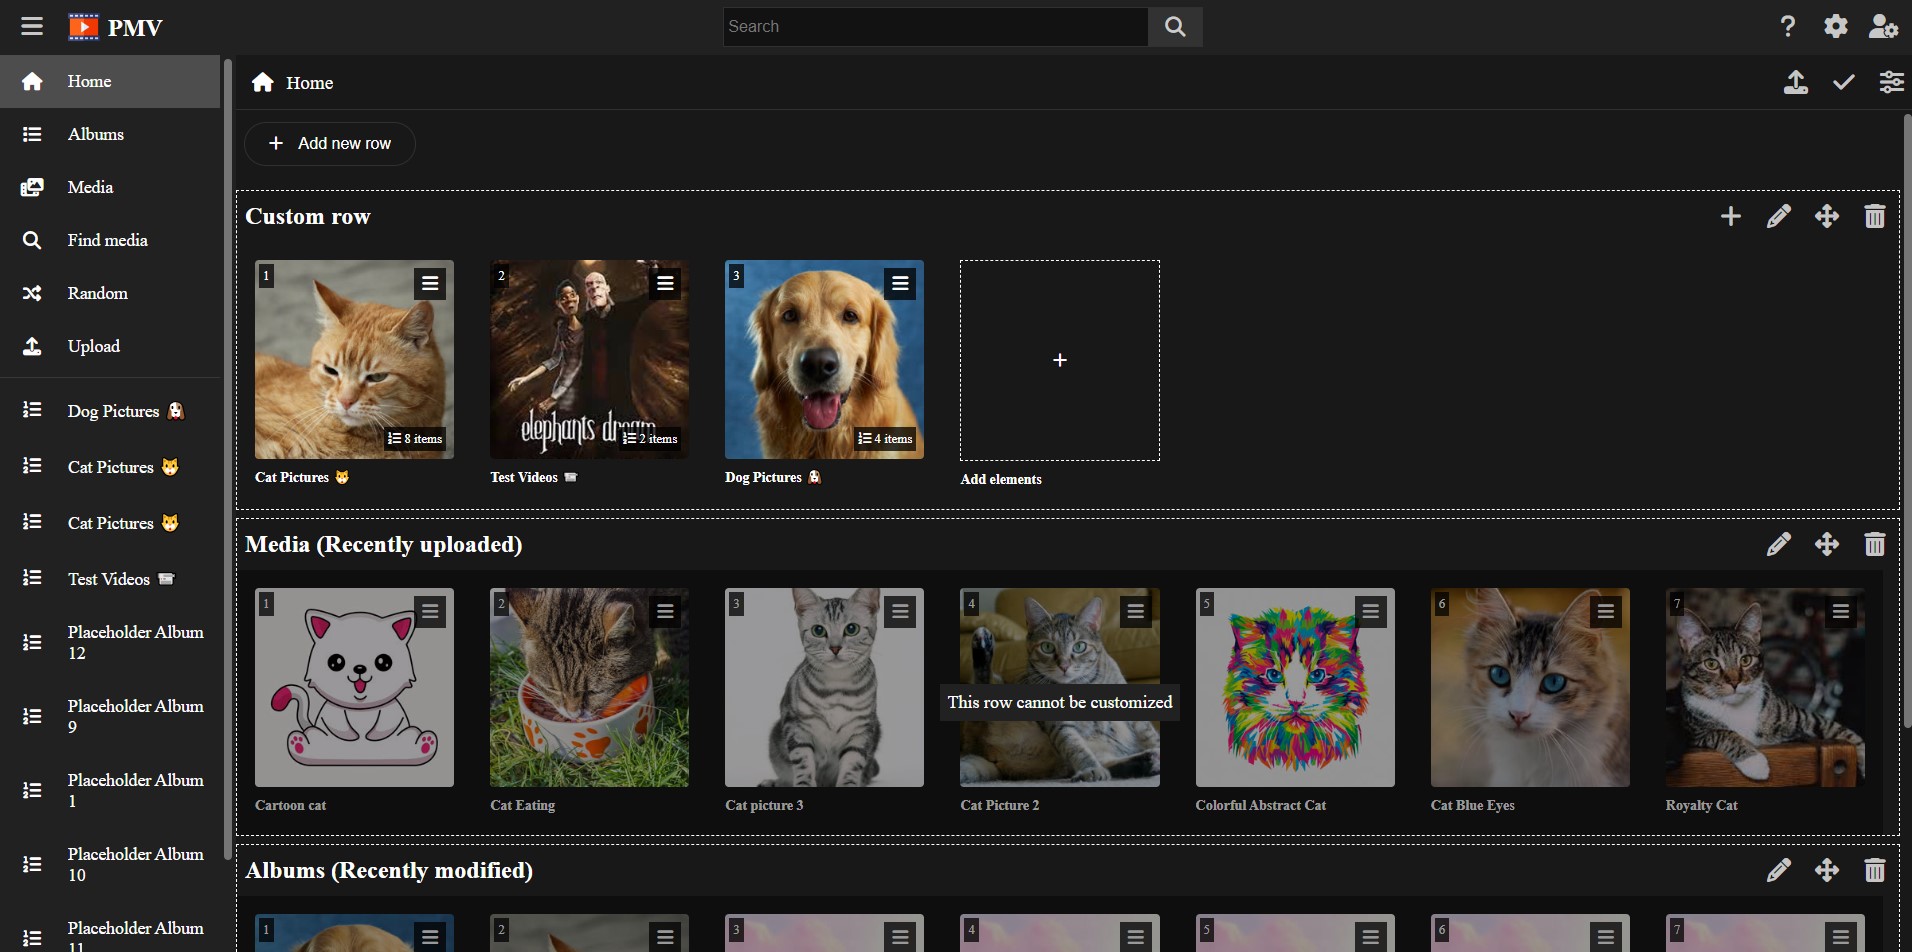
When you unlock the vault, the first page you will see is the Home page.
By default, the home page will show you the most recent media element you added to the vault, along with the most recently updated albums.

This page is very customizable. Click in the pencil icon in order to add custom rows and create your own custom home page for your vault.
The Media page consists on a paginated gallery containing all the media files you stored in your vault.
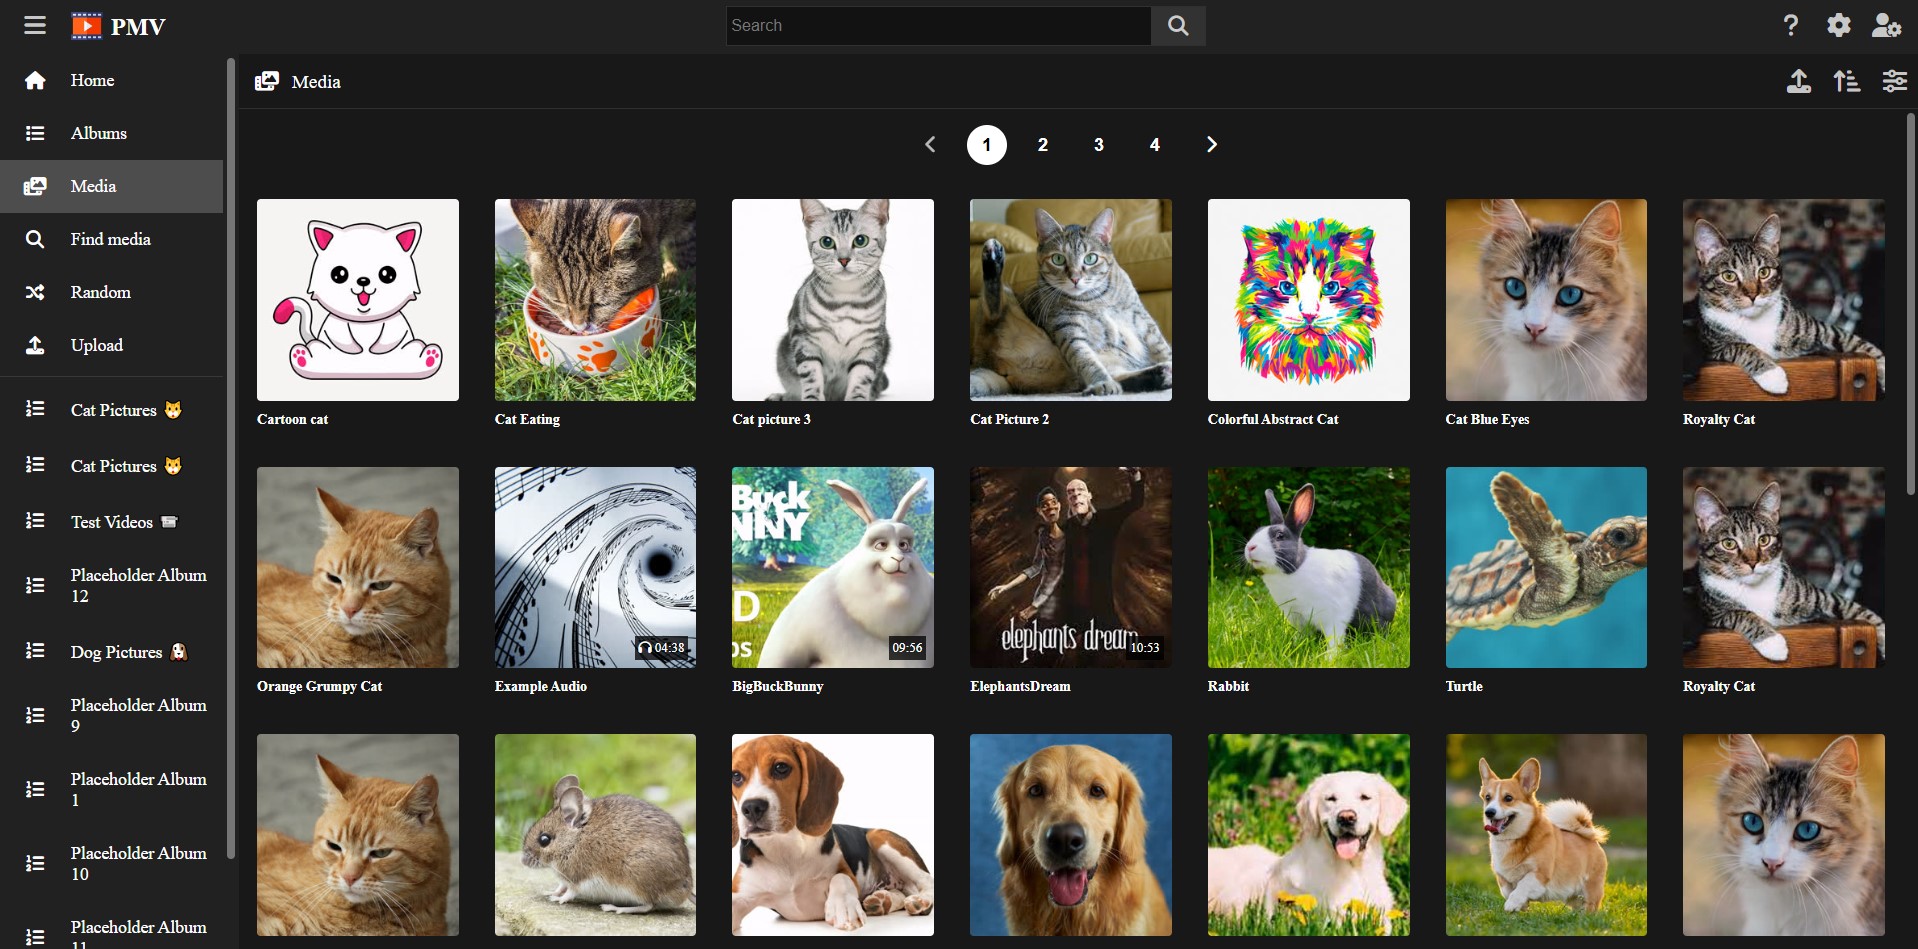
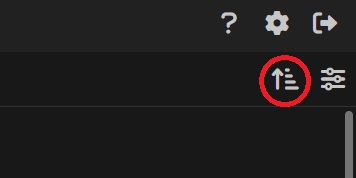
By default, it will show the most recent media files first. You can change this clicking on the arrow icon at the top-right, in order to show the oldest media files first.
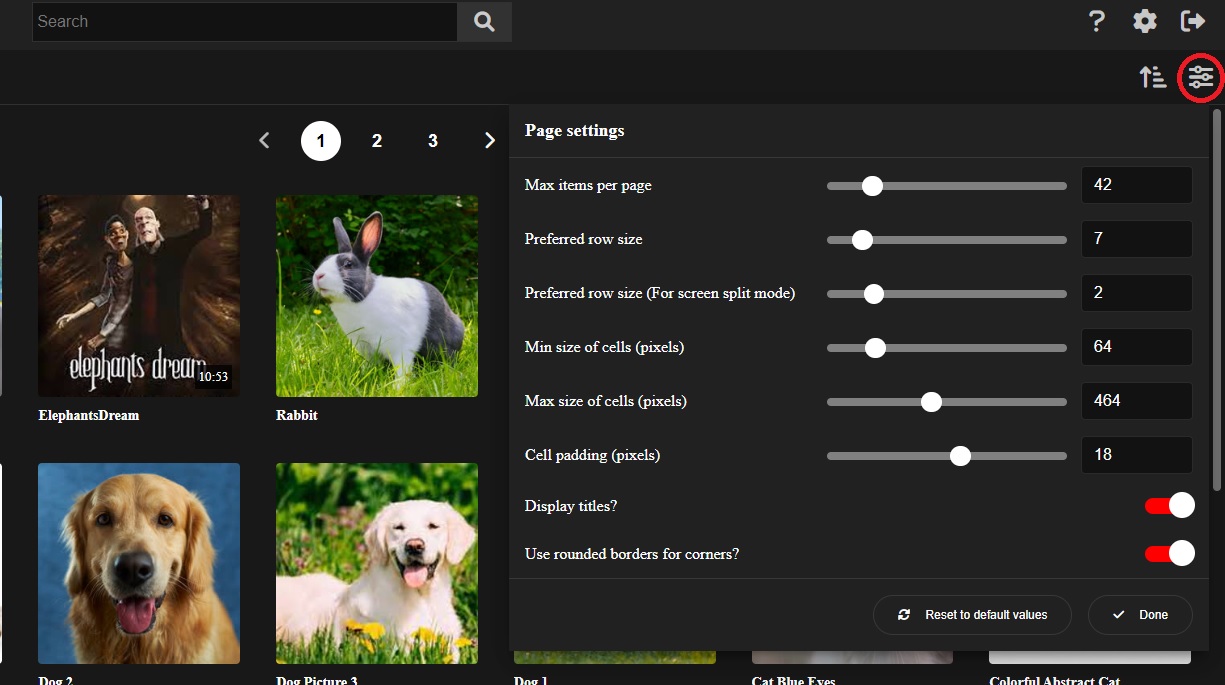
You can also customize the page by clicking in the cog button at the top-right. This will open a modal where you can change:
By typing in the search bar at the top, you can find any album or tag in the vault.
When selecting a tag, it will filter by that tag, showing you a filtered Media page, only showing the media files containing the tag.
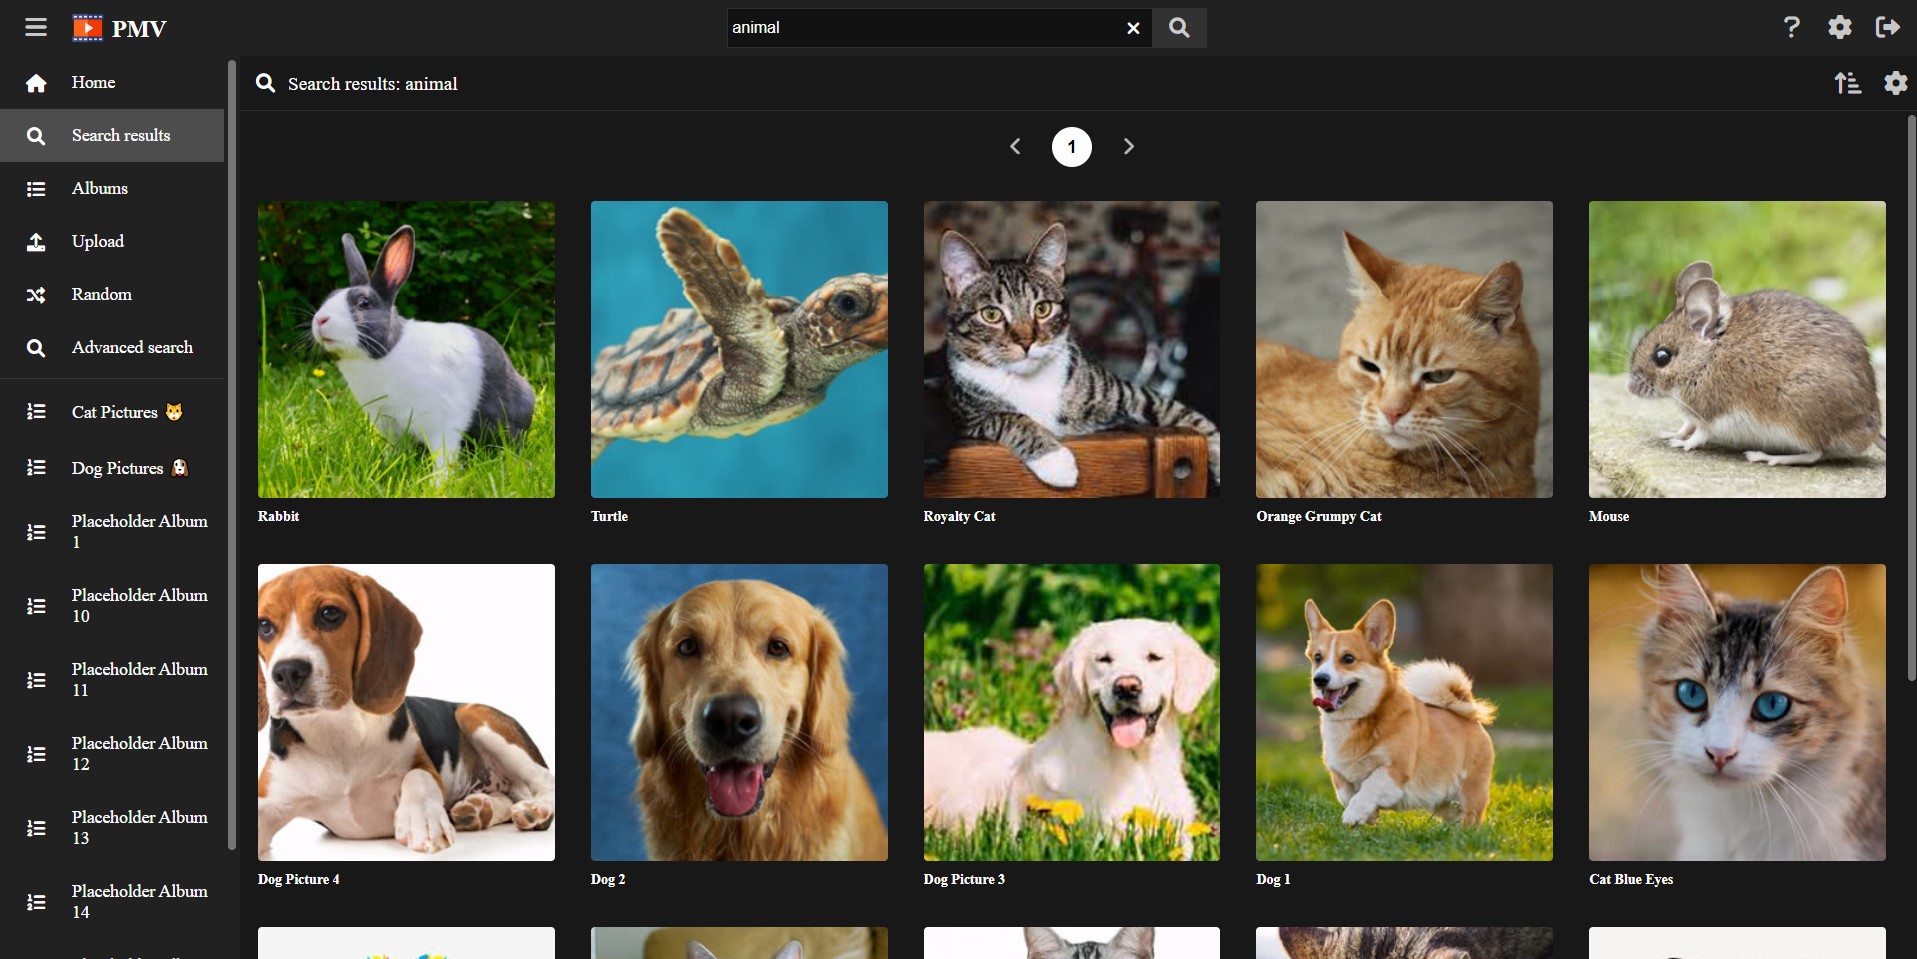
This filter also applies to the Random page, in order to get random, filtered results.
You can clear the filter by clicking on the X button that appears in the search bar when there is an active filter.
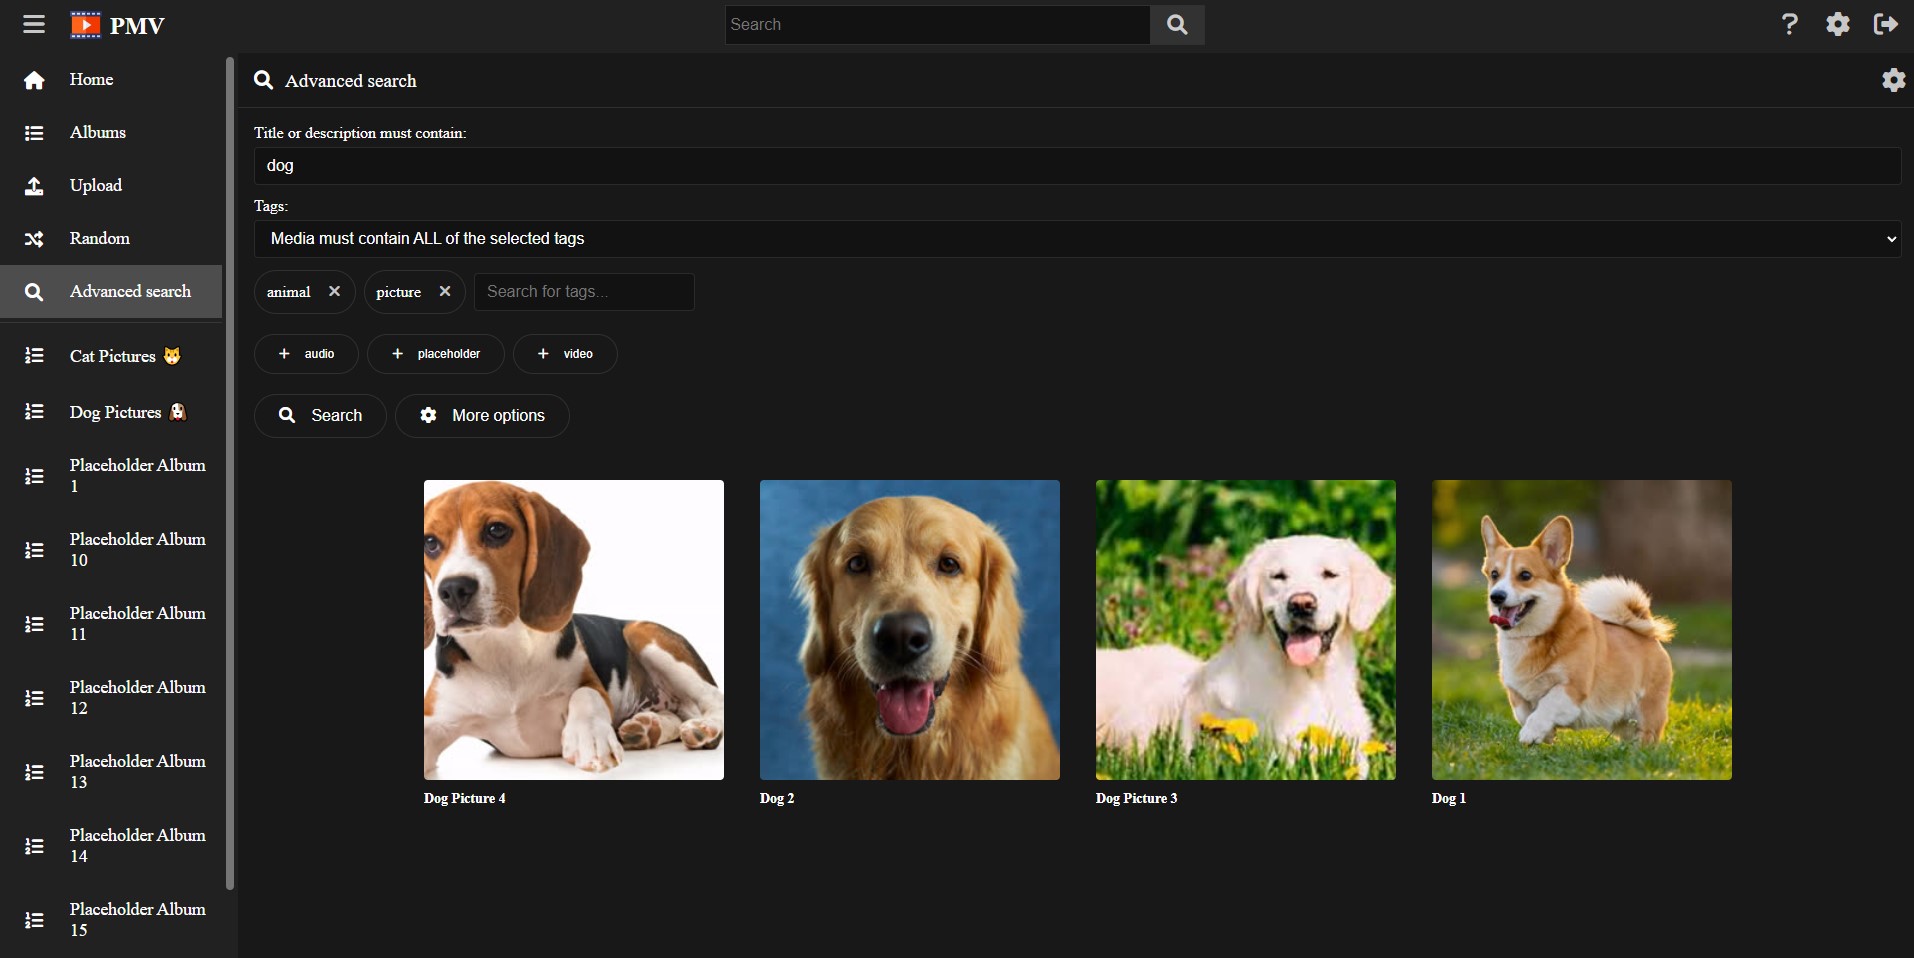
If you want a more advanced search system, in order to find a particular file in your vault, you can use the Find media page. This page will offer you a variety of options like:
Once your filter is set, you can scroll down until you find what you’re looking for.
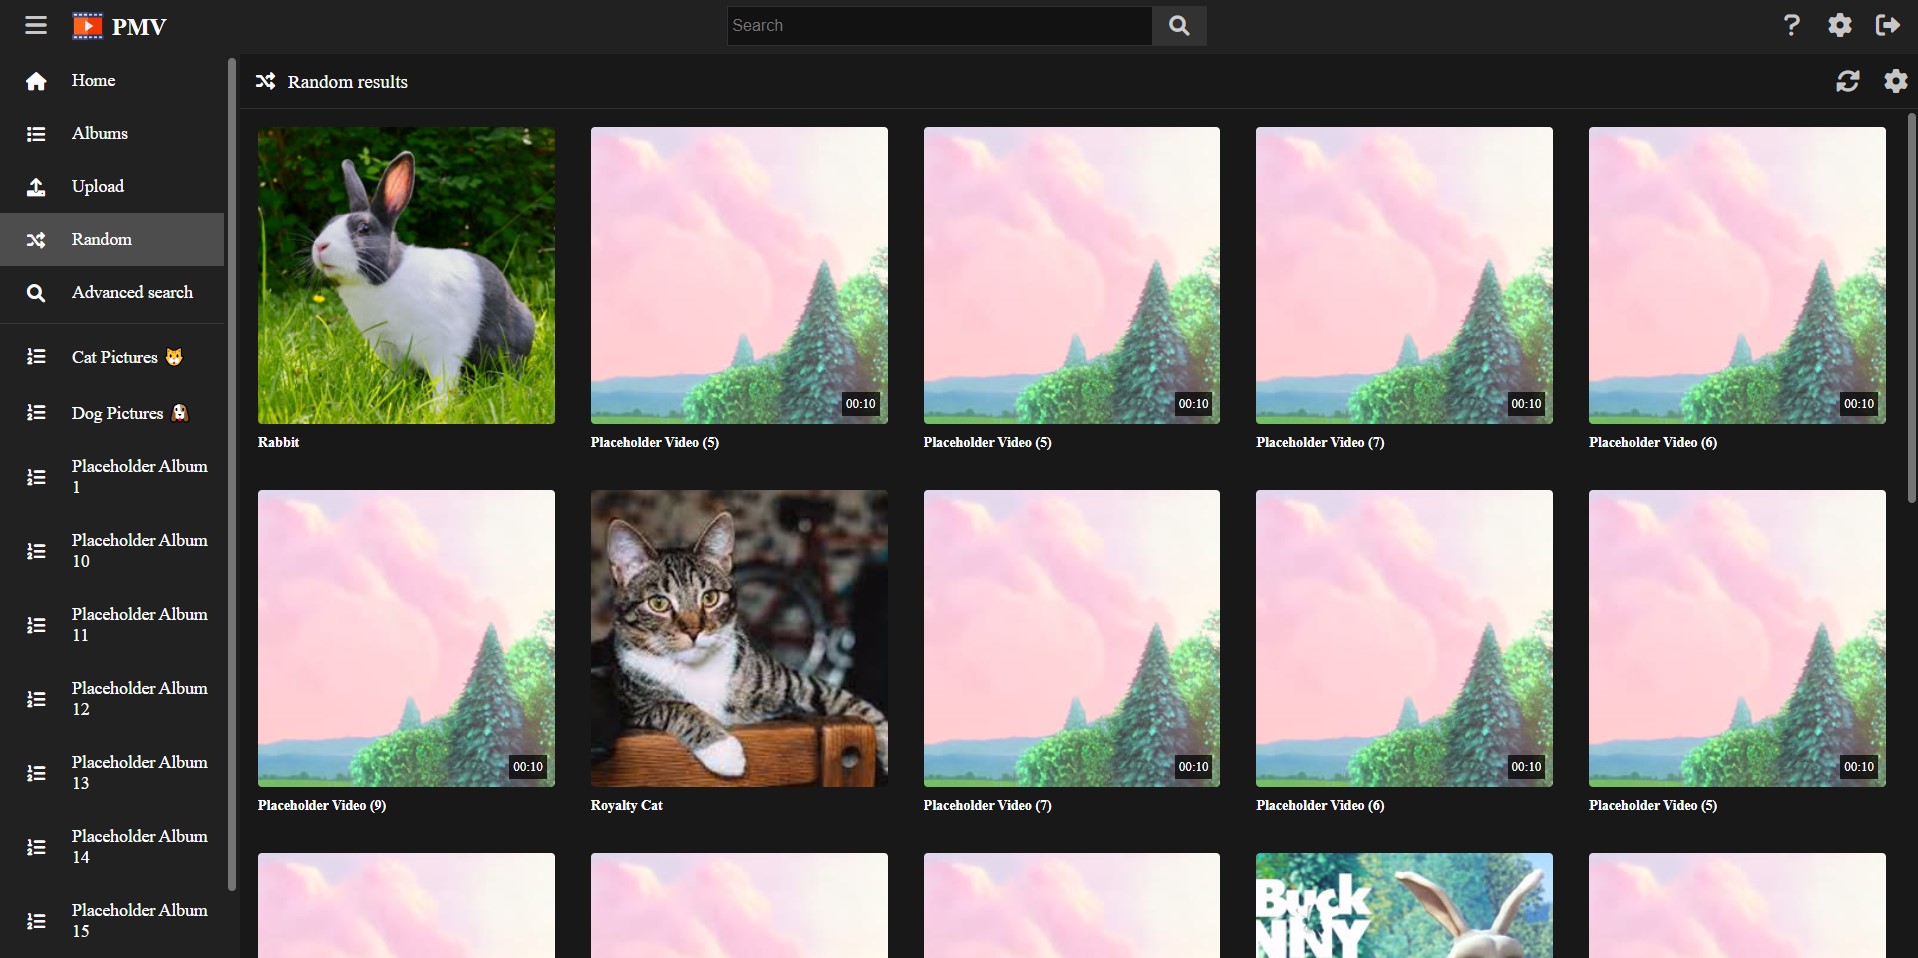
In case you want to load random media files from your media vault, you can try the Random page. This page works similar to the Media page, without the menu.
Each time you reload, a new seed is used, giving you a new set of random results.
You can use albums in order to keep ordered lists of media files in your vault.
In this tutorial we will explain how to create and use them.
If you visit the Albums page, you will see the full list of albums existing in your vault.
You can filter by name, and also create new ones from this page.
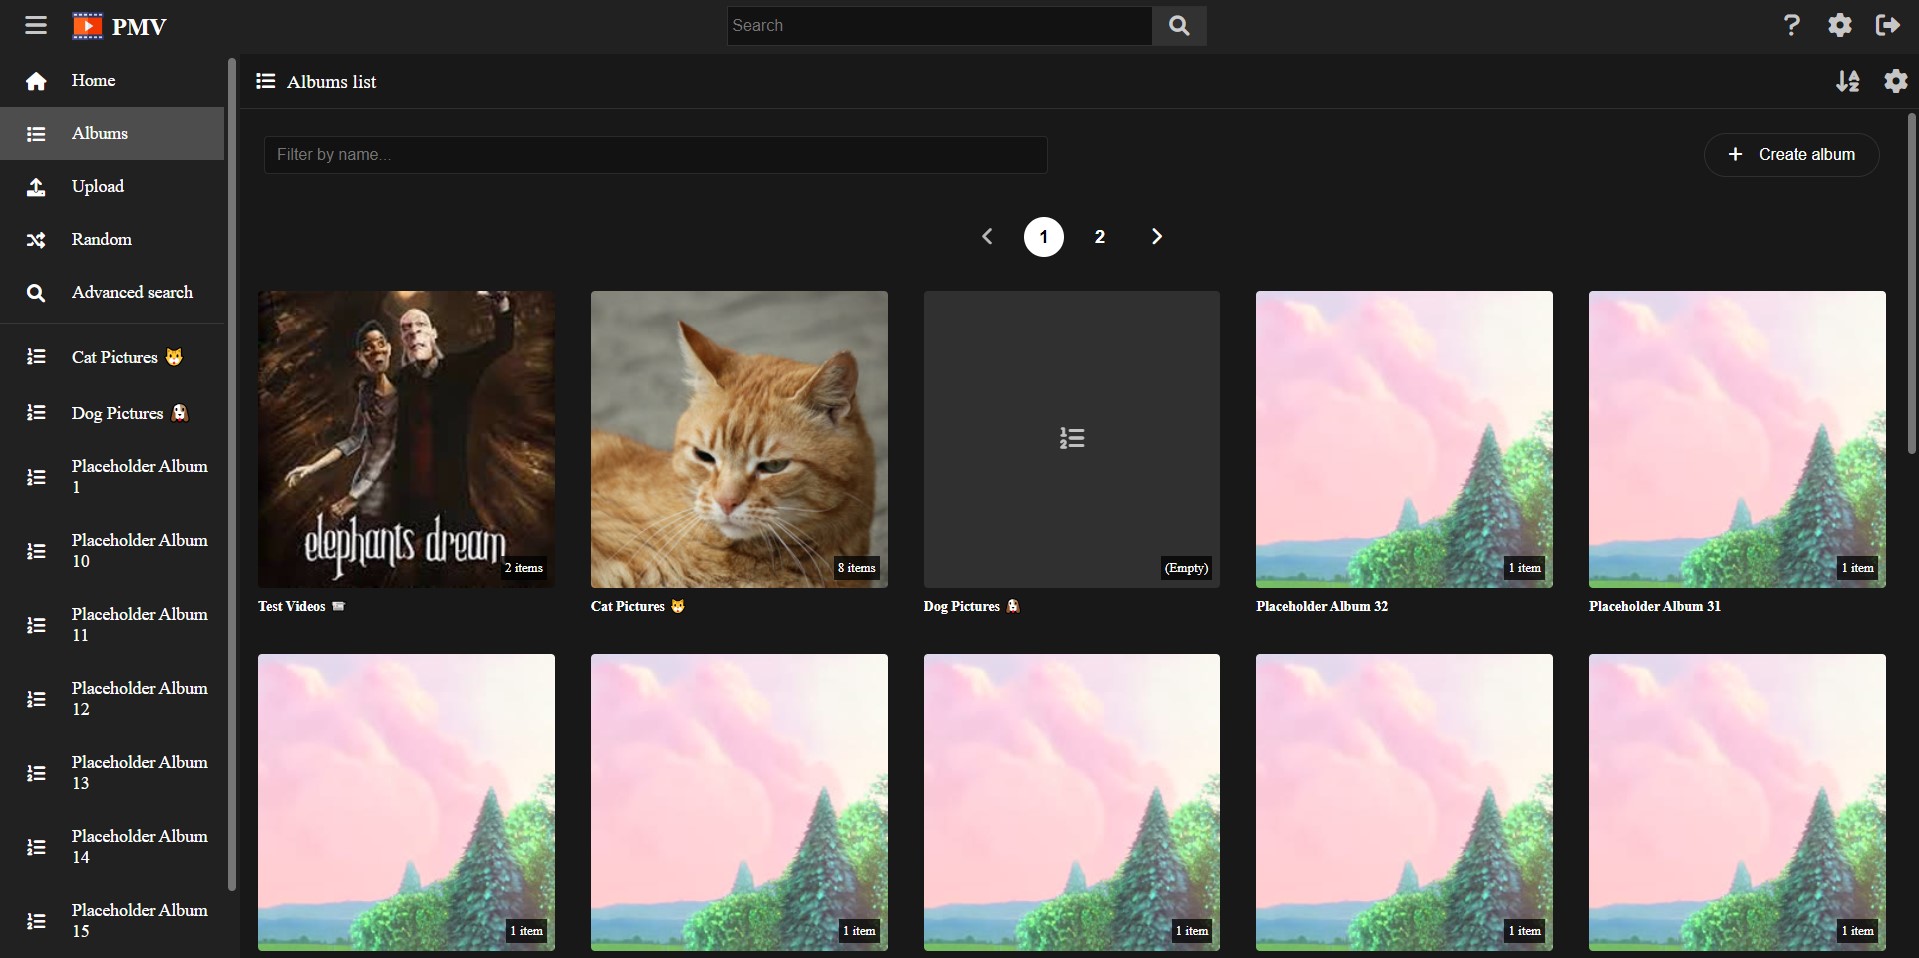
From the Albums page, click the Create album button in order to create a new album.
You must provide a name for the album and proceed.
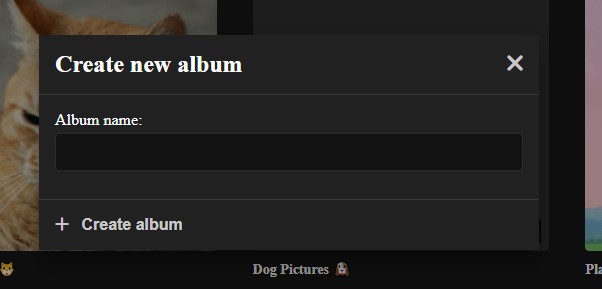
After the album is created, you will be redirected to it, being an empty album since it was just created.
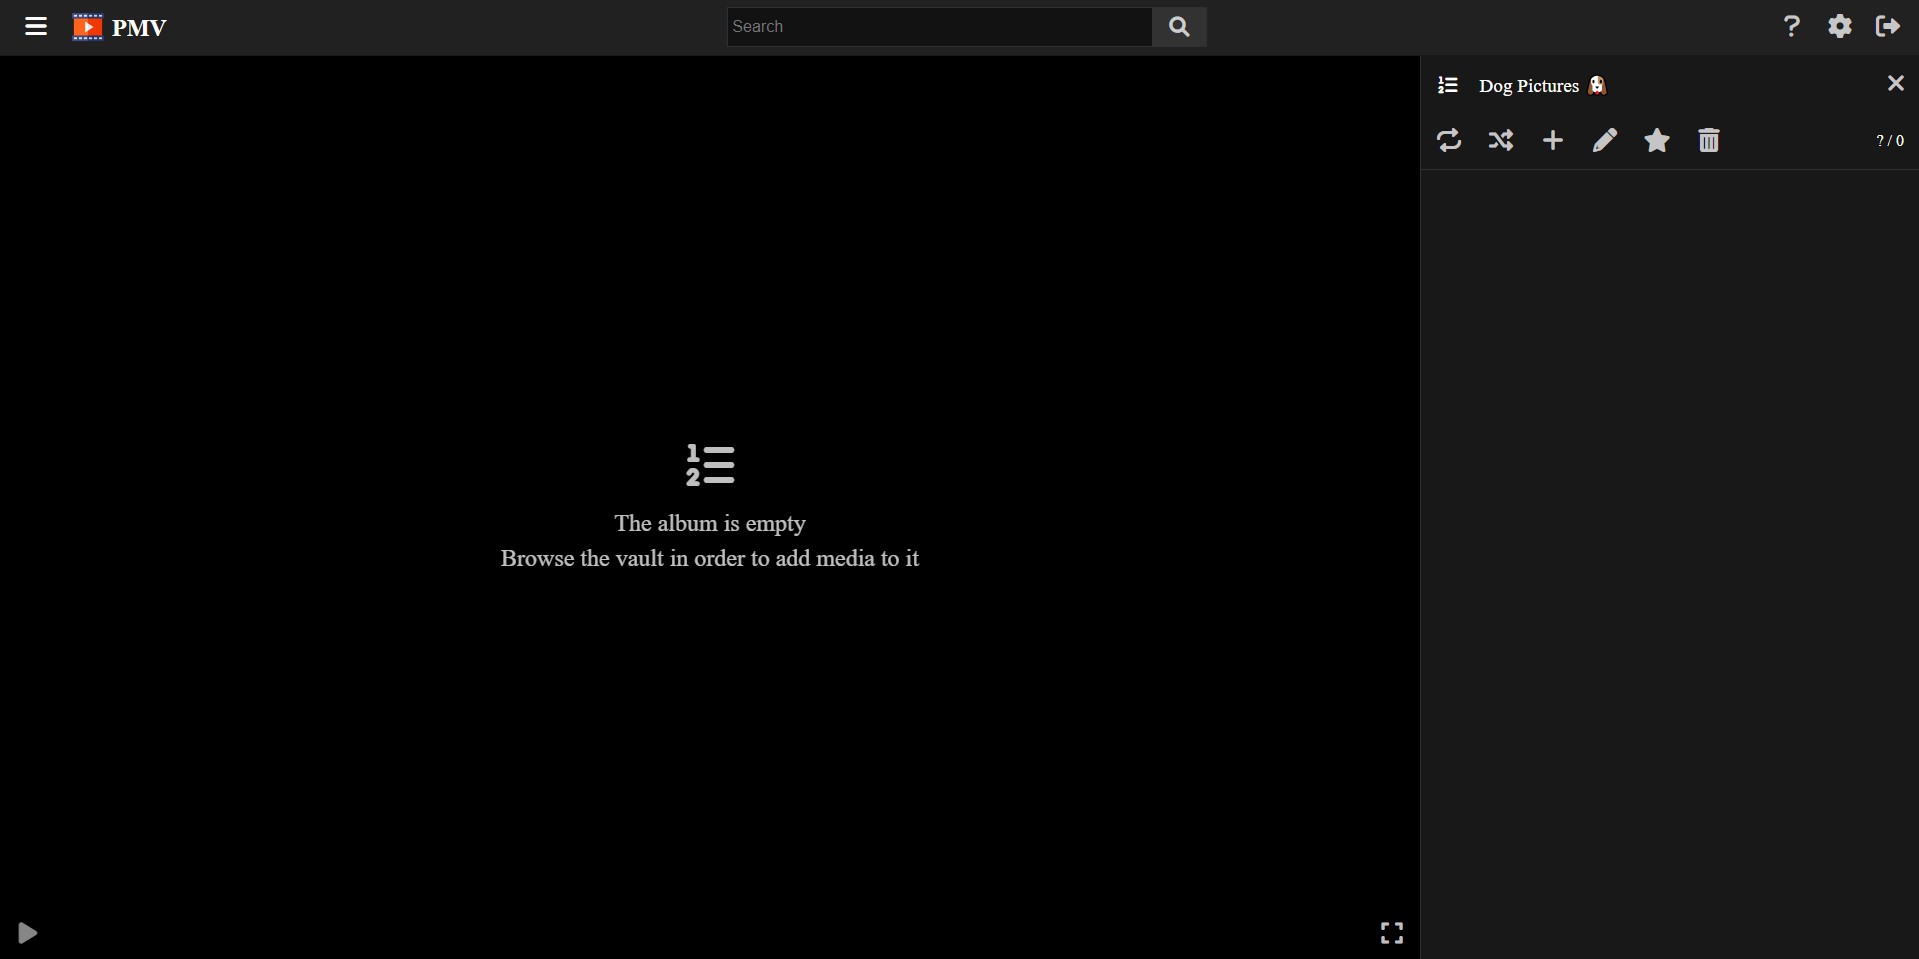
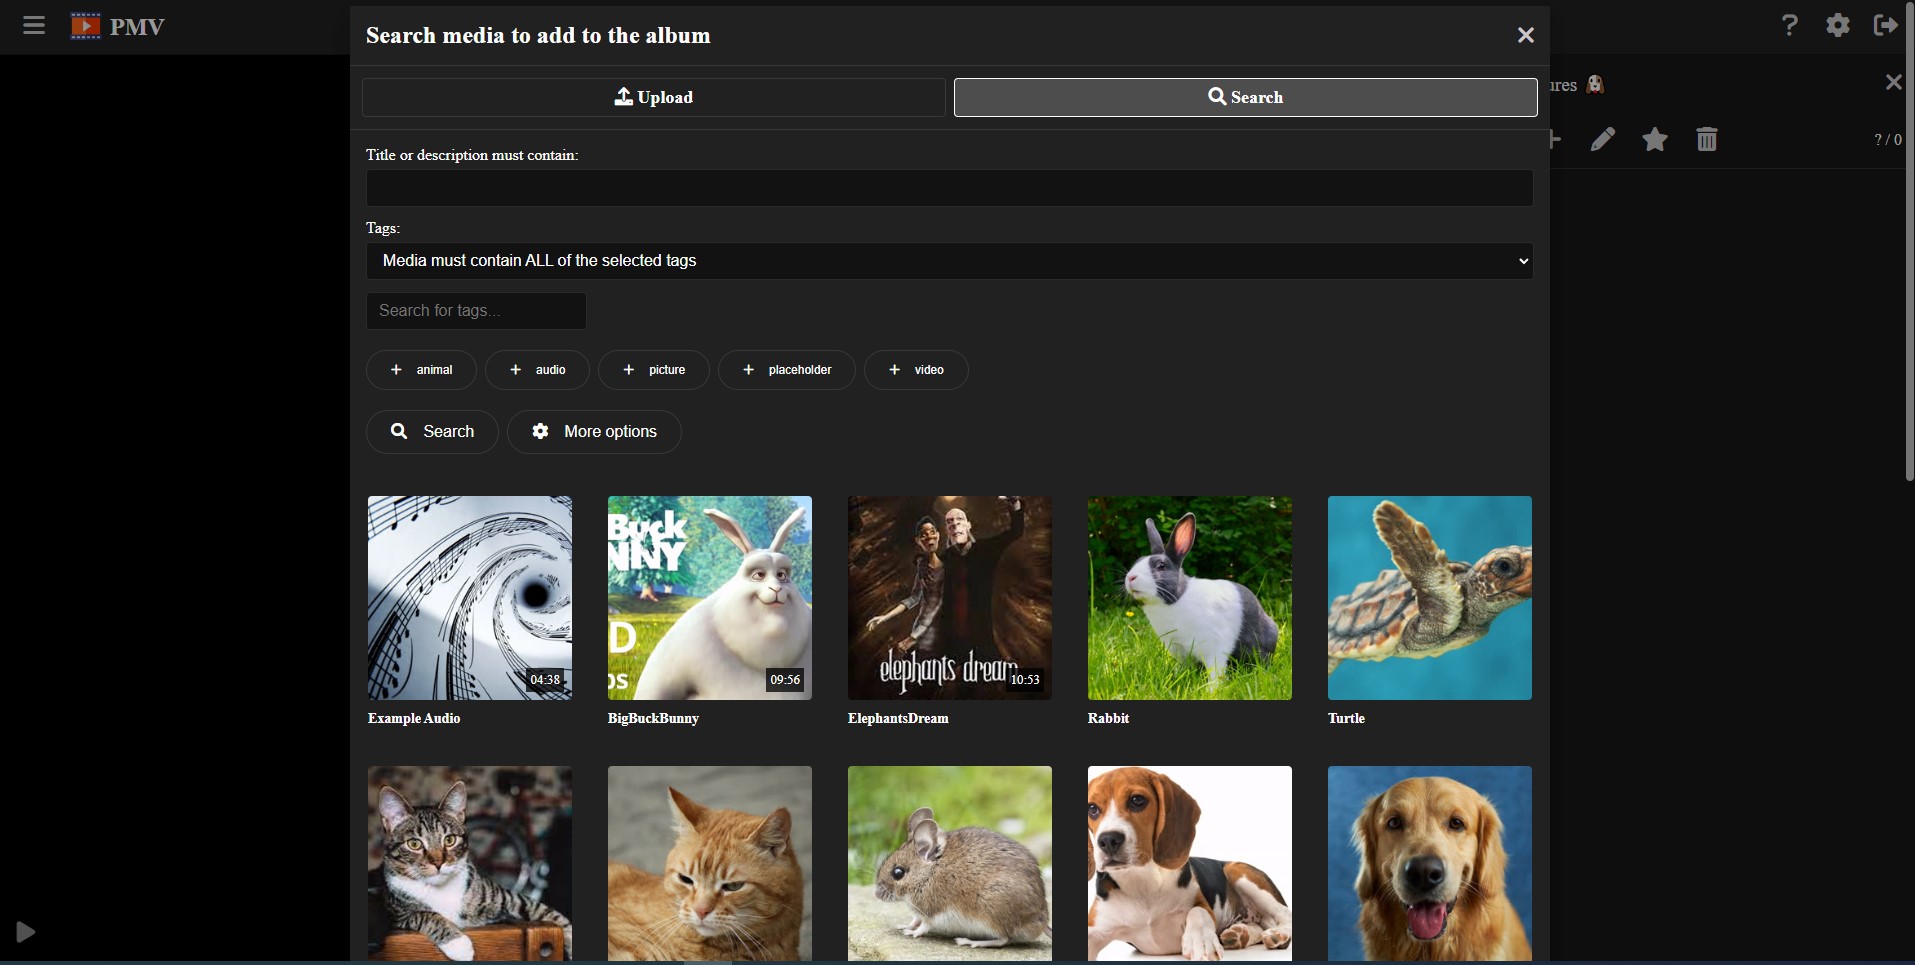
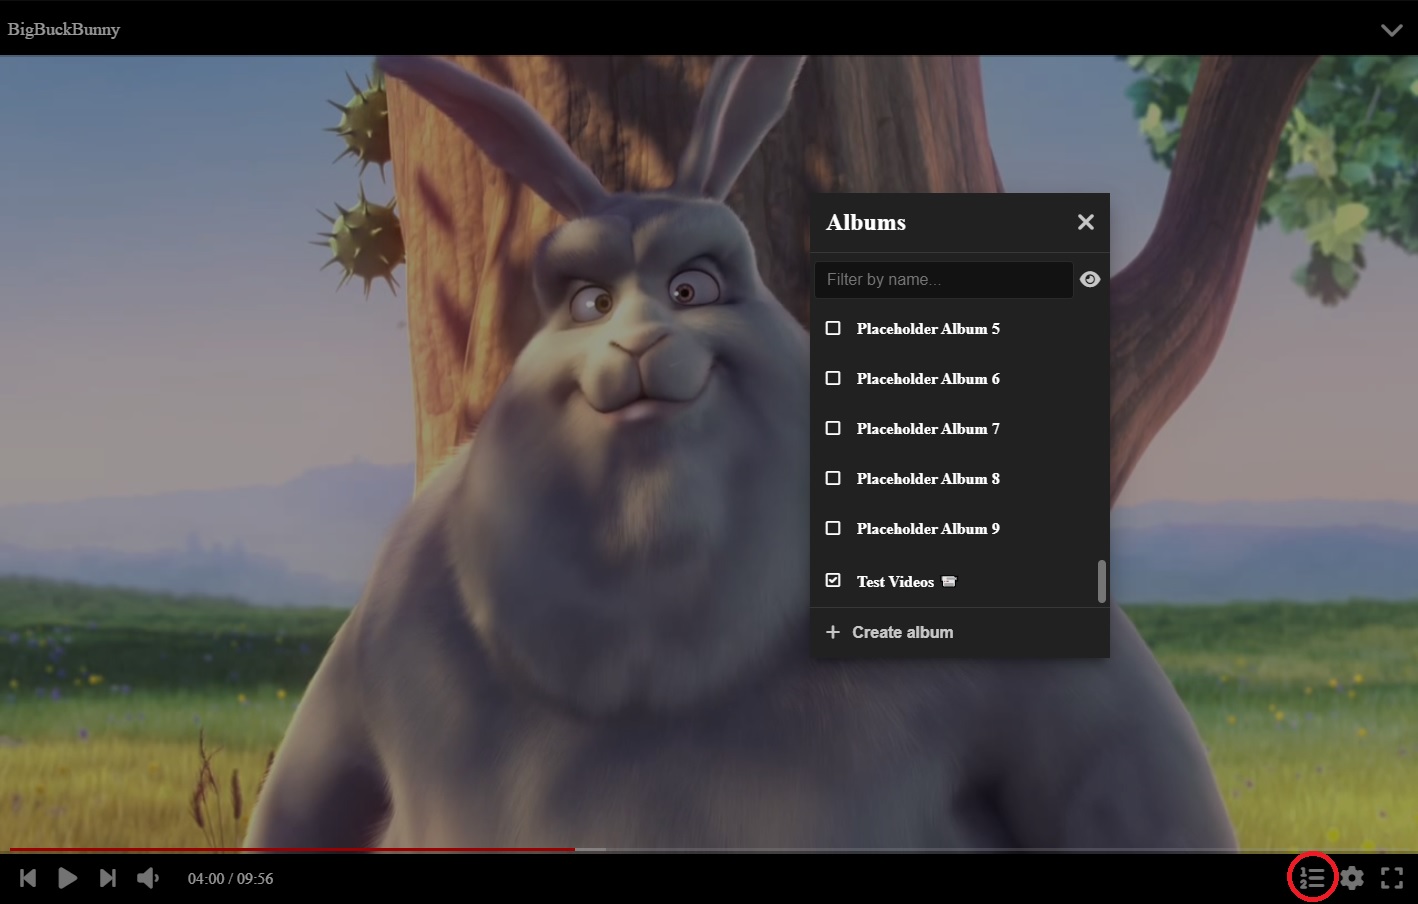
The first step after creating the album is adding the media files we want inside it.
In order to do this, you have two alternatives:
Once you have multiple media files inside an album, you can navigate using multiple methods:
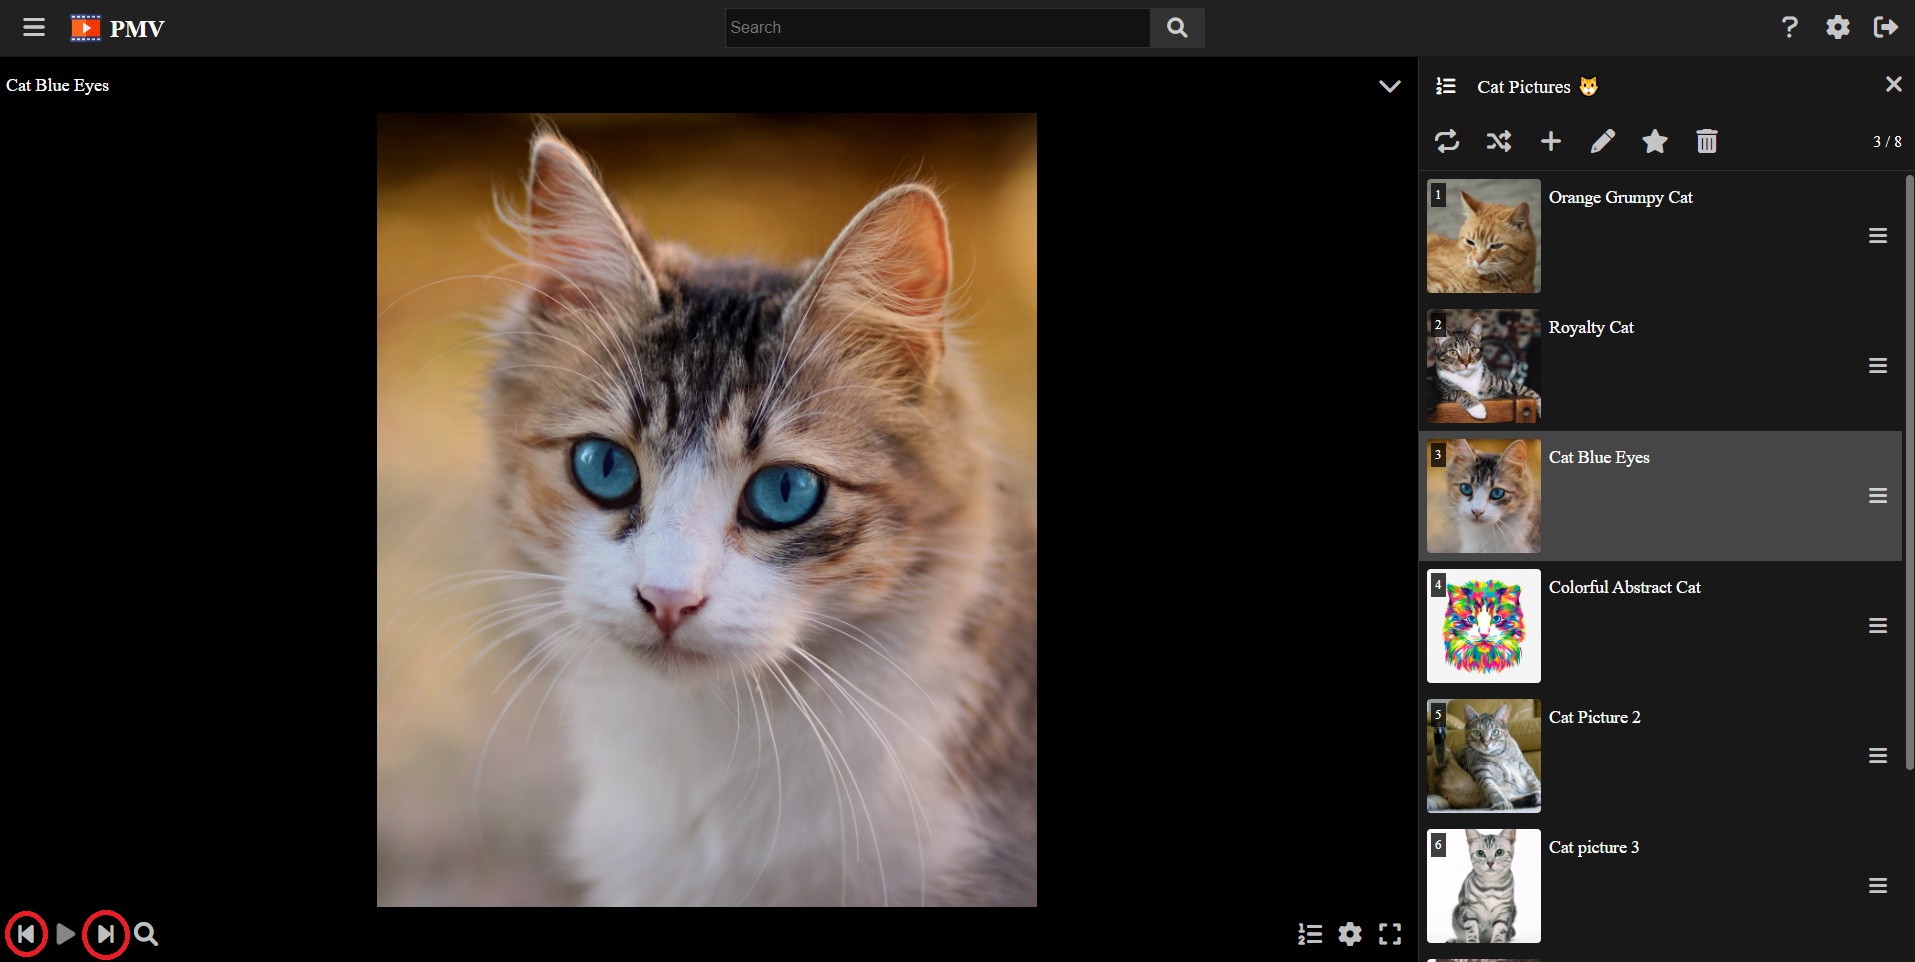
In the player configuration you can set the Auto next option, in order to automatically navigate to the next media when the video / audio ends or after a certain amount of time in the case of pictures.

You can set the Loop option for the album by clicking in the corresponding button in the album options. When enabled, the next media of the last element will be the first element, and the previous media of the first element will be the last element.

You can set the Random option for the album by clicking in the corresponding button in the album options. When enabled, the next media will be randomly chosen, and the previous media will be disabled.

By clicking in the Options button of a media file inside the vault, you will get a menu where you can change the position of the media file inside the album, and also delete it from the album.
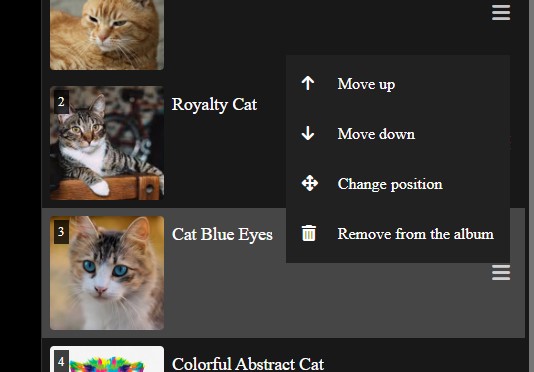
Also, if you are using a computer, you can drag and drop the elements in order to re-order them in a mode efficient way.
You can add the album into favorites by clicking the star button in the album options.

If the album is in favorites, it will appear at the top of the menu sidebar, in order to easily access it.
In order to rename the album, click in the pencil button in the album options.

In order to change the thumbnail of an album, click the image button in the album options.

By default, the album will use as its thumbnail, the thumbnail of the first element.
In order to delete the album, click in the trash button in the album options.

Note: Deleting the album will not delete any media file inside of it.
In order to make backups of your vault, you can just make regular copies of the vault folder. Due to its design, it’s always in a consistent status and spreads the data into multiple files, so any external backup tool will work.
Here is the list of alternatives you can use:
In this tutorial we’ll explain how to use the backup tool provided by the PersonalMediaVault installation.
When opening a vault from the launcher, you get a CLI interface with multiple commands.
In order to make a backup, use the backup command:
backup /path/to/backup/folder
In case the destination path is not empty, it will only copy the new files and update the ones that have been modified.
You can also use the backup tool from the terminal, running the pmv-backup binary:
pmv-backup backup /path/to/vault /path/to/backup/folder
In case you got the encryption key leaked, and it’s no longer secure, you can make a backup re-encrypting everything with a brand new randomly generated encryption key.
In order to do that, use the re-encrypt option:
pmv-backup re-encrypt /path/to/vault /path/to/backup/folder
Note: The re-encryption process may take a very long time. Make sure to always use a secure password in order to prevent data leaks in the first place.
Since restoring backup can take a long time, you may want a method to recover access to your vaulty fast in case you lose access to your credentials.
You can use the key-export option of the backup tool in order to export the vault encryption key:
pmv-backup key-export /path/to/vault
Make sure to back it up in a secure and private place.
In case you lose access to your vault, and want to recover the key, you can use the key-recover option of the backup tool:
pmv-backup key-recover /path/to/vault
This section contains technical documents and guides about multiple aspects of PersonalMediaVault.
Check the list below in order to find the information you are looking for.
If you can’t find what you’re looking for, feel free to start a discussion on GitHub.
This document specifies the vault frontend customization capabilities implemented by the PersonalMediaVault backend, such as custom title, custom style or custom icons.
You can customize the vault frontend title and also setup custom CSS code if you need it. Simply go to Settings and then Advanced Settings.

The custom title will affect the page base title.
The custom CSS code can be used to do complex stuff, like changing colors or font sizes. Note that this is not a recommended feature, since the style is already optimized for both dark and light theme.
By default, the PersonalMediaVault backend will serve the official icon.
You can change it by adding a custom favicon.ico into your vault folder.
You may have to clear cache to see the change, since the browser caches the icon to prevent requesting it multiple times.
Similar to the favicon, by default, the official logos will be served.
If you want to change them, you must create a folder inside your vault folder with the name img/icons.
You can copy the official ones and modify them.
| File | Description |
|---|---|
favicon.png | Favicon used to display for the top bar. (Default format) |
favicon.svg | Favicon used to display for the top bar. (Alternative format) |
favicon-32x32.png | Small favicon image (32x32 px) |
favicon-16x16.png | Small favicon image (16x16 px) |
This is a list of all available server options for the PersonalMediaVault backend.
In order to run the server, you can run the pmvd binary.
In order to see the options, use:
pmvd --help
In order to run the daemon, use:
pmvd --daemon [OPTIONS]
Here is the full list of available options:
| Option | Description |
|---|---|
--help, -h | Prints command line options. |
--version, -v | Prints version. |
--daemon, -d | Runs backend daemon. |
--init, -i | Initializes the vault. Asks for username and password. |
--clean, -c | Cleans temporal path before starting the daemon. |
--port -p <port> | Sets the listening port. By default 80 (or 443 if using SSL). |
--bind -b <bind-addr> | Sets the bind address. By default it binds all interfaces. |
--vault-path, -vp <path> | Sets the data storage path for the vault. |
--cache-size <size> | Sets the LRU cache size. By default is can hold 1024 elements. |
Also, here is a list of available debug options:
| Option | Description |
|---|---|
--skip-lock | Ignores vault lockfile. |
--check-trash | Checks the vault (at startup) in order to find trash files. This option requires the vault credentials passed in the environment variables VAULT_USER and VAULT_PASSWORD, in order to decrypt the vault files. |
--remove-trash | Removes the trash files. Combine this option with --check-trash. |
--debug | Enables debug mode. |
--log-requests | Enables logging requests to standard output. |
--cors-insecure | Allows all CORS requests (insecure, for development). |
--launch-tag <tag> | Sets launcher tag (for launcher use). |
Also, here is a list of environment variables to configure other options:
| Variable Name | Description |
|---|---|
| FFMPEG_PATH | Path to ffmpeg binary |
| FFPROBE_PATH | Path to ffprobe binary |
| FFMPEG_VIDEO_ENCODER | Name of the FFmpeg codec to encode the videos. |
| TEMP_PATH | Temporal path to store things like uploaded files or to use for FFMPEG encoding. Note: It should be in a different filesystem if the vault is stored in an unsafe environment. By default, this will be stored in ~/.pmv/temp |
| FRONTEND_PATH | Path to static frontend to serve it. |
| SSL_CERT | Path to the SSL certificate. Required to enable HTTPS |
| SSL_KEY | Path to SSL private key. Required to enable HTTPS |
| USING_PROXY | Set it to YES if you are using a reverse proxy. |
| TEMP_FILE_DELETE_MODE | Set it to SECURE to clear all the bytes of temporal files (secure delete). |
Also, here is the list environment variables to configure semantic search:
| Variable Name | Description |
|---|---|
| SEMANTIC_SEARCH_ENABLED | Set it to YES to enable semantic search. The rest of the options must be configured. Otherwise you will get an error. |
| QDRANT_HOST | Host of the Qdrant database. |
| QDRANT_PORT | GRPC port of the Qdrant database. Default: 6334 |
| QDRANT_API_KEY | API key for the Qdrant database. |
| QDRANT_USE_TLS | Set it to YES in order to use TLS to connect to the Qdrant database. |
| QDRANT_INITIAL_SCAN | By default, when the vault is unlocked, a task to scan for missing media in the Qdrant database will be created. Set this variable to NO to disable it. |
| CLIP_API_BASE | Base URL of the CLIP API (provided by pmv-ai-service). Example: http://localhost:5000/clip |
| CLIP_API_AUTH | Value of the Authorization header in order to use the CLIP API. |
| CLIP_IMAGE_SIZE_LIMIT_MB | Limit on size (MB) before the images are discarded from being encoded by CLIP. Default: 20 |
This technical guide explains how to set up PersonalMediaVault as a service in a Linux machine using systemd.
Make sure to follow the installation guide on Linux before doing this. This guide expects you to have PersonalMediaVault already installed in your system.
The first step for creating a systemd service is to create an user for that service.
In order to create the user, run the following commands:
sudo groupadd pmv
sudo useradd -M pmv -g pmv
sudo usermod -L pmv
After you did this, now it’s time to create a folder to store the vault. In this guide we are going to use /var/pmv/vault.
Run the following commands:
sudo mkdir /var/pmv
sudo mkdir /var/pmv/vault
sudo chown -R pmv:pmv /var/pmv
Then, it’s time to create the service file, run the following command:
sudo nano /etc/systemd/system/pmv.service
Copy the following contents and save it:
[Unit]
Description=PersonalMediaVault
After=network.target auditd.service

[Service]
Type=simple
ExecStart=/usr/bin/pmvd --daemon --log-requests --skip-lock --vault-path /var/pmv/vault
User=pmv
Group=pmv
WorkingDirectory=/var/pmv/vault
Environment=FRONTEND_PATH=/usr/lib/pmv/www
Environment=FFMPEG_PATH=/usr/bin/ffmpeg
Environment=FFPROBE_PATH=/usr/bin/ffprobe
Environment=TEMP_PATH=/tmp/pmv
LimitNOFILE=infinity
LimitCORE=infinity
KillMode=process
StandardInput=null
StandardOutput=syslog
StandardError=syslog
Restart=always

[Install]
WantedBy=multi-user.target
Note: You may want to change some options. For that, make sure to check the following:
After you saved the service file, and exited the editor, run the following command to enable the service, so it runs every time the system starts:
sudo systemctl enable pmv
Then, you can start it:
sudo systemctl start pmv
After it was started, you can check the logs with journalctl. Example:
sudo journalctl -u pmv
You can also check the service status with:
sudo systemctl status pmv
This is the documentation for the vault storage model, including the types of files it uses, their internal structure and the encryption algorithms used.
Use this document as reference for any software development that requires interaction with the vault files.
The vault storage model uses different types of files:
The lock file has the .lock extension.
It stores in plain text, a decimal number representing the PID of the current Process accessing the vault.
PersonalMediaVault backend should check for the existence of this file and the process before accessing the vault.
Unencrypted JSON files have the .json extension.
They follow the JSON format. The schema varies depending on the specific file.
Since they are not encrypted, they just store configuration, like the port it should listen, or the encryption parameters.
Encrypted JSON files have the .pmv extension.
They take as a base a JSON plaintext, that is encrypted using an algorithm like AES.
They are binary files, with the following structure:
| Starting byte | Size (bytes) | Value name | Description |
|---|---|---|---|
0 | 2 | Algorithm ID | Identifier of the algorithm, stored as a Big Endian unsigned integer |
2 | H | Header | Header containing any parameters required by the encryption algorithm. The size depends on the algorithm used. |
2 + H | N | Body | Body containing the raw encrypted data. The size depends on the initial unencrypted data and algorithm used. |
The system is flexible enough to allow multiple encryption algorithms. Currently, there are 2 supported ones:
AES256_ZIP: ID = 1, Uses ZLIB (RFC 1950) to compress the data, and then uses AES with a key of 256 bits to encrypt the data, CBC as the mode of operation and an IV of 128 bits. This algorithm uses a header of 20 bytes, containing the following fields:| Starting byte | Size (bytes) | Value name | Description |
|---|---|---|---|
0 | 4 | Compressed plaintext size | Size of the compressed plaintext, in bytes, used to remove padding |
4 | 16 | IV | Initialization vector for AES_256_CBC algorithm |
AES256_FLAT: ID = 2, Uses AES with a key of 256 bits to encrypt the data, CBC as the mode of operation and an IV of 128 bits. This algorithm uses a header of 20 bytes, containing the following fields:| Starting byte | Size (bytes) | Value name | Description |
|---|---|---|---|
0 | 4 | Plaintext size | Size of the plaintext, in bytes, used to remove padding |
4 | 16 | IV | Initialization vector for AES_256_CBC algorithm |
Index files have the .index extension.
They are sorted lists of media assets identifiers. They can store all the existing identifiers, or a fraction of them, for example, for a tag.
Thanks to being sorted, searching for a specific identifier can be achieved using binary search.
They are binary files, consisting of the following fields:
| Starting byte | Size (bytes) | Value name | Description |
|---|---|---|---|
0 | 8 | Index size | Number of entries the index file contains, stored as a Big Endian unsigned integer |
8 + 8*K | 8 | Media asset identifier | Each media asset identifier is stored as a Big Endian unsigned integer. They are stored next to each other, and already sorted from lower value to grater value |
Encrypted assets have the .pma extension.
They store one or multiple encrypted files.
They are also binary files, and they can be of two types:
s_.m_.These asset files are used to store a single and possibly big file in chunks, encrypted each chunk using the same method described by the Encrypted JSON files section.
They are binary files consisting of 3 contiguous sections: The header, the chunk index and the encrypted chunks.
The header contains the following fields:
| Starting byte | Size (bytes) | Value name | Description |
|---|---|---|---|
0 | 8 | File size | Size of the original file, in bytes, stored as a Big Endian unsigned integer |
8 | 8 | Chunk size limit | Max size of a chunk, in bytes, stored as a Big Endian unsigned integer |
After the header, the chunk index is stored. For each chunk the file was split into, the chunk index will store a metadata entry, with the following fields:
| Starting byte | Size (bytes) | Value name | Description |
|---|---|---|---|
0 | 8 | Chunk pointer | Starting byte of the chunk, stored as a Big Endian unsigned integer |
8 | 8 | Chunk size | Size of the chunk, in bytes, stored as a Big Endian unsigned integer |
After the chunk index, the encrypted chunks are stored following the same structure described in the Encrypted JSON files section.
This chunked structure allows to randomly access any point in the file as a low cost, since you don’t need to decrypt the entire file, only the corresponding chunks. This capability is specially great for video rewinding and seeking.
These asset files are used to store multiple smaller files, meant to be sorted and accessed by an index number.
They are binary files consisting of 3 contiguous sections: The header, the file table and the encrypted files.
The header contains the following fields:
| Starting byte | Size (bytes) | Value name | Description |
|---|---|---|---|
0 | 8 | File count | Number of files stored by the asset, stored as a Big Endian unsigned integer |
After the header, a file table is stored. For each file stored by the asset, a metadata entry is stored, with the following fields:
| Starting byte | Size (bytes) | Value name | Description |
|---|---|---|---|
0 | 8 | File data pointer | Starting byte of the file encrypted data, stored as a Big Endian unsigned integer |
8 | 8 | File size | Size of the encrypted file, in bytes, stored as a Big Endian unsigned integer |
After the file table, each file is stored following the same structure described in the Encrypted JSON files section.
This format is useful to store video previews, without the need to use too many files.
Media vaults are stored in folders. A vault folder may contain the following files and folders:
| Name | Path | Type | Description |
|---|---|---|---|
| Media assets | media | Folder | Folder where media assets are stored. |
| Tag indexes | tags | Folder | Folder where tag indexes are stored. |
| Lock file | vault.lock | Lock file | File used to prevent multiple instances of the PersonalMediaVault backend to access a vault at the same time. It may not be present, in case the vault is not being accessed. |
| Credentials file | credentials.json | Unencrypted JSON file | File to store the existing accounts, along with the hashed credentials and the encrypted vault key, protected with the account password. |
| Media ID tracker | media_ids.json | Unencrypted JSON file | File to store the last used media asset ID. |
| Tasks tracker | tasks.json | Unencrypted JSON file | File used to store the last used task ID, along with the list of pending tasks. |
| Albums | albums.pmv | Encrypted JSON file | File used to store the existing albums, including the metadata and the list of media assets included in them. |
|
| Tag list | tag_list.pmv | Encrypted JSON file | File to store the metadata of the existing vault tags |
| User configuration | user_config.pmv | Encrypted JSON file | File to store user configuration, like the vault title or the encoding parameters |
| UseHome pager configuration | home_page.pmv | Encrypted JSON file | File to store the custom home page configuration |
| Main index | main.index | Index file | File to index every single media asset existing in the vault. |
The media assets are stored inside the media folder.
In order to prevent the folder size to increase too much, the assets are distributed evenly in 256 sub-folders. The sub-folder name for each media asset is calculated from its identifier, since it’s a 64 bit unsigned integer, the folder name is the identifier module 256, and the result turned into a 2 character hex lowercased string
Examples: 00, 01, 02…, fd, fe, ff.
Inside each subfolder, the assets are stored inside their own folders, named by turning their identifier into a decimal string. Examples:
media_id=0 - Stored inside {VAULT_FOLDER}/media/00/0media_id=15 - Stored inside {VAULT_FOLDER}/media/0f/15import (
"fmt",
"hex",
"path",
)
func GetMediaAssetFolder(vault_path string, media_id uint64) string {
subFolderName := hex.EncodeToString([]byte{ byte(media_id % 256) });
return path.Join(vault_path, "media", subFolderName, fmt.Sprint(media_id))
}
The media asset folder may contain up to 3 types of files:
meta.pmv and used to store metadata.s_ prefix and the asset ID in decimal, with .pma extension.m_ prefix and the asset ID in decimal, with .pma extension.Each media asset folder must contain a file named meta.pmv, being an encrypted JSON file containing the metadata of the media asset.
The file contains the following fields:
| Field name | Type | Description |
|---|---|---|
id | Number (64 bit unsigned integer) | Media asset identifier |
type | Number (8 bit unsigned integer) | Media type. Can be: 1 (Image), 2 (Video / Animation) or 3 (Audio / Sound) |
title | String | Title |
tags | Array<Number (64 bit unsigned integer)> | List of tags for the media. Only identifiers are stored |
duration | Number (Floating point) | Duration of the media in seconds |
width | Number (32 bit unsigned integer) | Width in pixels |
height | Number (32 bit unsigned integer) | Height in pixels |
fps | Number (32 bit unsigned integer) | Frames per second |
upload_time | Number (64 bit integer) | Upload timestamp (Unix milliseconds format) |
next_asset_id | Number (64 bit unsigned integer) | Identifier to use for the next asset, when created |
original_ready | Boolean | True if the original asset exists and is ready |
original_asset | Number (64 bit unsigned integer) | Asset ID of the original asset. The original asset is Single-File |
original_ext | String | Extension of the original asset file. Eg: mp4 |
original_encoded | Boolean | True if the original asset is encoded |
original_task | Number (64 bit unsigned integer) | If the original asset is not encoded, the ID of the task assigned to encode it |
thumb_ready | Boolean | True if the thumbnail asset exists and is ready |
thumb_asset | Number (64 bit unsigned integer) | Asset ID of the thumbnail asset. The thumbnail asset is Single-File |
previews_ready | Boolean | True if the video previews asset exists and is ready |
previews_asset | Number (64 bit unsigned integer) | Asset ID of the video previews asset. The video previews asset is Multi-File |
previews_interval | Number (Floating point) | Video previews interval in seconds |
previews_task | Number (64 bit unsigned integer) | If the video previews asset is not ready, the ID of the task assigned to generate it |
force_start_beginning | Boolean | True to indicate the player not to store the current playing time, so the video or audio starts from the beginning every time |
img_notes | Boolean | True if the image has a notes asset |
img_notes_asset | Number (64 bit unsigned integer) | Asset ID of the image notes asset. The image notes asset is Single-File |
resolutions | Array<Resolution> | List of extra resolutions |
subtitles | Array<Subtitle> | List of subtitles files |
time_splits | Array<TimeSplit> | List of time splits for videos or audios |
audio_tracks | Array<AudioTrack> | List of extra audio tracks for videos |
attachments | Array<Attachment> | List of attachments stored with the media asset |
ext_desc | Boolean | True only if the media has a description. |
ext_desc_asset | Number (64 bit unsigned integer) | Id of the asset containing the description. |
related | Array<Number (64 bit unsigned integer)> | List of IDs of related media assets |
The Resolution object has the following fields:
| Field name | Type | Description |
|---|---|---|
width | Number (32 bit unsigned integer) | Width in pixels |
height | Number (32 bit unsigned integer) | Height in pixels |
fps | Number (32 bit unsigned integer) | Frames per second |
ready | Boolean | True if the asset is ready |
asset | Number (64 bit unsigned integer) | Asset ID of the asset. The asset is Single-File |
ext | String | Asset file extension. Example: mp4 |
task_id | Number (64 bit unsigned integer) | If the asset is not ready, ID of the task assigned to encode it |
The Subtitle object has the following fields:
| Field name | Type | Description |
|---|---|---|
id | String | Subtitles language identifier. Example: eng |
name | String | Subtitles file name. Example English |
asset | Number (64 bit unsigned integer) | Asset ID of the asset. The asset is Single-File |
The TimeSplit object has the following fields:
| Field name | Type | Description |
|---|---|---|
time | Number (Floating point) | Time in seconds where the split starts |
name | String | Name of the time split |
The AudioTrack object has the following fields:
| Field name | Type | Description |
|---|---|---|
id | String | Audio track language identifier. Example: eng |
name | String | Audio track file name. Example English |
asset | Number (64 bit unsigned integer) | Asset ID of the asset. The asset is Single-File |
The Attachment object has the following fields:
| Field name | Type | Description |
|---|---|---|
id | Number (64 bit unsigned integer) | Unique attachment identifier |
name | String | Attachment file name |
size | Number (64 bit unsigned integer) | Attachment file size (in bytes) |
asset | Number (64 bit unsigned integer) | Asset ID of the asset. The asset is Single-File |
The image notes asset is a JSON file, containing an array of ImageNote objects, with the following fields:
| Field name | Type | Description |
|---|---|---|
x | Number (32 bit integer) | X position (pixels) |
y | Number (32 bit integer) | Y position (pixels) |
w | Number (32 bit integer) | Width (pixels) |
h | Number (32 bit integer) | Height (pixels) |
text | String | Text to display for the specified area |
When a tag is added to the vault, a new index file is created inside the tags folder, with a name made by concatenating the tag_ prefix with the tag identifier encoded in decimal, and the .index extension.
import (
    "fmt",
    "path",
)

func GetTagIndexPath(vault_path string, tag_id uint64) string {
	return path.Join(vault_path, "tags", "tag_"+fmt.Sprint(tag_id)+".index")
}
Each tag index file contains the list of media asset identifiers that have such tag.
The credentials file, named credentials.json is an unencrypted JSON file used to store the hashed credentials, along with the encrypted vault key.
The JSON file contains the following fields:
| Field name | Type | Description |
|---|---|---|
user | String | Username of the root account |
pwhash | String | Password hash. Base 64 encoded |
salt | String | Hashing salt. Base 64 encoded |
enckey | String | Encrypted key. Base 64 encoded |
method | String | Name of the hashing + encryption method used |
tfa | Boolean | True if two factor authentication is enabled |
tfa_method | String | If two factor authentication is enabled, the method (eg: totp:sha1:60:1) |
tfa_enckey | String | Encrypted two factor authentication key. Base 64 encoded |
auth_confirmation | Boolean | True if the authentication confirmation is enabled |
auth_confirmation_method | String | Authentication confirmation method (tfa or pw) |
auth_confirmation_period | Number (32 bit unsigned integer) | Period (seconds) to prevent asking for authentication confirmation multiple consecutive times. |
fingerprint | String | Vault fingerprint |
accounts | Array<Account> | Array of additional accounts |
Each Account is an object with the following fields:
| Field name | Type | Description |
|---|---|---|
user | String | Account username |
pwhash | String | Password hash. Base 64 encoded |
salt | String | Hashing salt. Base 64 encoded |
enckey | String | Encrypted key. Base 64 encoded |
method | String | Name of the hashing + encryption method used |
write | Boolean | True if the account has permission to modify the vault |
tfa | Boolean | True if two factor authentication is enabled |
tfa_method | String | If two factor authentication is enabled, the method (eg: totp:sha1:60:1) |
tfa_enckey | String | Encrypted two factor authentication key. Base 64 encoded |
auth_confirmation | Boolean | True if the authentication confirmation is enabled |
auth_confirmation_method | String | Authentication confirmation method (tfa or pw) |
auth_confirmation_period | Number (32 bit unsigned integer) | Period (seconds) to prevent asking for authentication confirmation multiple consecutive times. |
Currently, the following methods are implemented:
aes256/sha256/salt16This algorithm uses a random salt of 16 bytes (128 bits).
The password hash is calculated by using the SHA256 algorithm 2 times on the binary concatenation of the password (as UTF-8) and the random salt:
import (
    "sha256"
)

func ComputePasswordHash(password string, salt []byte) []byte {
	firstHash := sha256.Sum256(append([]byte(password), salt...))
	secondHash := sha256.Sum256(firstHash[:])
	return secondHash[:]
}
The vault key is encrypted using the AES256 algorithm, using the system defined in the Encrypted JSON files section. Specifically using the AES256_FLAT mode.
The key for the encryption is calculated by hashing with SHA256 the the binary concatenation of the password (as UTF-8) and the random salt:
import (
    "sha256"
)

func ComputeAESEncryptionKey(password string, salt []byte) []byte {
	passwordHash := sha256.Sum256(append([]byte(password), salt...))
	return passwordHash[:]
}
The media ID tracker file, named media_ids.json is an unencrypted JSON file used to store the number of used media identifiers, very important to prevent duplicated identifiers.
The JSON file has just one field:
| Field name | Type | Description |
|---|---|---|
next_id | Number (64 bit unsigned integer) | Next identifier to use when adding a new media asset |
The task tracker file, named tasks.json is an unencrypted JSON file used to store the number of used task identifiers, in order to prevent duplicates. It also stores the pending tasks, in order to continue them in case of a vault restart.
The JSON file contains the following fields:
| Field name | Type | Description |
|---|---|---|
next_id | Number (64 bit unsigned integer) | Next identifier to use when creating a new task |
pending | Object (Mapping String -> PendingTask) | Mapping. For each pending task, the required metadata to restart them |
The PendingTask objects have the following fields:
| Field name | Type | Description |
|---|---|---|
id | Number (64 bit unsigned integer) | Task identifier |
media_id | Number (64 bit unsigned integer) | Media asset ID |
type | Number (8 bit unsigned integer) | Task type. It can be: 0 (Encode original), 1 (Encode extra resolution) or 2 (Generate video previews) |
first_time_enc | Boolean | True if this task is the first time the asset is being encoded (was just uploaded) |
resolution | Object { width: Width (px), height: Height (px), fps: Frames per second } | Resolution for type = 1 |
The albums file, named albums.pmv is an encrypted JSON file used to store the list of existing albums in the vault.
The file has the following fields:
| Field name | Type | Description |
|---|---|---|
next_id | Number (64 bit unsigned integer) | Identifier to use for the next album, when creating a new one. |
next_thumb_id | Number (64 bit unsigned integer) | Identifier to use for the next thumbnail asset. |
albums | Object { Mapping ID -> Album } | List of albums. For each album it maps its identifier to its metadata |
The Album object has the following fields:
| Field name | Type | Description |
|---|---|---|
name | String | Name of the album |
lm | Number (64 bit integer) | Last modified timestamp. Unix milliseconds format |
list | Array<Number (64 bit unsigned integer)> | List of media asset identifiers contained in the album |
thumb | Number (64 bit unsigned integer) | ID of the thumbnail asset of the album. May be null if no thumbnail is set. |
The thumbnail files of the albums are stored in a folder, named thumb_album.
This folder contains Single-File encrypted assets, named concatenating the s_ prefix and the asset ID in decimal, with .pma extension.
The tags file, named tag_list.pmv is an encrypted JSON file used to store the list of existing tags in the vault.
The file has the following fields:
| Field name | Type | Description |
|---|---|---|
next_id | Number (64 bit unsigned integer) | Identifier to use for the next tag, when creating a new one. |
tags | Object { Mapping ID -> String } | List of tags. For each tag, it maps its identifier to its name |
The user configuration file, named user_config.pmv is an encrypted JSON file used to store the vault configuration set by the user.
The file has the following fields:
| Field name | Type | Description |
|---|---|---|
title | String | Vault custom title |
logo | String | Vault custom logo text |
css | String | Custom CSS for the frontend |
max_tasks | Number (32 bit integer) | Max number of tasks to run in parallel |
encoding_threads | Number (32 bit integer) | Max number of threads to use for a single encoding task |
video_previews_interval | Number (32 bit integer) | Video previews interval (seconds) |
resolutions | Array<VideoResolution> | Resolutions to automatically encode when uploading a video |
image_resolutions | Array<ImageResolution> | Resolutions to automatically encode when uploading an image |
invite_limit | Number (32 bit integer) | Max number of invites per user |
preserve_originals | Boolean | Preserve original media before encoding? |
The VideoResolution object has the following fields:
| Field name | Type | Description |
|---|---|---|
width | Number (32 bit unsigned integer) | Width in pixels |
height | Number (32 bit unsigned integer) | Height in pixels |
fps | Number (32 bit unsigned integer) | Frames per second |
The ImageResolution object has the following fields:
| Field name | Type | Description |
|---|---|---|
width | Number (32 bit unsigned integer) | Width in pixels |
height | Number (32 bit unsigned integer) | Height in pixels |
The user configuration file, named home_page.pmv is an encrypted JSON file used to store the home page configuration for the vault.
The file has the following fields:
| Field name | Type | Description |
|---|---|---|
groups | Array<HomePageGroup> | Groups of elements to display in the home page. |
next_id | Number (64 bit unsigned integer) | ID to assign to the next group created by the user. |
The HomePageGroup object has the following fields:
| Field name | Type | Description |
|---|---|---|
id | Number (64 bit unsigned integer) | ID of the group to uniquely identity it. |
type | Number (8 bit unsigned integer) | Type of group (0 = custom/default, 1 = recent media, 2 = recent albums) |
name | String | Name for the group, in order to display it to the user. |
elements | Array<HomePageElement> | List of ordered elements to display for the group. Only for type = 0 |
The HomePageElement object has the following fields:
| Field name | Type | Description |
|---|---|---|
t | Number (8 bit unsigned integer) | Type of element (0 = media/default, 1 = album) |
i | Number (64 bit unsigned integer) | Identifier of the media or the album |
The main index file, named main.index is an index file containing every single media asset identifier existing in the vault.
This file is used to check if a media asset exists and to perform searches when a tag filter is not specified.
This section contains the documentation about the PersonalMediaVault console client.
The PersonalMediaVault console client is a CLI application developed in the Rust programming language that can be used to interact with the PersonalMediaVault server without a GUI environment or inside shell scripts.
In order to download the tool, go to the Releases and download the binary for your system
You can find its source code at the pmv-cli repository. You can compile it yourself following the instructions provided in the README document.
In order to use the tool, place the binary inside a folder in your PATH environment variable.
Run the tool help command to see the manual:
pmv-cli --help
For more information, check the Manual
This is the manual for the PersonalMediaVault console client.
Command line interface client for PersonalMediaVault
Usage:
pmv-cli [OPTIONS] <COMMAND>
Commands:
| Command | Description |
|---|---|
| login | Logins into an active vault, printing a session URL into the standard output |
| logout | Closes the active session, given a session URL |
| account | Manages accounts |
| media | Manages media assets |
| random | Retrieves random media assets from the vault |
| search | Searches for media assets in the vault (Basic) |
| advanced-search | Searches for media assets in the vault (Advanced) |
| tag | Manages tags |
| album | Manages albums |
| config | Manages vault configuration |
| task | Retrieves tasks information |
| invites | Manages invites |
| home | Manges the home page |
| batch | Applies a batch operation to a list of media assets |
| get-server-information | Gets server information, like the version it is using |
| get-disk-usage | Gets server disk usage |
Options:
| Option | Description |
|---|---|
-u, --vault-url <VAULT_URL> | HTTP connection URL to the active vault |
-d, --debug | Turn debug messages on |
-y, --yes | Auto confirm actions |
-h, --help | Print help |
-V, --version | Print version |
Logins into an active vault, printing a session URL into the standard output
Usage:
pmv-cli login [OPTIONS]
Options:
| Option | Description |
|---|---|
-U, --username <USERNAME> | Vault username. You can also specify the credentials in the URL |
-D, --duration <DURATION> | Session duration. Can be: day, week, month or year |
-I, --invite-code <INVITE_CODE> | Invite code. Setting this option will ignore the credentials and use the code |
-T, --tfa-code <TFA_CODE> | Two factor authentication code |
-h, --help | Print help |
Closes the active session, given a session URL
Usage:
pmv-cli logout
Options:
| Option | Description |
|---|---|
-h, --help | Print help |
Manages accounts
Usage:
pmv-cli account <COMMAND>
Commands:
| Command | Description |
|---|---|
| context | Prints account context to the standard output |
| change-username | Changes username (only for root account) |
| change-password | Changes account password |
| get-security-settings | Gets account security settings |
| set-auth-confirmation | Sets auth confirmation options |
| get-totp-settings | Gets TOTP settings in order to enable two factor authentication |
| enable-tfa | Enables two factor authentication |
| disable-tfa | Disables two factor authentication |
| list | Lists accounts |
| create | Creates new account |
| update | Updates an account |
| delete | Deletes an existing account |
Options:
| Option | Description |
|---|---|
-h, --help | Print help |
Prints account context to the standard output
Usage:
pmv-cli account context
Options:
| Option | Description |
|---|---|
-h, --help | Print help |
Changes username (only for root account)
Usage:
pmv-cli account change-username <USERNAME>
Arguments:
| Argument | Description |
|---|---|
<USERNAME> | Username to change into |
Options:
| Option | Description |
|---|---|
-h, --help | Print help |
Changes account password
Usage:
pmv-cli account change-password
Options:
| Option | Description |
|---|---|
-h, --help | Print help |
Gets account security settings
Usage:
pmv-cli account get-security-settings
Options:
| Option | Description |
|---|---|
-h, --help | Print help |
Sets auth confirmation options
Usage:
pmv-cli account set-auth-confirmation [OPTIONS] <AUTH_CONFIRMATION>
Arguments:
| Argument | Description |
|---|---|
<AUTH_CONFIRMATION> | Set to ’true’ to enable auth confirmation, Set it to ‘false’ to disable it |
Options:
| Option | Description |
|---|---|
--prefer-password | |
Prefer using the account password instead of two factor authentication | |
--period-seconds <PERIOD_SECONDS> | |
Period (seconds) to remember the last auth confirmation | |
-h, --help | |
Print help |
Gets TOTP settings in order to enable two factor authentication
Usage:
pmv-cli account get-totp-settings [OPTIONS]
Options:
| Option | Description |
|---|---|
--issuer <ISSUER> | TOTP issuer (to be added th the URL) |
--account <ACCOUNT> | TOTP account (to be added th the URL) |
--algorithm <ALGORITHM> | Hashing algorithm (sha-1, sha-256 or sha-512) |
--period <PERIOD> | TOTP period (30s, 60s or 120s) |
--allow-skew | Allows clock skew of 1 period |
-h, --help | Print help |
Enables two factor authentication
Usage:
pmv-cli account enable-tfa <METHOD> <SECRET>
Arguments:
| Argument | Description |
|---|---|
<METHOD> | Two factor authentication method (from the settings command result) |
<SECRET> | Two factor authentication secret |
Options:
| Option | Description |
|---|---|
-h, --help | Print help |
Disables two factor authentication
Usage:
pmv-cli account disable-tfa
Options:
| Option | Description |
|---|---|
-h, --help | Print help |
Lists accounts
Usage:
pmv-cli account list [OPTIONS]
Options:
| Option | Description |
|---|---|
-c, --csv | CSV format |
-h, --help | Print help |
Creates new account
Usage:
pmv-cli account create [OPTIONS] <USERNAME>
Arguments:
| Argument | Description |
|---|---|
<USERNAME> | Username for the new account |
Options:
| Option | Description |
|---|---|
-a, --allow-write | Allows the new account to modify the vault |
-h, --help | Print help |
Updates an account
Usage:
pmv-cli account update [OPTIONS] <USERNAME>
Arguments:
| Argument | Description |
|---|---|
<USERNAME> | Username of the account |
Options:
| Option | Description |
|---|---|
-n, --new-username <NEW_USERNAME> | New username for the account |
-a, --allow-write <ALLOW_WRITE> | Allows the account to modify the vault [possible values: true, false] |
-h, --help | Print help |
Deletes an existing account
Usage:
pmv-cli account delete <USERNAME>
Arguments:
| Argument | Description |
|---|---|
<USERNAME> | Username of the account to delete |
Options:
| Option | Description |
|---|---|
-h, --help | Print help |
Manages media assets
Usage:
pmv-cli media <COMMAND>
Commands:
| Command | Description |
|---|---|
| get | Gets media asset metadata and download links |
| stats | Gets media asset size stats |
| download | Downloads a media asset |
| get-related | Gets related media |
| export | Exports a media asset, downloading everything (metadata + assets) into a folder |
| upload | Uploads a new media asset, waits for encryption and adds tags if specified |
| import | Imports a media asset, expecting a folder with the same format the export command uses |
| set-title | Changes the title of a media asset |
| set-description | Changes the description of a media asset |
| set-related-media | Sets the related media list |
| set-force-start-beginning | Changes the forced start from beginning parameter of a media asset |
| set-is-animation | Changes the is-animation parameter of a media asset |
| set-thumbnail | Sets the thumbnail of a media asset |
| get-time-slices | Prints the time slices of a media asset |
| set-time-slices | Sets the time slices of a media asset |
| set-image-notes | Sets the image notes of a media asset |
| add-resolution | Adds new resolution to the media asset |
| remove-resolution | Removes a resolution from the media asset |
| add-subtitle | Adds subtitle file to a media asset |
| rename-subtitle | Renames a subtitles file |
| remove-subtitle | Removes subtitle file from a media asset |
| add-audio | Adds audio track file to a media asset |
| rename-audio | Renames an audio track file |
| remove-audio | Removes audio track file from a media asset |
| add-attachment | Adds attachment file |
| rename-attachment | Renames attachment file |
| remove-attachment | Removes attachment file |
| re-encode | Re-Encodes a media asset |
| replace | Replaces the media asset with another file |
| delete | Deletes a media asset |
Options:
| Option | Description |
|---|---|
-h, --help | Print help |
Gets media asset metadata and download links
Usage:
pmv-cli media get <MEDIA>
Arguments:
| Argument | Description |
|---|---|
<MEDIA> | Media asset ID |
Options:
| Option | Description |
|---|---|
-h, --help | Print help |
Gets media asset size stats
Usage:
pmv-cli media stats <MEDIA>
Arguments:
| Argument | Description |
|---|---|
<MEDIA> | Media asset ID |
Options:
| Option | Description |
|---|---|
-h, --help | Print help |
Downloads a media asset
Usage:
pmv-cli media download [OPTIONS] <MEDIA> [ASSET]
Arguments:
| Argument | Description |
|---|---|
<MEDIA> | Media asset ID |
[ASSET] | Asset to download. Examples: original, thumbnail, resolution:1280x720:30, sub:ID, audio:ID, attachment:ID, notes, preview:Index, ext_desc |
Options:
| Option | Description |
|---|---|
-o, --output <OUTPUT> | Path to the file to download the asset into |
-p, --print-link | Prints the download link, instead of downloading to a file |
-h, --help | Print help |
Gets related media
Usage:
pmv-cli media get-related [OPTIONS] <MEDIA>
Arguments:
| Argument | Description |
|---|---|
<MEDIA> | Media asset ID |
Options:
| Option | Description |
|---|---|
-e, --extended | Extended version of the results table |
-c, --csv | CSV format |
-h, --help | Print help |
Exports a media asset, downloading everything (metadata + assets) into a folder
Usage:
pmv-cli media export [OPTIONS] <MEDIA>
Arguments:
| Argument | Description |
|---|---|
<MEDIA> | Media asset ID |
Options:
| Option | Description |
|---|---|
-o, --output <OUTPUT> | Path to the folder to download the files into |
-h, --help | Print help |
Uploads a new media asset, waits for encryption and adds tags if specified
Usage:
pmv-cli media upload [OPTIONS] <PATH>
Arguments:
| Argument | Description |
|---|---|
<PATH> | Path to the file to upload |
Options:
| Option | Description |
|---|---|
-t, --title <TITLE> | A title for the media asset |
-a, --album <ALBUM> | Album to upload the media asset into |
-T, --tags <TAGS> | Tags to add to the media asset, separated by spaces |
-s, --skip-encryption | Do not wait for encryption |
-h, --help | Print help |
Imports a media asset, expecting a folder with the same format the export command uses
Usage:
pmv-cli media import [OPTIONS] <PATH>
Arguments:
| Argument | Description |
|---|---|
<PATH> | Path to the folder to import |
Options:
| Option | Description |
|---|---|
-a, --album <ALBUM> | Album to upload the media asset into |
-h, --help | Print help |
Changes the title of a media asset
Usage:
pmv-cli media set-title <MEDIA> <TITLE>
Arguments:
| Argument | Description |
|---|---|
<MEDIA> | Media asset ID |
<TITLE> | Title |
Options:
| Option | Description |
|---|---|
-h, --help | Print help |
Changes the description of a media asset
Usage:
pmv-cli media set-description <MEDIA> <PATH>
Arguments:
| Argument | Description |
|---|---|
<MEDIA> | Media asset ID |
<PATH> | Path to the text file containing the description |
Options:
| Option | Description |
|---|---|
-h, --help | Print help |
Sets the related media list
Usage:
pmv-cli media set-related-media <MEDIA> <RELATED>
Arguments:
| Argument | Description |
|---|---|
<MEDIA> | Media asset ID |
<RELATED> | List of related media IDs, separated by commas |
Options:
| Option | Description |
|---|---|
-h, --help | Print help |
Changes the forced start from beginning parameter of a media asset
Usage:
pmv-cli media set-force-start-beginning <MEDIA> <FORCE_START_BEGINNING>
Arguments:
| Argument | Description |
|---|---|
<MEDIA> | Media asset ID |
<FORCE_START_BEGINNING> | Set to ’true’ if you want to tell the clients not to store the time, so they always start from the beginning |
Options:
| Option | Description |
|---|---|
-h, --help | Print help |
Changes the is-animation parameter of a media asset
Usage:
pmv-cli media set-is-animation <MEDIA> <IS_ANIMATION>
Arguments:
| Argument | Description |
|---|---|
<MEDIA> | Media asset ID |
<IS_ANIMATION> | Set to ’true’ if you want to tell the clients to treat the media as an animation, so they force the loop and disable time skipping |
Options:
| Option | Description |
|---|---|
-h, --help | Print help |
Sets the thumbnail of a media asset
Usage:
pmv-cli media set-thumbnail <MEDIA> <PATH>
Arguments:
| Argument | Description |
|---|---|
<MEDIA> | Media asset ID |
<PATH> | Path to the thumbnail file |
Options:
| Option | Description |
|---|---|
-h, --help | Print help |
Prints the time slices of a media asset
Usage:
pmv-cli media get-time-slices <MEDIA>
Arguments:
| Argument | Description |
|---|---|
<MEDIA> | Media asset ID |
Options:
| Option | Description |
|---|---|
-h, --help | Print help |
Sets the time slices of a media asset
Usage:
pmv-cli media set-time-slices <MEDIA> <PATH>
Arguments:
| Argument | Description |
|---|---|
<MEDIA> | Media asset ID |
<PATH> | Path to the file containing the time slices |
Options:
| Option | Description |
|---|---|
-h, --help | Print help |
Sets the image notes of a media asset
Usage:
pmv-cli media set-image-notes <MEDIA> <PATH>
Arguments:
| Argument | Description |
|---|---|
<MEDIA> | Media asset ID |
<PATH> | Path to the image notes file |
Options:
| Option | Description |
|---|---|
-h, --help | Print help |
Adds new resolution to the media asset
Usage:
pmv-cli media add-resolution <MEDIA> <RESOLUTION>
Arguments:
| Argument | Description |
|---|---|
<MEDIA> | Media asset ID |
<RESOLUTION> | Resolution. Example: 1280x720:30 |
Options:
| Option | Description |
|---|---|
-h, --help | Print help |
Removes a resolution from the media asset
Usage:
pmv-cli media remove-resolution <MEDIA> <RESOLUTION>
Arguments:
| Argument | Description |
|---|---|
<MEDIA> | Media asset ID |
<RESOLUTION> | Resolution. Example: 1280x720:30 |
Options:
| Option | Description |
|---|---|
-h, --help | Print help |
Adds subtitle file to a media asset
Usage:
pmv-cli media add-subtitle [OPTIONS] <MEDIA> <SUB_ID> <PATH>
Arguments:
| Argument | Description |
|---|---|
<MEDIA> | Media asset ID |
<SUB_ID> | Subtitle file identifier. Example: EN |
<PATH> | Path to the subtitles file |
Options:
| Option | Description |
|---|---|
--name <NAME> | Subtitle file display name. If not specified, the identifier is used |
-h, --help | Print help |
Renames a subtitles file
Usage:
pmv-cli media rename-subtitle [OPTIONS] <MEDIA> <SUB_ID>
Arguments:
| Argument | Description |
|---|---|
<MEDIA> | Media asset ID |
<SUB_ID> | Subtitle file identifier. Example: EN |
Options:
| Option | Description |
|---|---|
--new-id <NEW_ID> | New ID for the subtitles file |
--new-name <NEW_NAME> | New name for the subtitles file |
-h, --help | Print help |
Removes subtitle file from a media asset
Usage:
pmv-cli media remove-subtitle <MEDIA> <SUB_ID>
Arguments:
| Argument | Description |
|---|---|
<MEDIA> | Media asset ID |
<SUB_ID> | Subtitle file identifier. Example: EN |
Options:
| Option | Description |
|---|---|
-h, --help | Print help |
Adds audio track file to a media asset
Usage:
pmv-cli media add-audio [OPTIONS] <MEDIA> <TRACK_ID> <PATH>
Arguments:
| Argument | Description |
|---|---|
<MEDIA> | Media asset ID |
<TRACK_ID> | Audio track file identifier. Example: EN |
<PATH> | Path to the audio track file |
Options:
| Option | Description |
|---|---|
--name <NAME> | Audio track file display name. If not specified, the identifier is used |
-h, --help | Print help |
Renames an audio track file
Usage:
pmv-cli media rename-audio [OPTIONS] <MEDIA> <TRACK_ID>
Arguments:
| Argument | Description |
|---|---|
<MEDIA> | Media asset ID |
<TRACK_ID> | Audio track file identifier. Example: EN |
Options:
| Option | Description |
|---|---|
--new-id <NEW_ID> | New ID for the audio track file |
--new-name <NEW_NAME> | New name for the audio track file |
-h, --help | Print help |
Removes audio track file from a media asset
Usage:
pmv-cli media remove-audio <MEDIA> <TRACK_ID>
Arguments:
| Argument | Description |
|---|---|
<MEDIA> | Media asset ID |
<TRACK_ID> | Audio track file identifier. Example: EN |
Options:
| Option | Description |
|---|---|
-h, --help | Print help |
Adds attachment file
Usage:
pmv-cli media add-attachment <MEDIA> <PATH>
Arguments:
| Argument | Description |
|---|---|
<MEDIA> | Media asset ID |
<PATH> | Path to the attachment file |
Options:
| Option | Description |
|---|---|
-h, --help | Print help |
Renames attachment file
Usage:
pmv-cli media rename-attachment <MEDIA> <ATTACHMENT_ID> <NAME>
Arguments:
| Argument | Description |
|---|---|
<MEDIA> | Media asset ID |
<ATTACHMENT_ID> | Attachment ID |
<NAME> | New name for the attachment file |
Options:
| Option | Description |
|---|---|
-h, --help | Print help |
Removes attachment file
Usage:
pmv-cli media remove-attachment <MEDIA> <ATTACHMENT_ID>
Arguments:
| Argument | Description |
|---|---|
<MEDIA> | Media asset ID |
<ATTACHMENT_ID> | Attachment ID |
Options:
| Option | Description |
|---|---|
-h, --help | Print help |
Re-Encodes a media asset
Usage:
pmv-cli media re-encode <MEDIA>
Arguments:
| Argument | Description |
|---|---|
<MEDIA> | Media asset ID |
Options:
| Option | Description |
|---|---|
-h, --help | Print help |
Replaces the media asset with another file
Usage:
pmv-cli media replace <MEDIA> <PATH>
Arguments:
| Argument | Description |
|---|---|
<MEDIA> | Media asset ID |
<PATH> | Path to the media file to upload |
Options:
| Option | Description |
|---|---|
-h, --help | Print help |
Deletes a media asset
Usage:
pmv-cli media delete <MEDIA>
Arguments:
| Argument | Description |
|---|---|
<MEDIA> | Media asset ID |
Options:
| Option | Description |
|---|---|
-h, --help | Print help |
Retrieves random media assets from the vault
Usage:
pmv-cli random [OPTIONS]
Options:
| Option | Description |
|---|---|
-s, --seed <SEED> | PRNG seed |
-p, --page-size <PAGE_SIZE> | Page size, 10 by default |
-t, --tag <TAG> | Filter by a tag |
-e, --extended | Extended version of the results table |
-c, --csv | CSV format |
-h, --help | Print help |
Searches for media assets in the vault (Basic)
Usage:
pmv-cli search [OPTIONS]
Options:
| Option | Description |
|---|---|
-p, --page <PAGE> | Selects the results page. The fist page is the page 1 |
-s, --page-size <PAGE_SIZE> | Page size, 10 by default |
-t, --tag <TAG> | Filter by a tag |
-r, --reverse | Reverses results sorting. By default newest results are first. With this option, oldest results are first |
-e, --extended | Extended version of the results table |
-c, --csv | CSV format |
-h, --help | Print help |
Searches for media assets in the vault (Advanced)
Usage:
pmv-cli advanced-search [OPTIONS]
Options:
| Option | Description |
|---|---|
-q, --title <TITLE> | Filter by title |
-k, --media-type <MEDIA_TYPE> | Filter by media type. Can be: video, audio or image |
-t, --tags <TAGS> | Filter by tags. Expected a list of tag names, separated by spaces |
-m, --tags-mode <TAGS_MODE> | Tag filtering mode. Can be: all, any, none or untagged |
-a, --album <ALBUM> | Filter by album. Expected an album ID, like: #1 |
-l, --limit <LIMIT> | Limit on the number of results to get. 25 by default |
-s, --start-from <START_FROM> | Media id to use as a stating point for the scanning process |
-r, --reverse | Reverses results sorting. By default newest results are first. With this option, oldest results are first |
-e, --extended | Extended version of the results table |
-c, --csv | CSV format |
-h, --help | Print help |
Manages tags
Usage:
pmv-cli tag <COMMAND>
Commands:
| Command | Description |
|---|---|
| list | List tags |
| add | Adds a tag to a media asset |
| remove | Removes a tag from a media asset |
Options:
| Option | Description |
|---|---|
-h, --help | Print help |
List tags
Usage:
pmv-cli tag list [OPTIONS]
Options:
| Option | Description |
|---|---|
-c, --csv | CSV format |
-a, --alphabetically | Sort alphabetically by name |
-h, --help | Print help |
Adds a tag to a media asset
Usage:
pmv-cli tag add <TAG> <MEDIA>
Arguments:
| Argument | Description |
|---|---|
<TAG> | Tag name or identifier |
<MEDIA> | Media asset ID |
Options:
| Option | Description |
|---|---|
-h, --help | Print help |
Removes a tag from a media asset
Usage:
pmv-cli tag remove <TAG> <MEDIA>
Arguments:
| Argument | Description |
|---|---|
<TAG> | Tag name or identifier |
<MEDIA> | Media asset ID |
Options:
| Option | Description |
|---|---|
-h, --help | Print help |
Manages albums
Usage:
pmv-cli album <COMMAND>
Commands:
| Command | Description |
|---|---|
| list | List albums |
| get | Get album and prints it |
| download-thumbnail | Downloads the thumbnail of an album |
| create | Creates a new album |
| rename | Renames an album |
| change-thumbnail | Changes the thumbnail of an album |
| delete | Deletes album |
| add | Adds a media asset to an album |
| remove | Removes a media asset from an album |
| set-position | Changes the position of a media asset inside al album |
| export | Exports an album, downloading everything (metadata + assets) into a folder |
| import | Imports an album, expecting a folder with the same format the export command uses |
| optimize-thumbnails | Optimizes thumbnails of albums, making the loading process faster |
Options:
| Option | Description |
|---|---|
-h, --help | Print help |
List albums
Usage:
pmv-cli album list [OPTIONS]
Options:
| Option | Description |
|---|---|
-m, --media <MEDIA> | Filter by media |
-c, --csv | CSV format |
-a, --alphabetically | Sort alphabetically by name |
-i, --id-sorted | Sort by ID |
-h, --help | Print help |
Get album and prints it
Usage:
pmv-cli album get [OPTIONS] <ALBUM>
Arguments:
| Argument | Description |
|---|---|
<ALBUM> | Album ID |
Options:
| Option | Description |
|---|---|
-e, --extended | Extended version of the results table |
-c, --csv | CSV format |
-h, --help | Print help |
Downloads the thumbnail of an album
Usage:
pmv-cli album download-thumbnail [OPTIONS] <ALBUM>
Arguments:
| Argument | Description |
|---|---|
<ALBUM> | Album ID |
Options:
| Option | Description |
|---|---|
-o, --output <OUTPUT> | Path to the file to download the asset into |
-p, --print-link | Prints the download link, instead of downloading to a file |
-h, --help | Print help |
Creates a new album
Usage:
pmv-cli album create <NAME>
Arguments:
| Argument | Description |
|---|---|
<NAME> | Album name |
Options:
| Option | Description |
|---|---|
-h, --help | Print help |
Renames an album
Usage:
pmv-cli album rename <ALBUM> <NAME>
Arguments:
| Argument | Description |
|---|---|
<ALBUM> | Album ID |
<NAME> | Album name |
Options:
| Option | Description |
|---|---|
-h, --help | Print help |
Changes the thumbnail of an album
Usage:
pmv-cli album change-thumbnail <ALBUM> <PATH>
Arguments:
| Argument | Description |
|---|---|
<ALBUM> | Album ID |
<PATH> | Path to the thumbnail file |
Options:
| Option | Description |
|---|---|
-h, --help | Print help |
Deletes album
Usage:
pmv-cli album delete <ALBUM>
Arguments:
| Argument | Description |
|---|---|
<ALBUM> | Album ID |
Options:
| Option | Description |
|---|---|
-h, --help | Print help |
Adds a media asset to an album
Usage:
pmv-cli album add <ALBUM> <MEDIA>
Arguments:
| Argument | Description |
|---|---|
<ALBUM> | Album ID |
<MEDIA> | Media asset ID |
Options:
| Option | Description |
|---|---|
-h, --help | Print help |
Removes a media asset from an album
Usage:
pmv-cli album remove <ALBUM> <MEDIA>
Arguments:
| Argument | Description |
|---|---|
<ALBUM> | Album ID |
<MEDIA> | Media asset ID |
Options:
| Option | Description |
|---|---|
-h, --help | Print help |
Changes the position of a media asset inside al album
Usage:
pmv-cli album set-position <ALBUM> <MEDIA> <POSITION>
Arguments:
| Argument | Description |
|---|---|
<ALBUM> | Album ID |
<MEDIA> | Media asset ID |
<POSITION> | New position for the media asset, starting at 1 |
Options:
| Option | Description |
|---|---|
-h, --help | Print help |
Exports an album, downloading everything (metadata + assets) into a folder
Usage:
pmv-cli album export [OPTIONS] <ALBUM>
Arguments:
| Argument | Description |
|---|---|
<ALBUM> | Album ID |
Options:
| Option | Description |
|---|---|
-o, --output <OUTPUT> | Path to the folder to download the files into |
-h, --help | Print help |
Imports an album, expecting a folder with the same format the export command uses
Usage:
pmv-cli album import <PATH>
Arguments:
| Argument | Description |
|---|---|
<PATH> | Path to the folder to import |
Options:
| Option | Description |
|---|---|
-h, --help | Print help |
Optimizes thumbnails of albums, making the loading process faster
Usage:
pmv-cli album optimize-thumbnails
Options:
| Option | Description |
|---|---|
-h, --help | Print help |
Manages vault configuration
Usage:
pmv-cli config <COMMAND>
Commands:
| Command | Description |
|---|---|
| get | Gets vault configuration |
| get-css | Gets custom CSS code configured for the vault |
| set-title | Sets vault title |
| set-max-tasks | Sets max tasks in parallel |
| set-encoding-threads | Sets number of encoding threads to use |
| set-video-previews-interval | Sets the video previews interval in seconds |
| set-max-invites | Sets the max number of invited sessions by user |
| set-preserve-originals | Sets the option to preserve original files, before encoding, as an attachment |
| set-css | Sets custom CSS for the vault |
| clear-css | Clears custom CSS for the vault |
| add-video-resolution | Adds video resolution |
| remove-video-resolution | Removes video resolution |
| add-image-resolution | Adds image resolution |
| remove-image-resolution | Removes image resolution |
Options:
| Option | Description |
|---|---|
-h, --help | Print help |
Gets vault configuration
Usage:
pmv-cli config get
Options:
| Option | Description |
|---|---|
-h, --help | Print help |
Gets custom CSS code configured for the vault
Usage:
pmv-cli config get-css
Options:
| Option | Description |
|---|---|
-h, --help | Print help |
Sets vault title
Usage:
pmv-cli config set-title <TITLE>
Arguments:
| Argument | Description |
|---|---|
<TITLE> | Vault title |
Options:
| Option | Description |
|---|---|
-h, --help | Print help |
Sets max tasks in parallel
Usage:
pmv-cli config set-max-tasks <MAX_TASKS>
Arguments:
| Argument | Description |
|---|---|
<MAX_TASKS> | Max tasks in parallel |
Options:
| Option | Description |
|---|---|
-h, --help | Print help |
Sets number of encoding threads to use
Usage:
pmv-cli config set-encoding-threads <ENCODING_THREADS>
Arguments:
| Argument | Description |
|---|---|
<ENCODING_THREADS> | Number of encoding threads to use |
Options:
| Option | Description |
|---|---|
-h, --help | Print help |
Sets the video previews interval in seconds
Usage:
pmv-cli config set-video-previews-interval <INTERVAL_SECONDS>
Arguments:
| Argument | Description |
|---|---|
<INTERVAL_SECONDS> | Interval in seconds |
Options:
| Option | Description |
|---|---|
-h, --help | Print help |
Sets the max number of invited sessions by user
Usage:
pmv-cli config set-max-invites <INVITE_LIMIT>
Arguments:
| Argument | Description |
|---|---|
<INVITE_LIMIT> | Max number of invited sessions by user |
Options:
| Option | Description |
|---|---|
-h, --help | Print help |
Sets the option to preserve original files, before encoding, as an attachment
Usage:
pmv-cli config set-preserve-originals [PRESERVE_ORIGINALS]
Arguments:
| Argument | Description |
|---|---|
[PRESERVE_ORIGINALS] | Preserve original media, before encoding, as an attachment? |
Options:
| Option | Description |
|---|---|
-h, --help | Print help |
Sets custom CSS for the vault
Usage:
pmv-cli config set-css <FILE_PATH>
Arguments:
| Argument | Description |
|---|---|
<FILE_PATH> | Path to the css file to use |
Options:
| Option | Description |
|---|---|
-h, --help | Print help |
Clears custom CSS for the vault
Usage:
pmv-cli config clear-css
Options:
| Option | Description |
|---|---|
-h, --help | Print help |
Adds video resolution
Usage:
pmv-cli config add-video-resolution <RESOLUTION>
Arguments:
| Argument | Description |
|---|---|
<RESOLUTION> | Video resolution. Example: 1280x720:30 |
Options:
| Option | Description |
|---|---|
-h, --help | Print help |
Removes video resolution
Usage:
pmv-cli config remove-video-resolution <RESOLUTION>
Arguments:
| Argument | Description |
|---|---|
<RESOLUTION> | Video resolution. Example: 1280x720:30 |
Options:
| Option | Description |
|---|---|
-h, --help | Print help |
Adds image resolution
Usage:
pmv-cli config add-image-resolution <RESOLUTION>
Arguments:
| Argument | Description |
|---|---|
<RESOLUTION> | Image resolution. Example: 1280x720 |
Options:
| Option | Description |
|---|---|
-h, --help | Print help |
Removes image resolution
Usage:
pmv-cli config remove-image-resolution <RESOLUTION>
Arguments:
| Argument | Description |
|---|---|
<RESOLUTION> | Image resolution. Example: 1280x720 |
Options:
| Option | Description |
|---|---|
-h, --help | Print help |
Retrieves tasks information
Usage:
pmv-cli task <COMMAND>
Commands:
| Command | Description |
|---|---|
| list | Lists current existing tasks |
| monitor | Monitors tasks |
| get | Get task status |
| wait | Waits for a task to finish, monitoring its status |
Options:
| Option | Description |
|---|---|
-h, --help | Print help |
Lists current existing tasks
Usage:
pmv-cli task list [OPTIONS]
Options:
| Option | Description |
|---|---|
-c, --csv | CSV format |
-h, --help | Print help |
Monitors tasks
Usage:
pmv-cli task monitor
Options:
| Option | Description |
|---|---|
-h, --help | Print help |
Get task status
Usage:
pmv-cli task get <TASK>
Arguments:
| Argument | Description |
|---|---|
<TASK> | Task identifier |
Options:
| Option | Description |
|---|---|
-h, --help | Print help |
Waits for a task to finish, monitoring its status
Usage:
pmv-cli task wait <TASK>
Arguments:
| Argument | Description |
|---|---|
<TASK> | Task identifier |
Options:
| Option | Description |
|---|---|
-h, --help | Print help |
Manages invites
Usage:
pmv-cli invites <COMMAND>
Commands:
| Command | Description |
|---|---|
| check | Prints the current invite code, if any |
| generate | Generates a new invite code |
| clear | Clears the current invite code |
| list-sessions | List active invited sessions |
| close-session | Closes an invited session |
Options:
| Option | Description |
|---|---|
-h, --help | Print help |
Prints the current invite code, if any
Usage:
pmv-cli invites check
Options:
| Option | Description |
|---|---|
-h, --help | Print help |
Generates a new invite code
Usage:
pmv-cli invites generate [OPTIONS]
Options:
| Option | Description |
|---|---|
-D, --duration <DURATION> | Session duration. Can be: day, week, month or year |
-h, --help | Print help |
Clears the current invite code
Usage:
pmv-cli invites clear
Options:
| Option | Description |
|---|---|
-h, --help | Print help |
List active invited sessions
Usage:
pmv-cli invites list-sessions [OPTIONS]
Options:
| Option | Description |
|---|---|
-c, --csv | CSV format |
-h, --help | Print help |
Closes an invited session
Usage:
pmv-cli invites close-session <INDEX>
Arguments:
| Argument | Description |
|---|---|
<INDEX> | Session index |
Options:
| Option | Description |
|---|---|
-h, --help | Print help |
Manges the home page
Usage:
pmv-cli home <COMMAND>
Commands:
| Command | Description |
|---|---|
| get-groups | Gets the groups in the home page |
| add-group | Adds a home page group |
| get-group-elements | Gets the elements of a group |
| set-group-elements | Sets the elements of a group |
| rename-group | Renames an existing group |
| move-group | Moves an existing group to another position |
| delete-group | Deletes an existing group |
Options:
| Option | Description |
|---|---|
-h, --help | Print help |
Gets the groups in the home page
Usage:
pmv-cli home get-groups
Options:
| Option | Description |
|---|---|
-h, --help | Print help |
Adds a home page group
Usage:
pmv-cli home add-group [OPTIONS] <NAME> <GROUP_TYPE>
Arguments:
| Argument | Description |
|---|---|
<NAME> | A name for the group |
<GROUP_TYPE> | The type of group (CUSTOM, RECENT_MEDIA or RECENT_ALBUMS) |
Options:
| Option | Description |
|---|---|
--prepend | Add this option in order to add the group at the top of the list |
-h, --help | Print help |
Gets the elements of a group
Usage:
pmv-cli home get-group-elements [OPTIONS] <ID>
Arguments:
| Argument | Description |
|---|---|
<ID> | ID of the group |
Options:
| Option | Description |
|---|---|
--as-refs | Add this option to print the elements as references |
-h, --help | Print help |
Sets the elements of a group
Usage:
pmv-cli home set-group-elements <ID> <ELEMENTS>
Arguments:
| Argument | Description |
|---|---|
<ID> | ID of the group |
<ELEMENTS> | List of group elements, as references, separated by commas. For media elements use M{ID} and for albums use A{ID}. Example: A12, M6, M8 |
Options:
| Option | Description |
|---|---|
-h, --help | Print help |
Renames an existing group
Usage:
pmv-cli home rename-group <ID> <NAME>
Arguments:
| Argument | Description |
|---|---|
<ID> | ID of the group |
<NAME> | A name for the group |
Options:
| Option | Description |
|---|---|
-h, --help | Print help |
Moves an existing group to another position
Usage:
pmv-cli home move-group <ID> <POSITION>
Arguments:
| Argument | Description |
|---|---|
<ID> | ID of the group |
<POSITION> | The position to move the group |
Options:
| Option | Description |
|---|---|
-h, --help | Print help |
Deletes an existing group
Usage:
pmv-cli home delete-group <ID>
Arguments:
| Argument | Description |
|---|---|
<ID> | ID of the group |
Options:
| Option | Description |
|---|---|
-h, --help | Print help |
Applies a batch operation to a list of media assets
Usage:
pmv-cli batch [OPTIONS] <COMMAND>
Commands:
| Command | Description |
|---|---|
| add-tags | Adds tags to the media assets |
| remove-tags | Removes tags from the media assets |
| add-to-album | Adds media assets into an album |
| remove-from-album | Removes media assets from an album, if they were in it |
| delete | Delete media assets |
Options:
| Option | Description |
|---|---|
-q, --title <TITLE> | Filter by title |
-k, --media-type <MEDIA_TYPE> | Filter by media type. Can be: video, audio or image |
-t, --tags <TAGS> | Filter by tags. Expected a list of tag names, separated by spaces |
-m, --tags-mode <TAGS_MODE> | Tag filtering mode. Can be: all, any, none or untagged |
-a, --album <ALBUM> | Filter by album. Expected an album ID, like: #1 |
-e, --everything | Do not filter. Apply to the entire vault instead |
-h, --help | Print help |
Adds tags to the media assets
Usage:
pmv-cli batch add-tags <TAGS>
Arguments:
| Argument | Description |
|---|---|
<TAGS> | List of tag names, separated by spaces |
Options:
| Option | Description |
|---|---|
-h, --help | Print help |
Removes tags from the media assets
Usage:
pmv-cli batch remove-tags <TAGS>
Arguments:
| Argument | Description |
|---|---|
<TAGS> | List of tag names, separated by spaces |
Options:
| Option | Description |
|---|---|
-h, --help | Print help |
Adds media assets into an album
Usage:
pmv-cli batch add-to-album <ALBUM>
Arguments:
| Argument | Description |
|---|---|
<ALBUM> | Album ID |
Options:
| Option | Description |
|---|---|
-h, --help | Print help |
Removes media assets from an album, if they were in it
Usage:
pmv-cli batch remove-from-album <ALBUM>
Arguments:
| Argument | Description |
|---|---|
<ALBUM> | Album ID |
Options:
| Option | Description |
|---|---|
-h, --help | Print help |
Delete media assets
Usage:
pmv-cli batch delete
Options:
| Option | Description |
|---|---|
-h, --help | Print help |
Gets server information, like the version it is using
Usage:
pmv-cli get-server-information
Options:
| Option | Description |
|---|---|
-h, --help | Print help |
Gets server disk usage
Usage:
pmv-cli get-disk-usage
Options:
| Option | Description |
|---|---|
-h, --help | Print help |