Installation on Windows
Categories:
This guide explains how to download and install PersonalMediaVault on a Windows system.
Download
Download the MSI installer (PersonalMediaVault-{VERSION}-x64.msi) from Releases.
The file should have a name formatted similar to PersonalMediaVault-A.B.C-x64.msi, replacing A, B and C for the major, minor and patch version number respectively.
Make sure to check the file hash with Powershell and compare it to the provided hash on GitHub.
Installing
Once downloaded, run the installer and follow the steps.
The installer should take care of everything for you, installing all the dependencies and placing the binaries in the Program Files folder.
Creating and running a vault
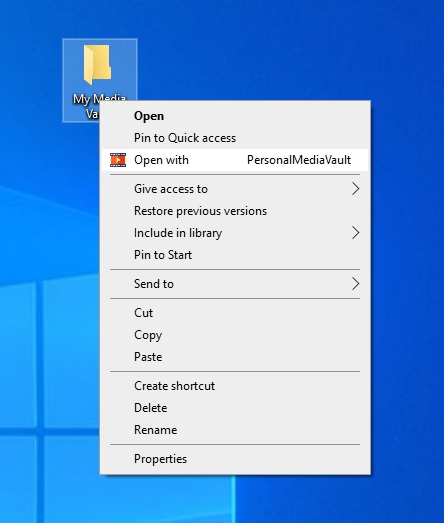
The installer will add an option to the file explorer to open a folder with PersonalMediaVault.
Create a new folder, and use that option to open with PersonalMediaVault.

That will open the launcher, asking you for an initial username and password for your vault.
After the vault is created, it will ask you for a port to run the server, and will start it, opening your default browser.