Setting up everything
Categories:
After you launched the vault server, you will be given an URL to connect to the vault using a web browser.
Most modern browsers are supported, including Chromium-based browser, Firefox-based browsers or Webkit-based browsers.
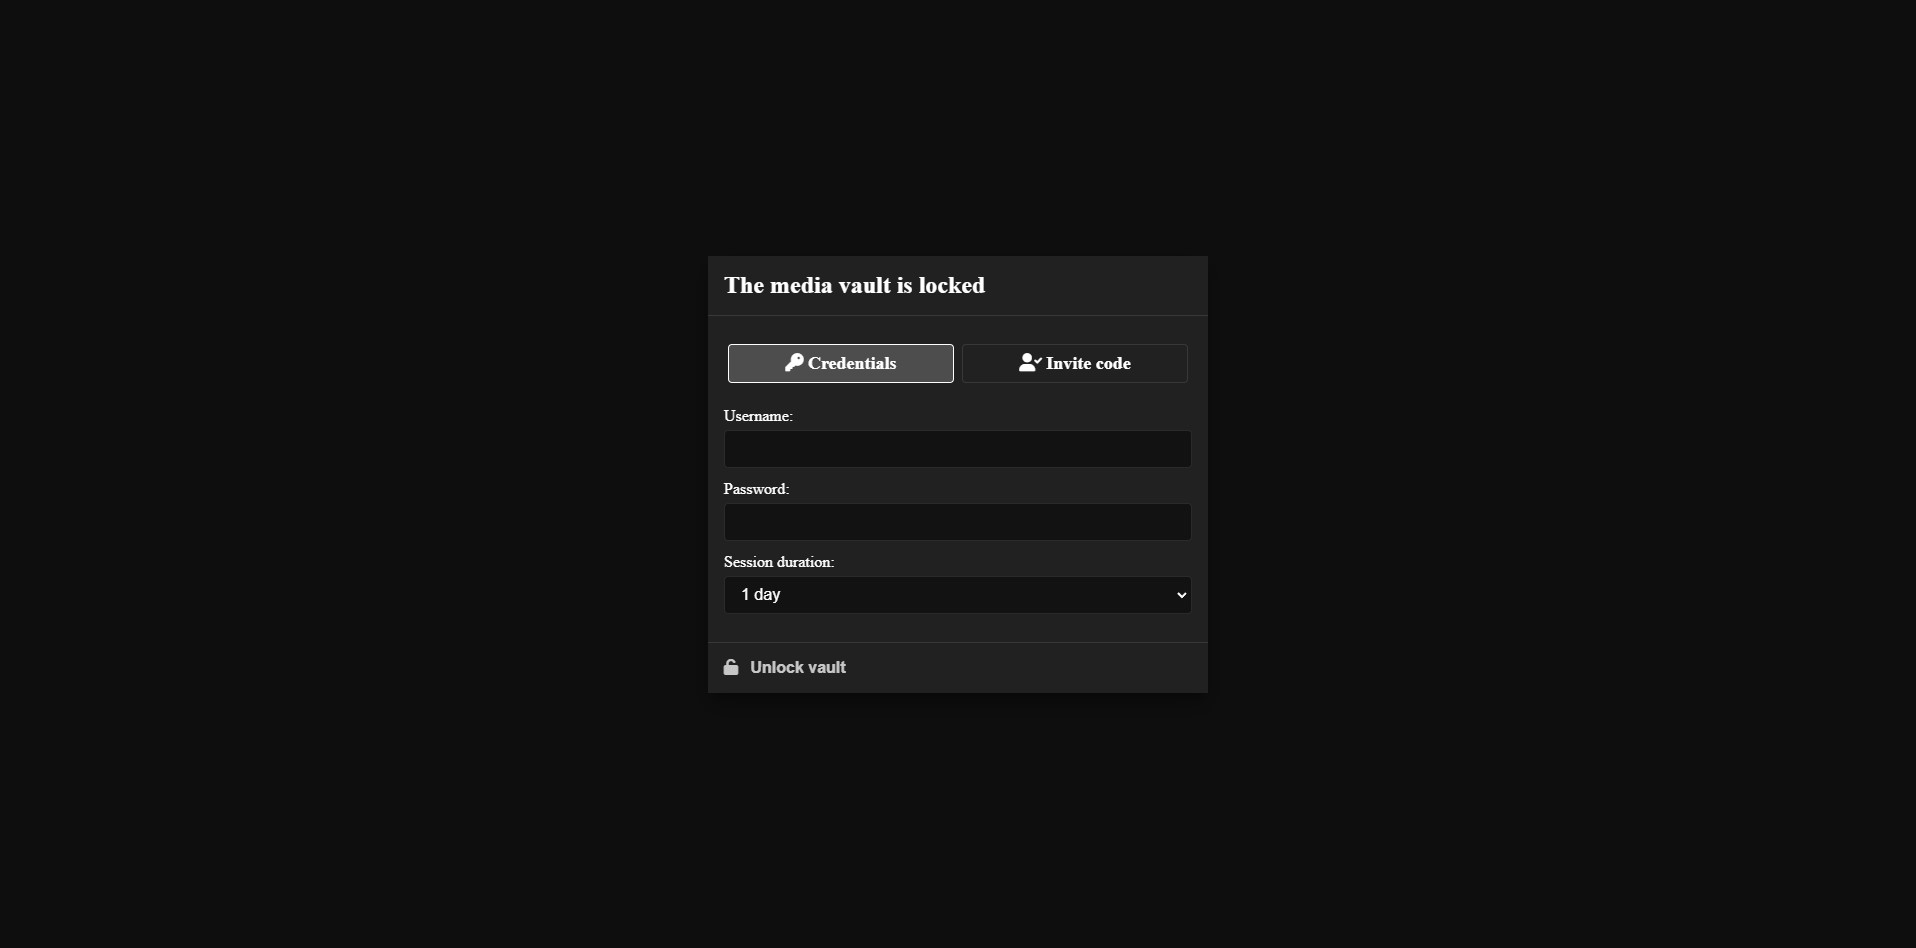
The fist screen you will see is a login screen asking for your vault credentials to unlock the vault. You have to use the credentials you provide when creating the vault. If you didn’t specify any credentials, by default, the username is admin and the password is also admin.
After you successfully log into your vault, you will be presented with the PersonalMediaVault main interface:
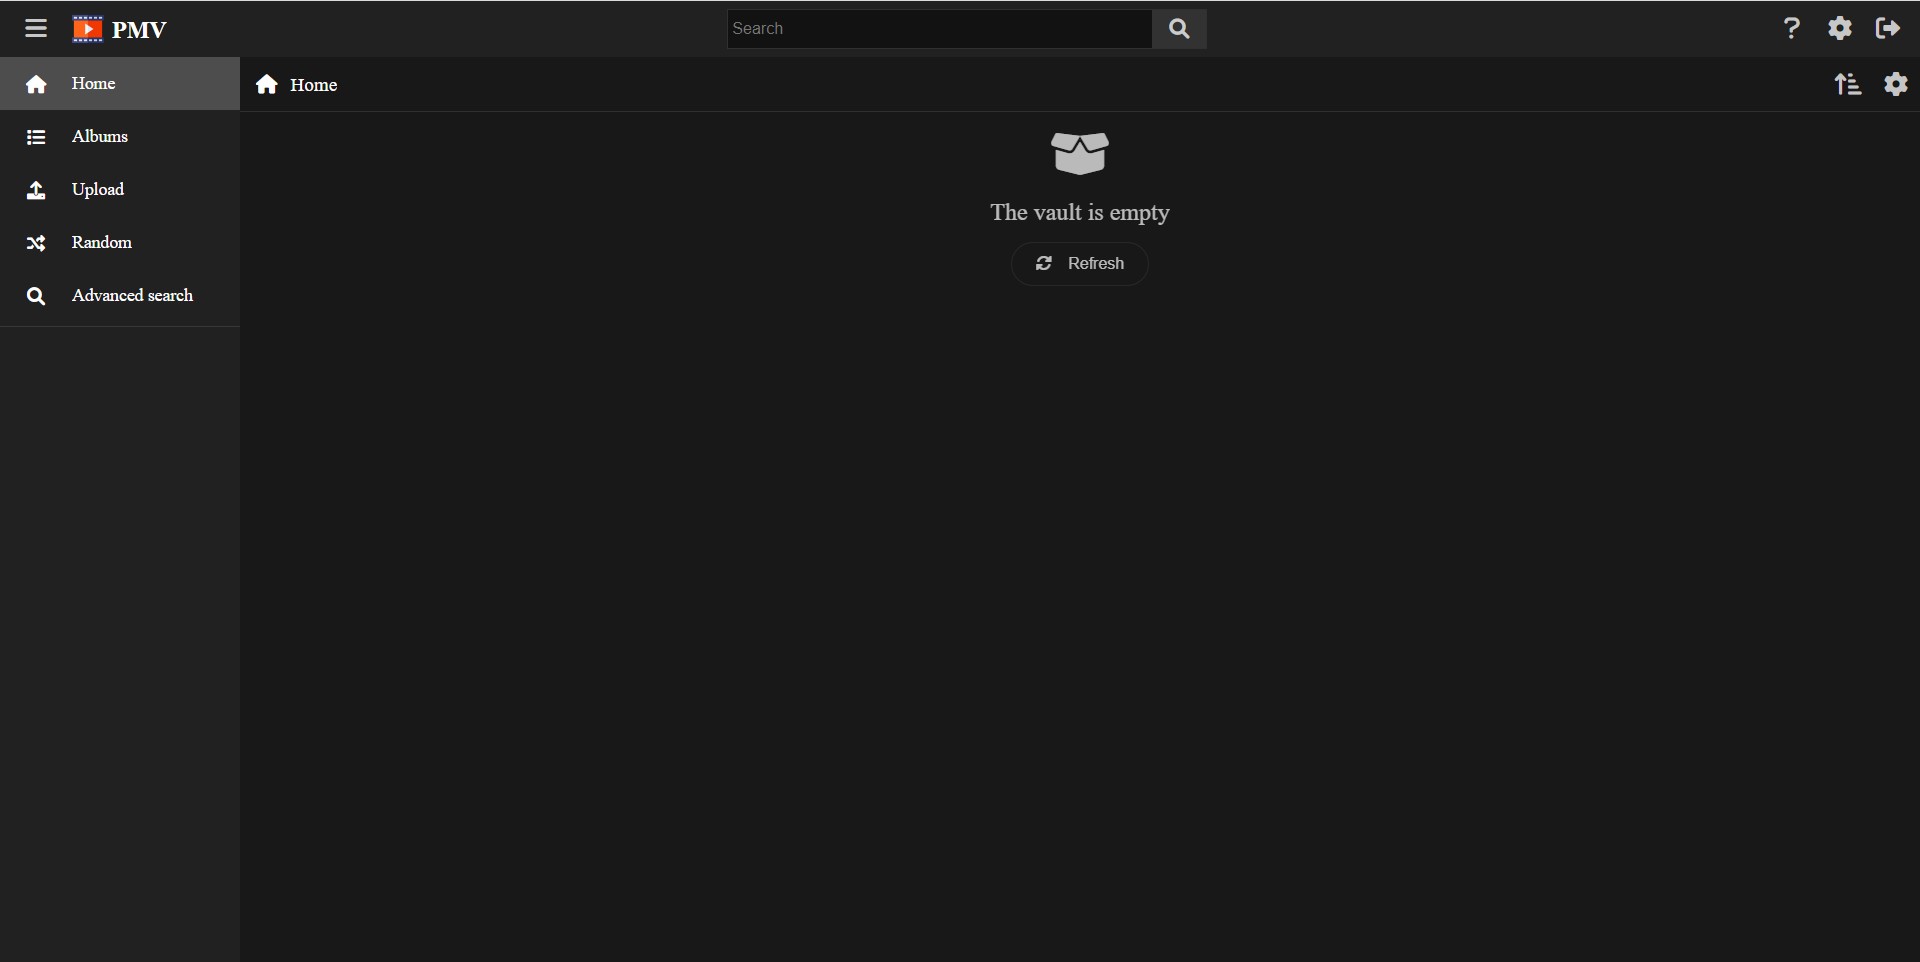
Let’s get familiar with the interface elements!
Menu sidebar
First, you have sidebar at the left. You can toggle its visibility with the button at the top left corner. The sidebar has the following elements:
- The Home page, where you can set up carrousels fo albums or media elements in order to access them in a more efficient and organized way.
- The Albums view, when you can access every album existing in your vault.
- The Media view, where you can find the media existing in your vault.
- The Find media view, where you can search for media files in your vault, by title, type, tags or album.
- The Random view, witch gives you random media files existing in your vault.
- The Upload view, where you can upload media files into your vault.
Below the main options, a list of albums will be displayed, ordered by usage or preference.
Top bar
In the top bar you will find a search bar, and three buttons.
The search bar lets you find tags and albums in your vault. You can type the name, or part of it, and filter by a tag or go into an album.
The top bar buttons are the following, from left to right:
- The question mark button will display the help menu, letting you know the current version of your PersonalMediaVault instance or giving your information about the documentation or the keyboard shortcuts.
- The cog button will display the vault settings menu. We’ll explain this menu in details in the next section of this tutorial.
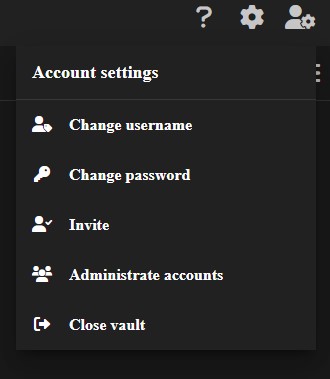
- The user with cog button will display the account settings menu. We’ll explain this menu in details in the next section of this tutorial.
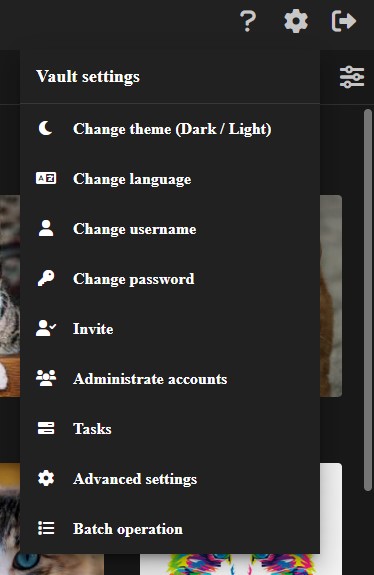
Vault settings menu
The vault settings menu has all the options you need to set your vault up. Let’s dive into them and make the necessary actions.
Change theme
Click in the Change theme (Dark / Light) option in order to select the theme you prefer for the web interface.
By default, PersonalMediaVault will detect your browser theme.
By selecting your preferred theme, PersonalMediaVault will save that preference in the local storage of your browser. In order to remember it in future sessions.
Change language
Click in the Change language option to select your language.
By default, PersonalMediaVault will detect your browser language.
By selecting your preferred language, PersonalMediaVault will save that preference in the local storage of your browser. In order to remember it in future sessions.
Isn’t your language yet supported? Feel free to contribute with a pull request to add a new language. In order to add a new language, check the frontend/src/locales folder. Copy
locale-en.jsonand translate every key to your language.
Tasks
The Tasks option will show you the list of current tasks running for the vault. These tasks and encoding or resizing tasks. They will be created the moment you upload media to your vault.
This option is rarely used, but it can give you a global view of all the tasks running, in case you need to know.
Advanced settings
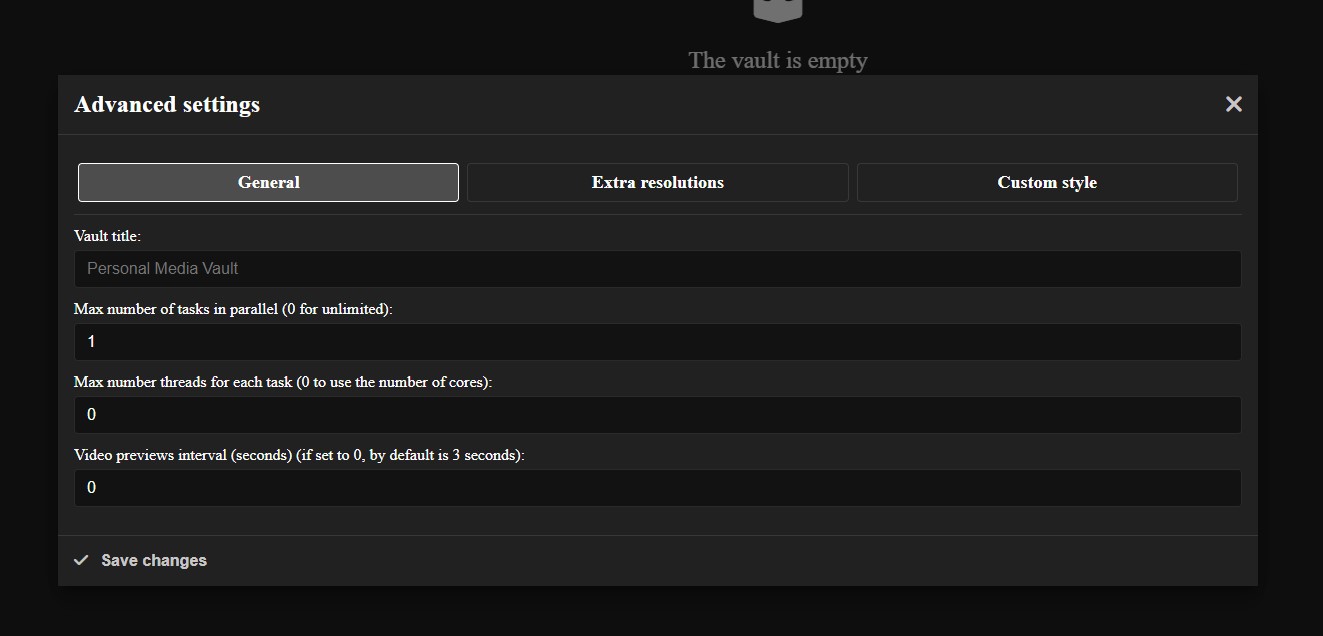
Click in the Advanced settings option to configure your vault advanced settings. This option will show a modal with 3 tabs.
The first tab, called General will allow you to configure the following:
- The vault title, displayed as the website title. By default is it
Personal Media Vault. - The max number of tasks allowed to run in parallel. Depending on your server capabilities, you may want to increase or decrease it.
- The max number of threads to use for each task. By default is
0, meaning it will use as many as optimal. You can set it in order to restrict the CPU usage. - The video previews interval, in seconds. Each interval, PersonalMediaVault will make a preview of a video in order to display them when hovering the timeline.
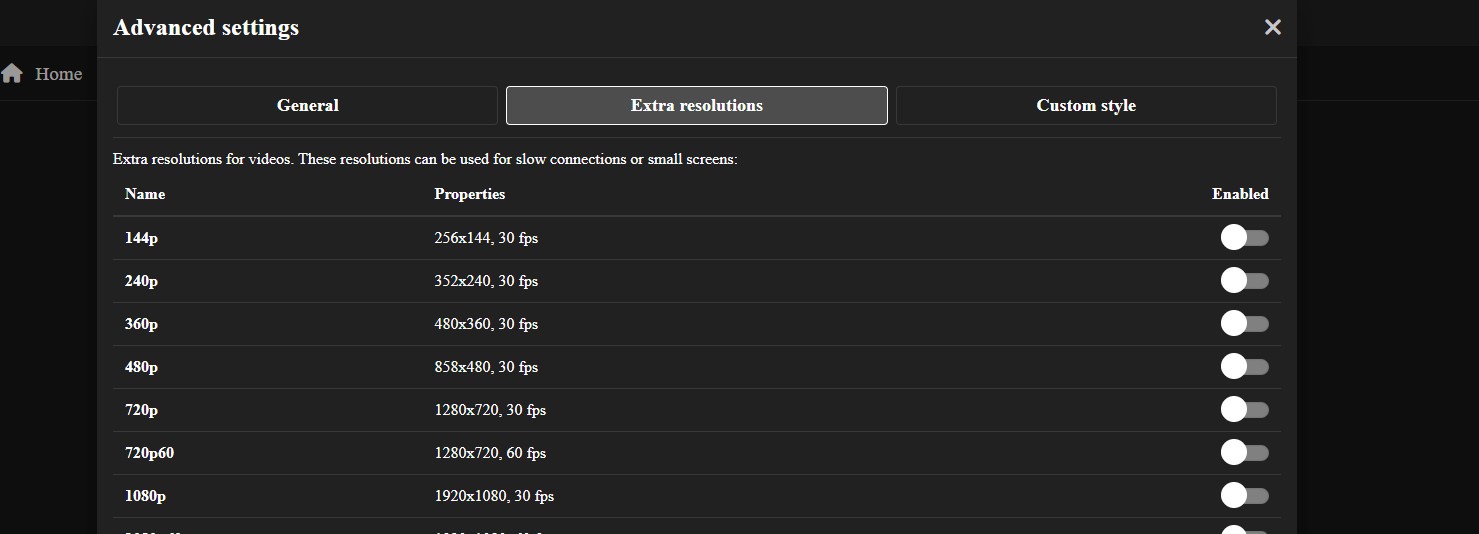
The second tab, called Extra resolutions will allow you to enable certain extra resolutions to use for small screens, in order to save memory and bandwidth. If you plan to use from a tablet or a mobile device, you may want to enable some of them.
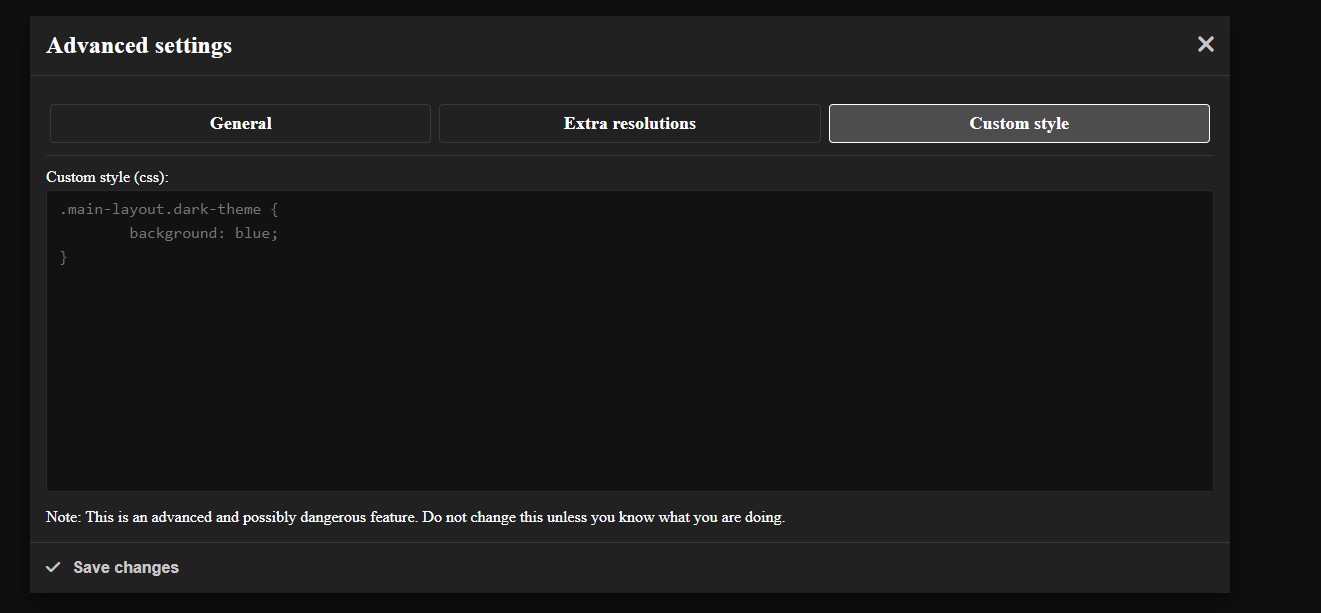
The third tab, called Custom style will let you specify custom CSS code to apply to the web interface. You can use this to make your own theme. However, this option is very advanced and requires CSS knowledge. If you do not have such knowledge or you are not interesting in a custom theme, just ignore this option.
Batch operation
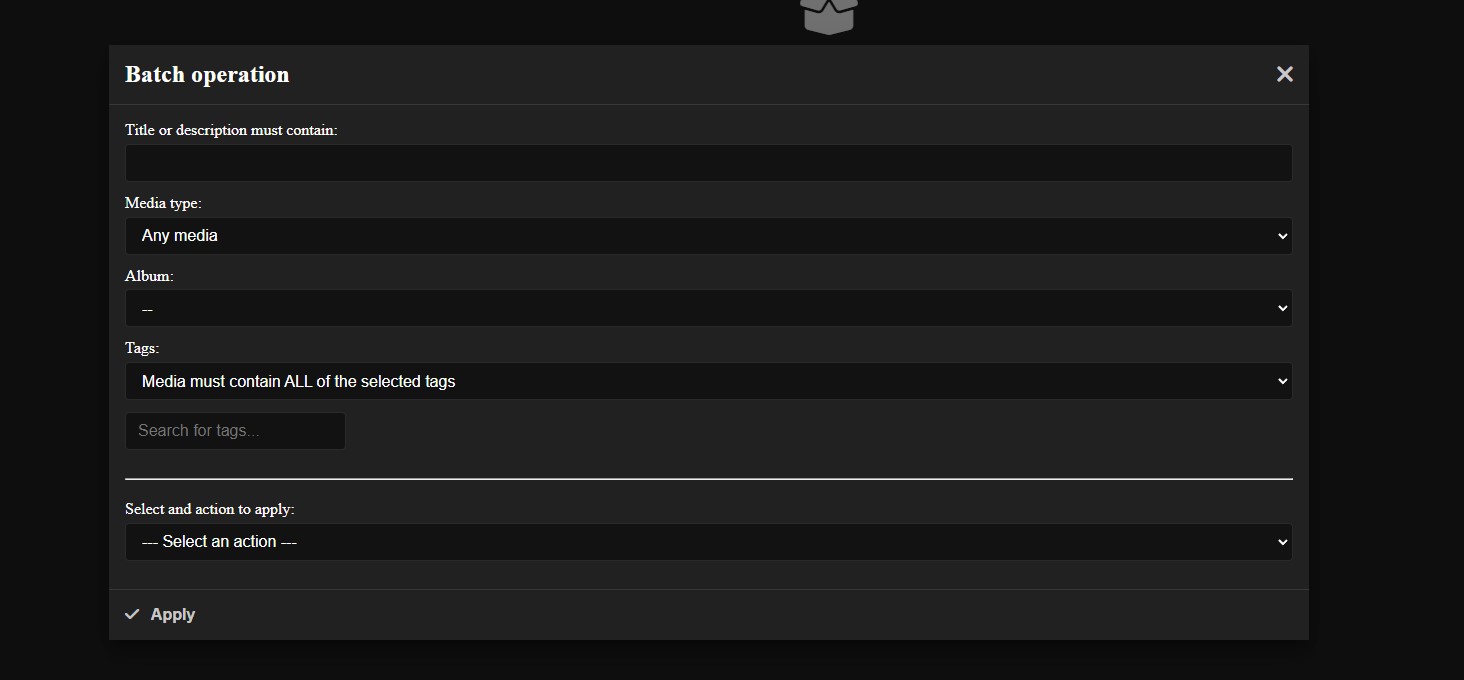
The Batch operation option will let you apply a batch operation to a subset of your vault media assets.
You can filter by title, description, tags or album.
You can apply any of the following operations:
- Adding tags.
- Removing tags
- Adding media into an album
- Removing media from an album
- Deleting media from the vault
This can be useful if you want to make a change to many media assets, saving you time.
Clear browser data
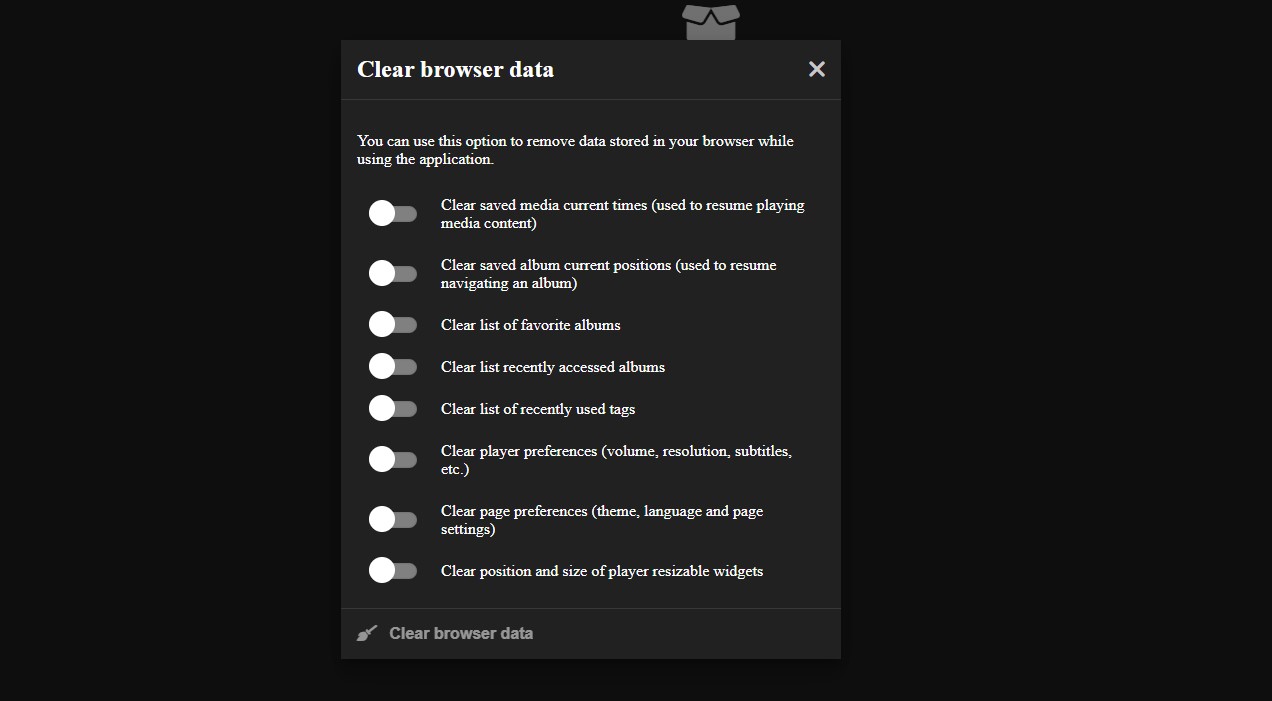
The Clear browser data option will let you clear the data stored in the browser by PersonalMediaVault.
This data is stored for convenience, in order to remember thing like your favorites list, the time you left a media playing at, or the preferences you set (theme, language, sizes, etc.).
You can clear this data in order to reset to the default values or to remove any track of your usage.
Account settings menu
The account settings menu has all the options you need to manage the vault account.
Change username
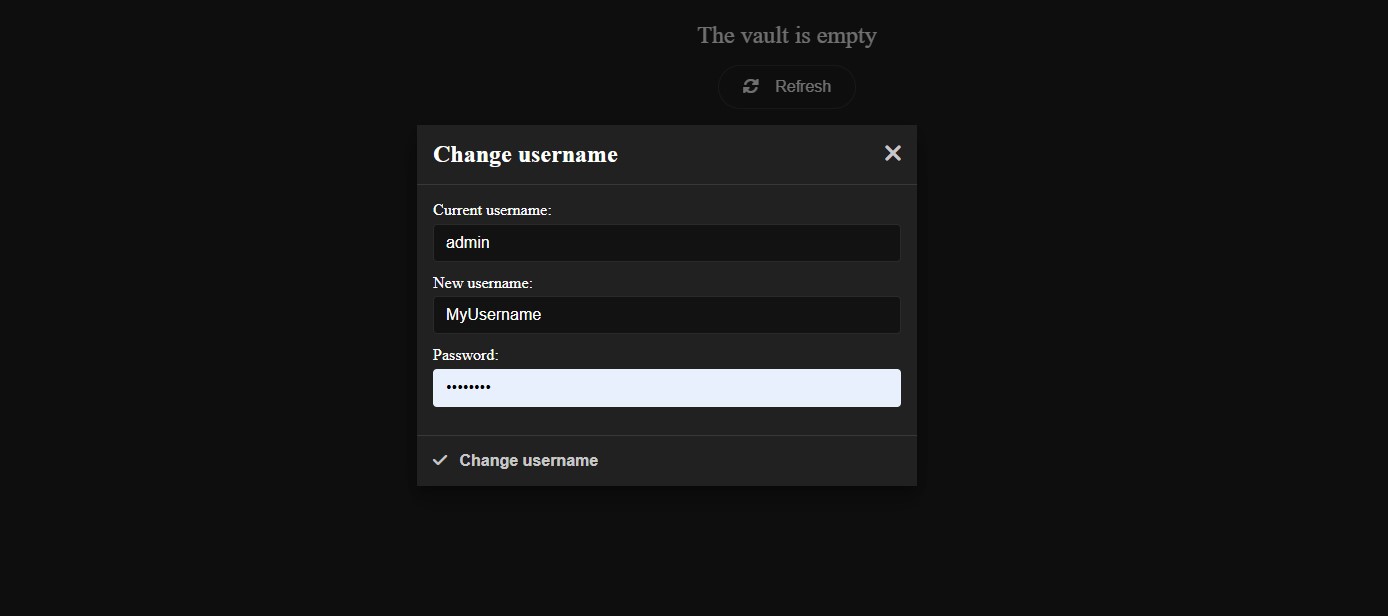
Click in the Change username option in order to change your username. This is the username you use to unlock the vault.
In order to change it, you must also provide your current password.
Change password
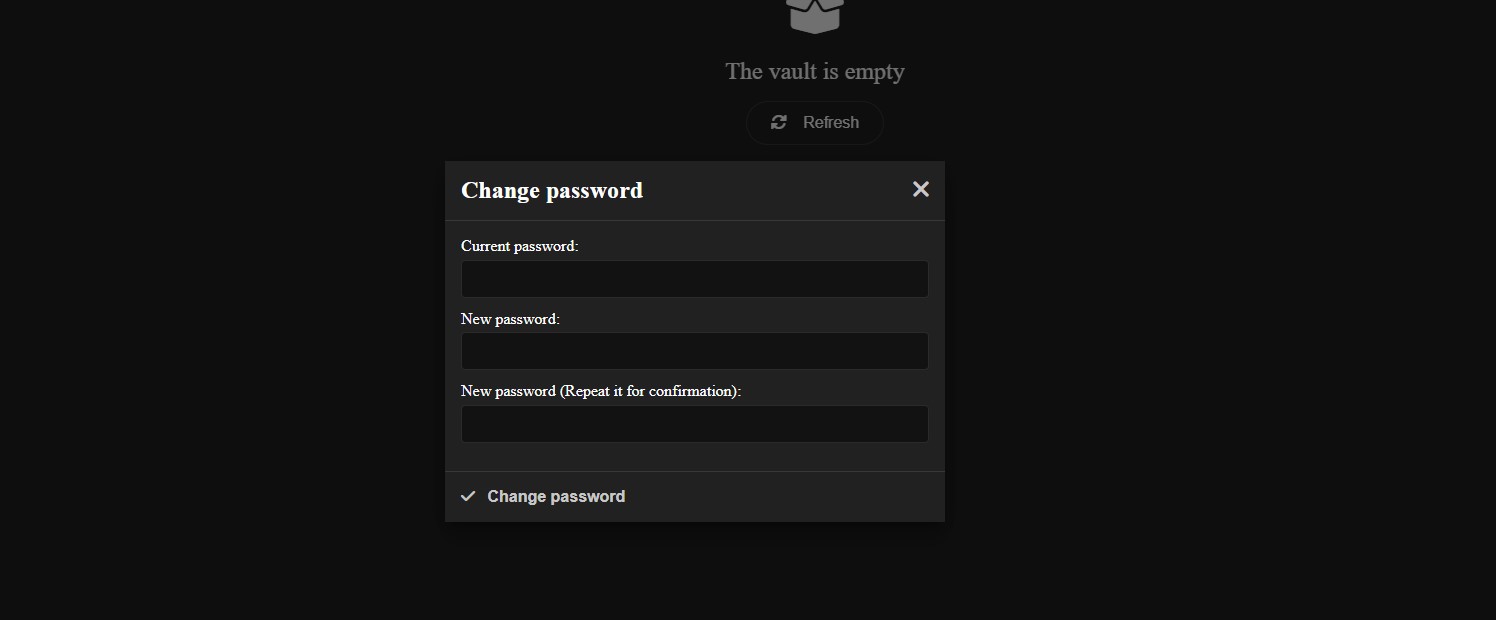
Click in the Change password option in order to change your password. This is the password you use to unlock the vault.
In order to change it, you must also provide your current password.
Make sure to use a very strong password, using letters (uppercase and lowercase), numbers and symbols.
Is it recommended to use a password manager, and making a backup of your password. If you lose your password, it will be impossible to recover the vault content, since it’s encrypted with that password.
Account security
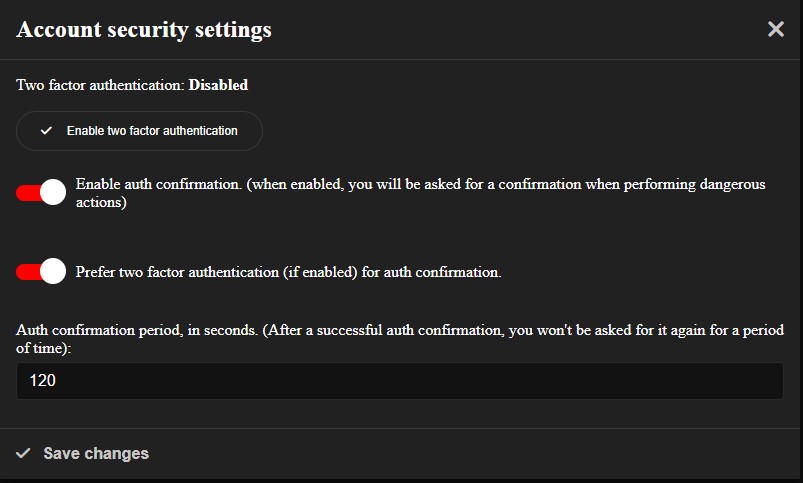
Click in the Account security option in order to change the security settings of your account.
You can configure the following settings:
- Two factor authentication
- Authentication confirmation (Require confirmation for certain dangerous operations). You can also set if you want to use your password, or a two factor authentication code. You can also configure a period to prevent asking for confirmation too often.
Invite
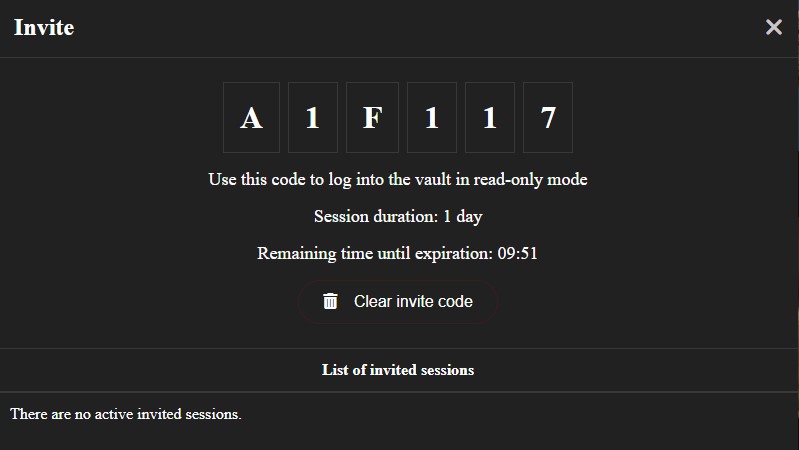
Click in the Invite option in order to invite users or devices to access the vault.
This feature will allow you to generate single-use codes that can be used to access the vault in read-only mode.
Administrate accounts
The Administrate accounts option will show you a list of extra accounts for your vault, allowing you to create new ones or delete existing ones.
This feature is useful when you have family or friend you want to share the vault with. You can make read-only accounts for them.
If this use case does not fit your needs, you can just ignore this option.
Close vault
The Close vault option will close the current session, locking the vault and redirecting you to the login screen.
Close the vault when you are not using it to prevent unwanted access.