Image viewer
Categories:
When selecting an image in the media vault, the image viewer will be used in order to display it.
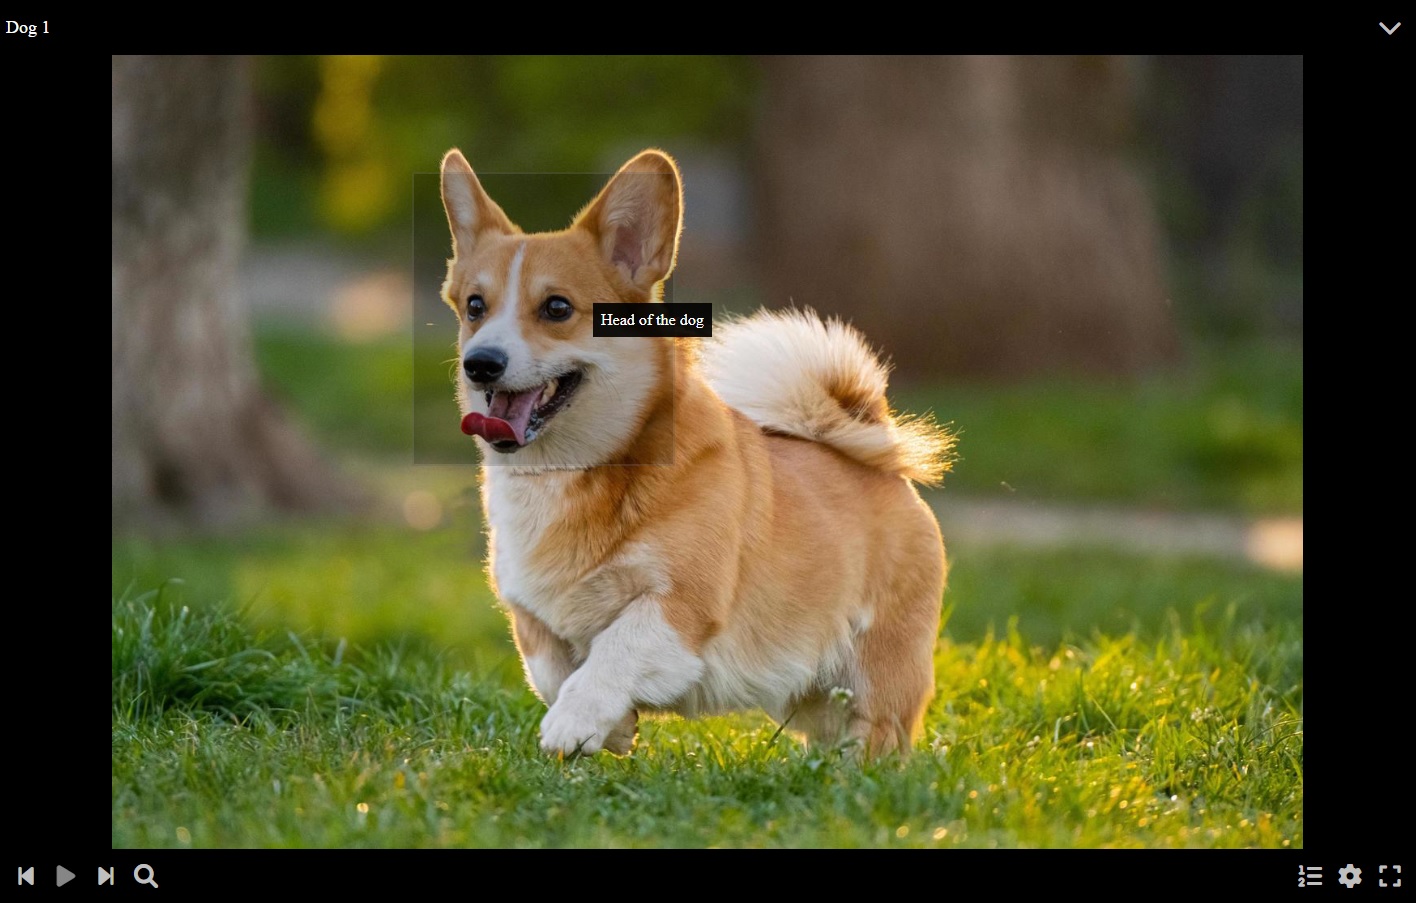
The PersonalMediaVault image viewer is very similar to the video player:
- At the top-left, you have the image title
- At the top-right, you have a button to open the image metadata editor.
- At the bottom you have the viewer controls.
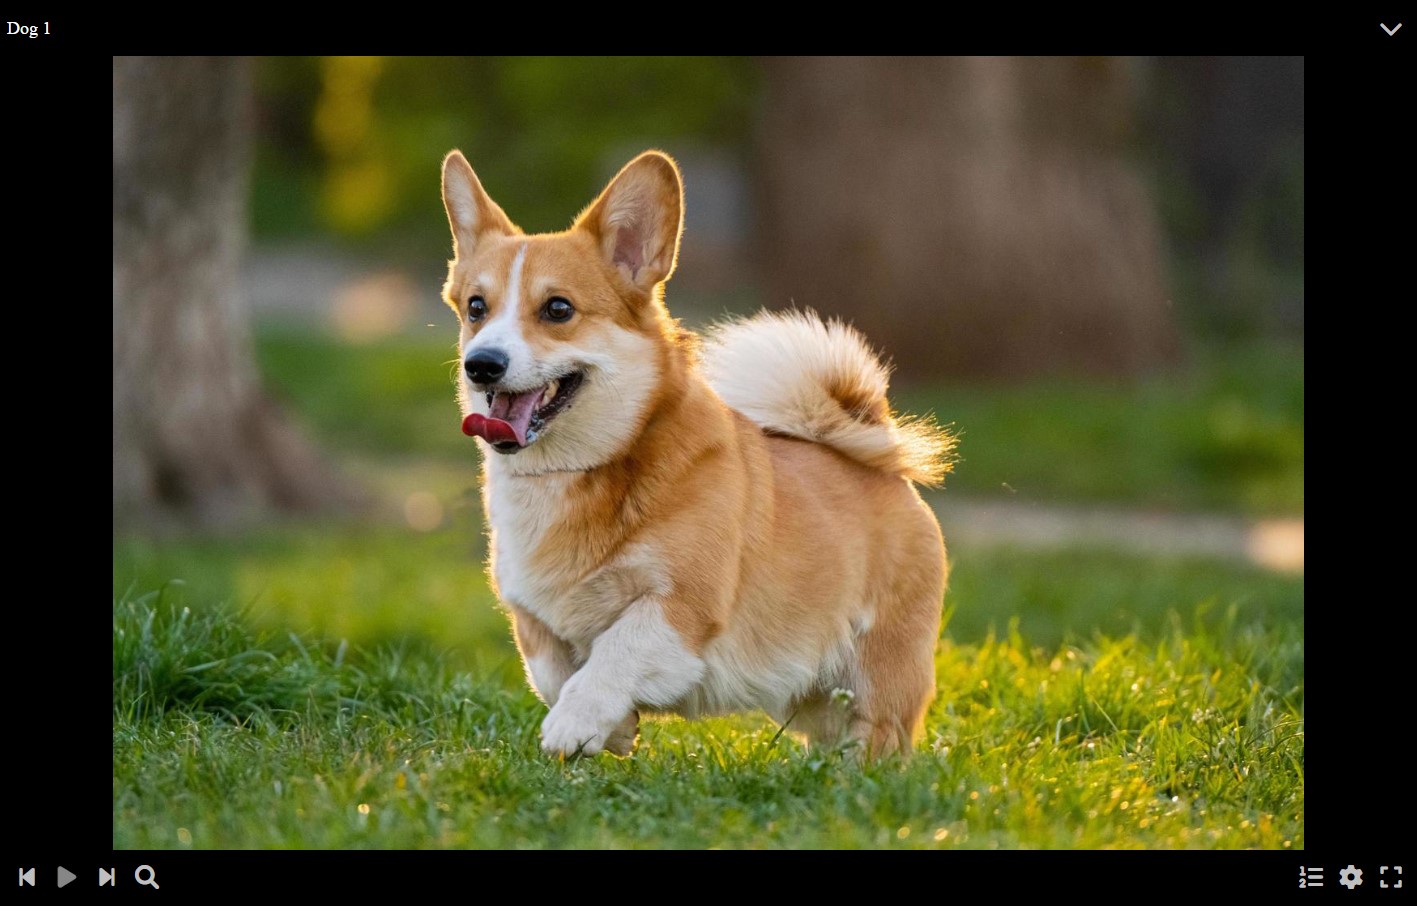
Basic controls
You can change the image scale with the scale control, which displays when hovering or clicking on it. The scale can be a percentage of the display width, or can be set to fit the image into the available space:
- Click the scale button, or press the Space bar, in order to toggle the image fitting mode.
- Drag the scale control or press the + and - keys to increase or decrease the scale by 10% respectively.
- You can press the Shift key, along with the + and - keys to increase or decrease the scale by 1% respectively.

By pressing the configuration button or the S key, you can open the image viewer configuration.

By pressing the full screen button, or the F key, you can toggle the full screen mode for the image viewer.

Configuration
You can open the viewer configuration by pressing the configuration button or the S key.
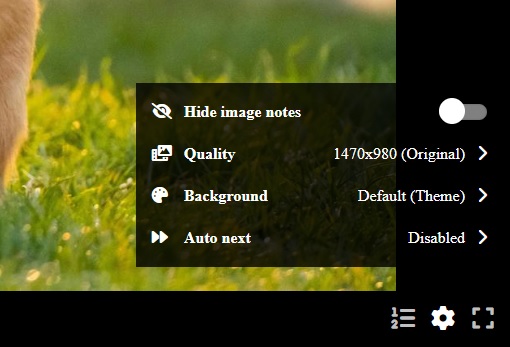
You can find several options:
- You can hide or show image notes.
- You can change the image quality (resolution), between the available ones.
- You can change the image background, for images with transparency.
- You can change the auto-next option. If enabled, the next media in the list will play after a certain number of seconds have passed.
Context menu
When right clicking with a mouse, or with a long tap in touch devices, it will open the viewer context menu, with several options for fast access to them.
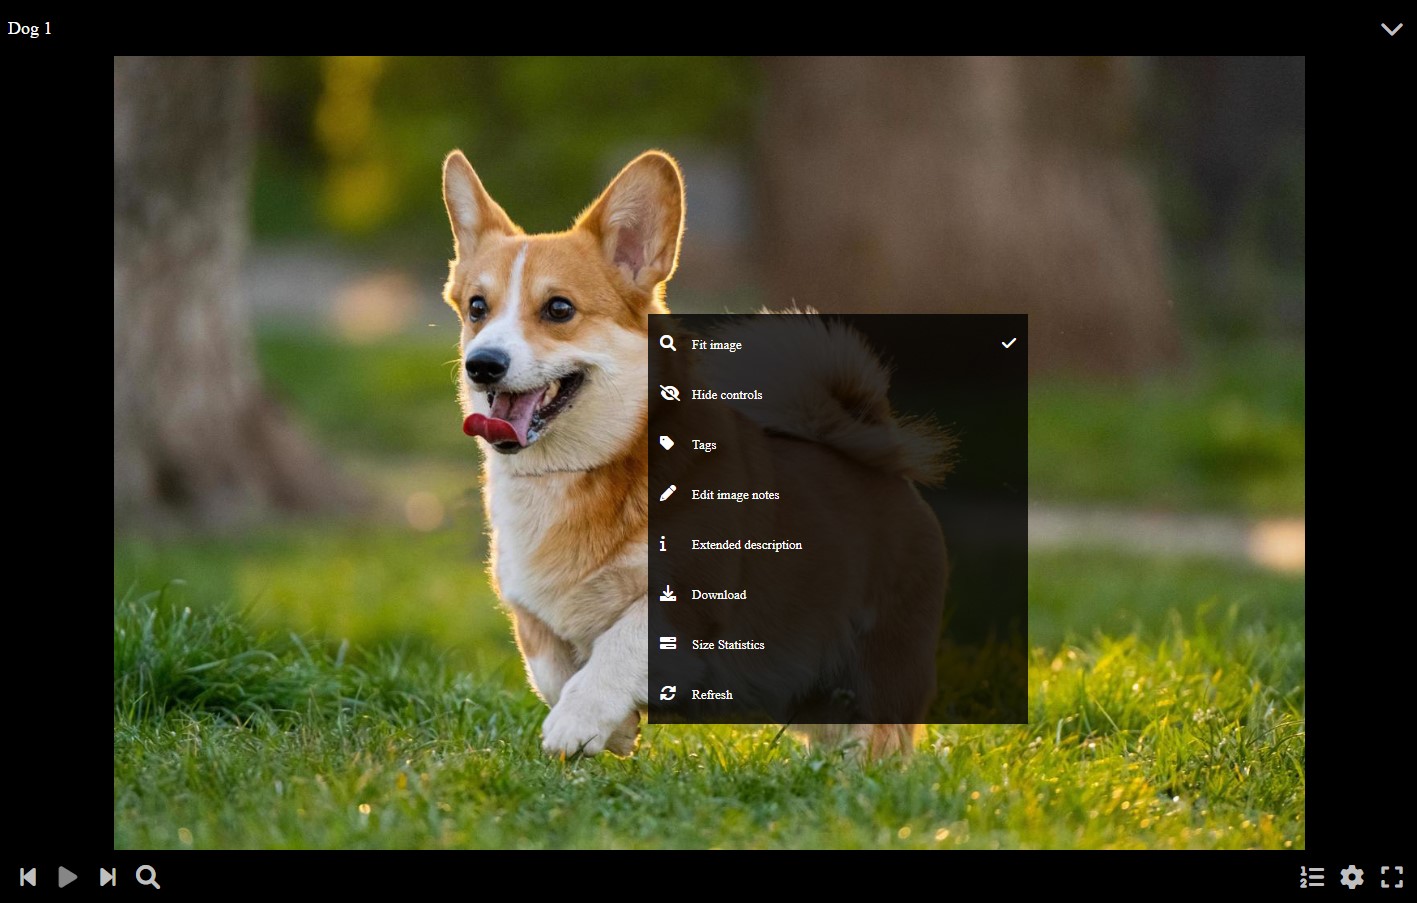
You can find several options:
- You can toggle the image size fitting mode. If enabled, the image will be automatically resized and centered to fit in the available size.
- You can hide or show the controls. When done with this options, the controls will stay hidden until you disable the option. You can press the C key to do the same.
- You can open the tags editor. You can also press the T key to open it.
- You can open the image notes editor. You can also press the N key to open it.
- You can open the extended description, being an arbitrary text to attach to the media. You can also press the I key to open it.
- You can download the image file.
- You can check the size of the files stored in the vault.
- You can refresh the media, reloading it from the server.
Editor
You can open the viewer editor by clicking the expand button at the top right corner of the viewer. Also you can press the E key.
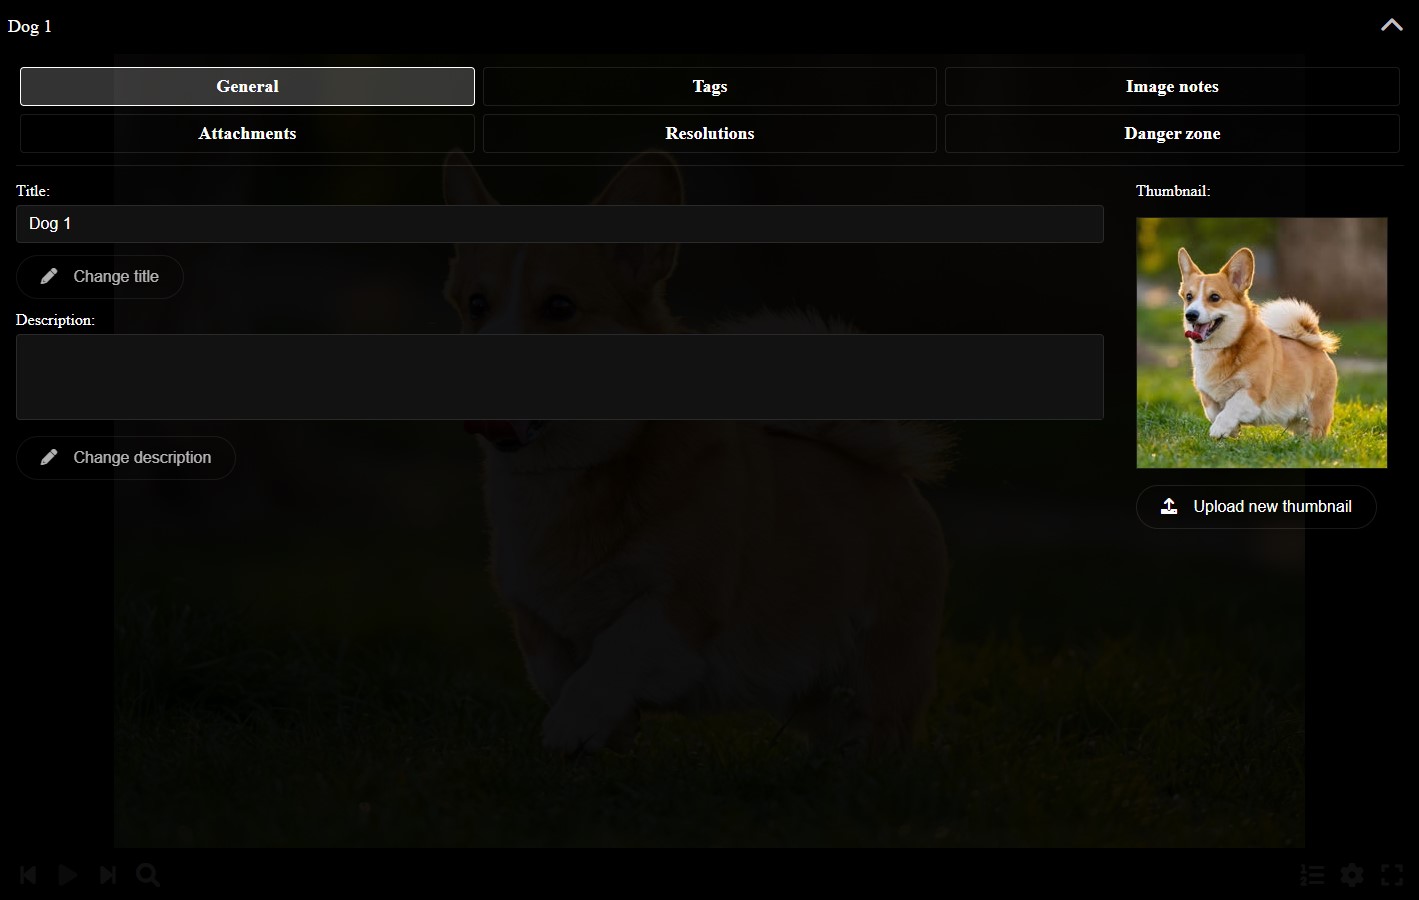
The viewer editor allows you to change any aspect of the image.
In the General tab you can change the title of the image, its description and thumbnail.
In the Tags tab you can change the media tags. You can use the tags to find the media later when searching for it.
You also have other tabs we explain in detail in the sections below.
Image notes
You can add annotation to the image by clicking the option in the context menu, or pressing the N key. This will toggle a mode where you can drag in order to add notes to the image, while being able to move and resize the existing ones.
When out of the image notes editor mode, they will be displayed as translucid squares that will display its corresponding text by hovering or clicking on them.
You can use image notes, for example, to name elements of the image, add extra information or translate texts in a foreign language.
You can also change the image notes in text mode by going to the Image Notes tab of the viewer editor, very useful to import and export notes.
Attachments
You can add attachments to the video by going to the Attachments tab of the viewer editor.
Attachments are arbitrary files you can store in the vault along with the media file, for example the original uncompressed image or the assets used to make it.
Resolutions
In the Resolutions tab of the viewer editor, you will be able to resize the image to different resolutions, in order to display it in smaller screens without wasting bandwidth.
Once a resolution is available, you will be able to select it from the viewer configuration menu.
Danger zone
In the Danger zone tab of the viewer editor, you can:
- Re-encode the image, in order to attempt to fix encoding errors.
- Delete the image from the vault, which requires confirmation. You can also use the Delete key.