This section contains tutorials on varios aspects of PersonalMediaVault.
Check the list below in order to find what you are looking for.
If you can’t find what you’re looking for, feel free to start a discussion on GitHub.
This is the multi-page printable view of this section. Click here to print.
This section contains tutorials on varios aspects of PersonalMediaVault.
Check the list below in order to find what you are looking for.
If you can’t find what you’re looking for, feel free to start a discussion on GitHub.
After you launched the vault server, you will be given an URL to connect to the vault using a web browser.
Most modern browsers are supported, including Chromium-based browser, Firefox-based browsers or Webkit-based browsers.
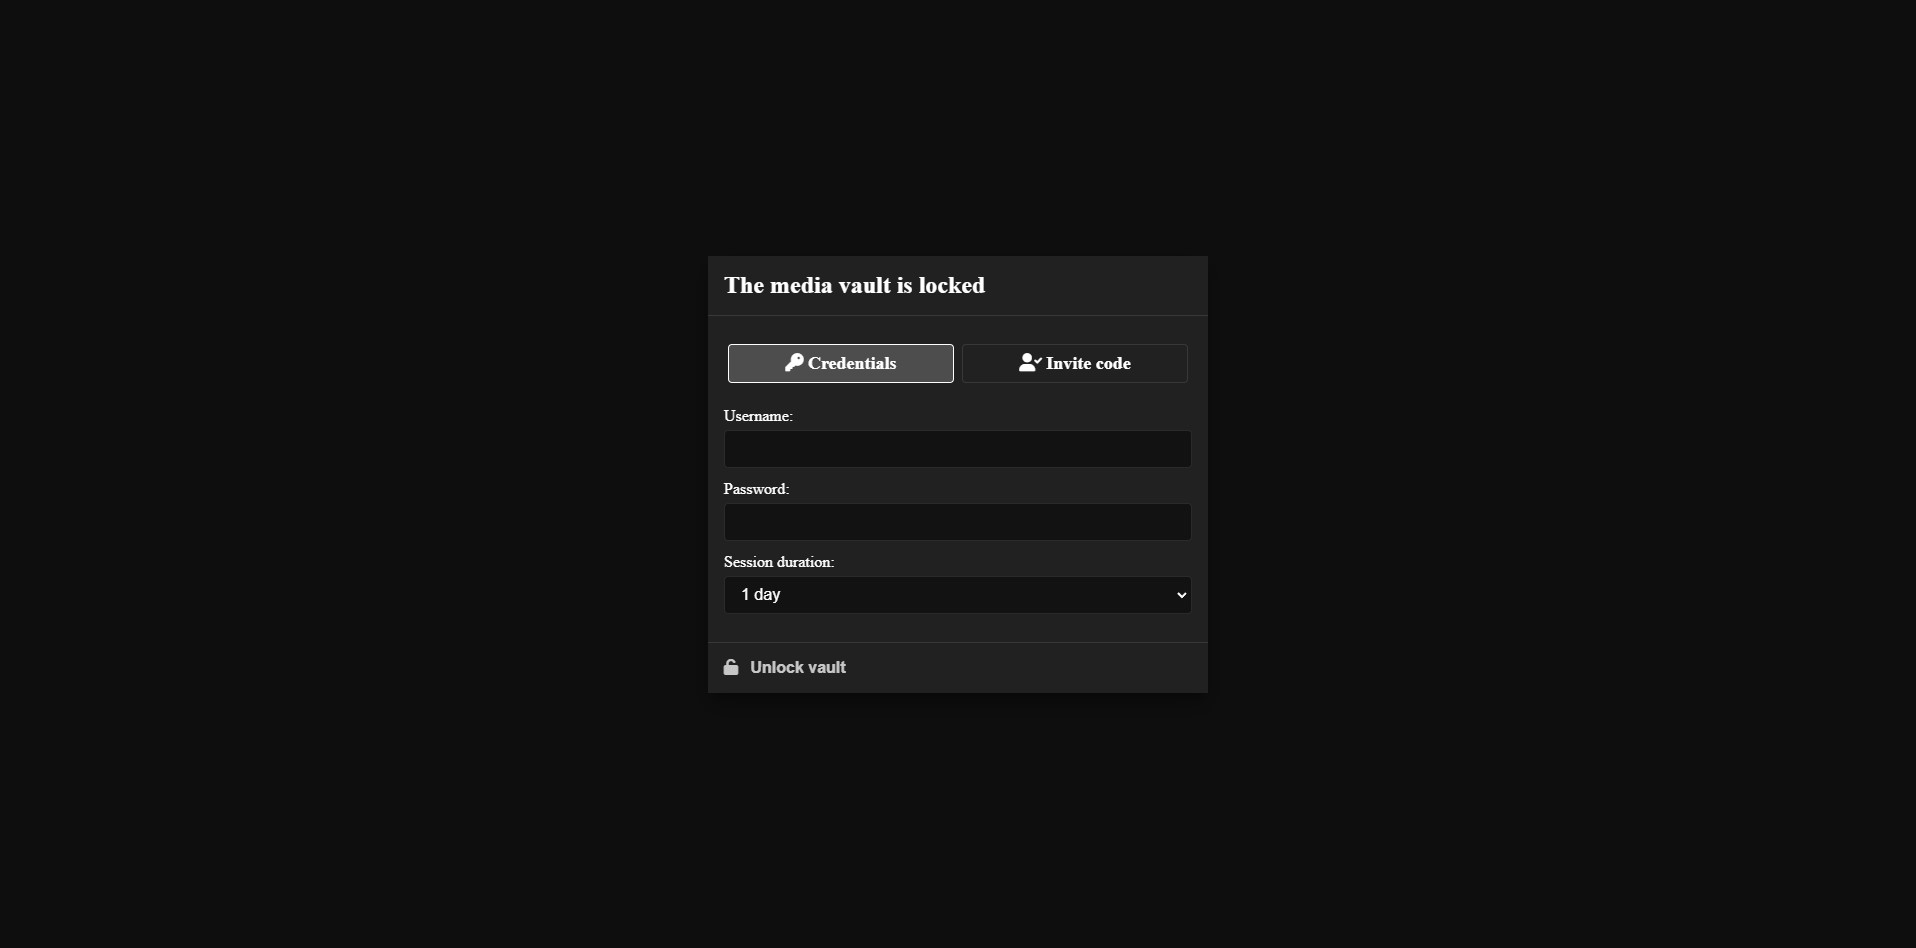
The fist screen you will see is a login screen asking for your vault credentials to unlock the vault. You have to use the credentials you provide when creating the vault. If you didn’t specify any credentials, by default, the username is admin and the password is also admin.
After you successfully log into your vault, you will be presented with the PersonalMediaVault main interface:
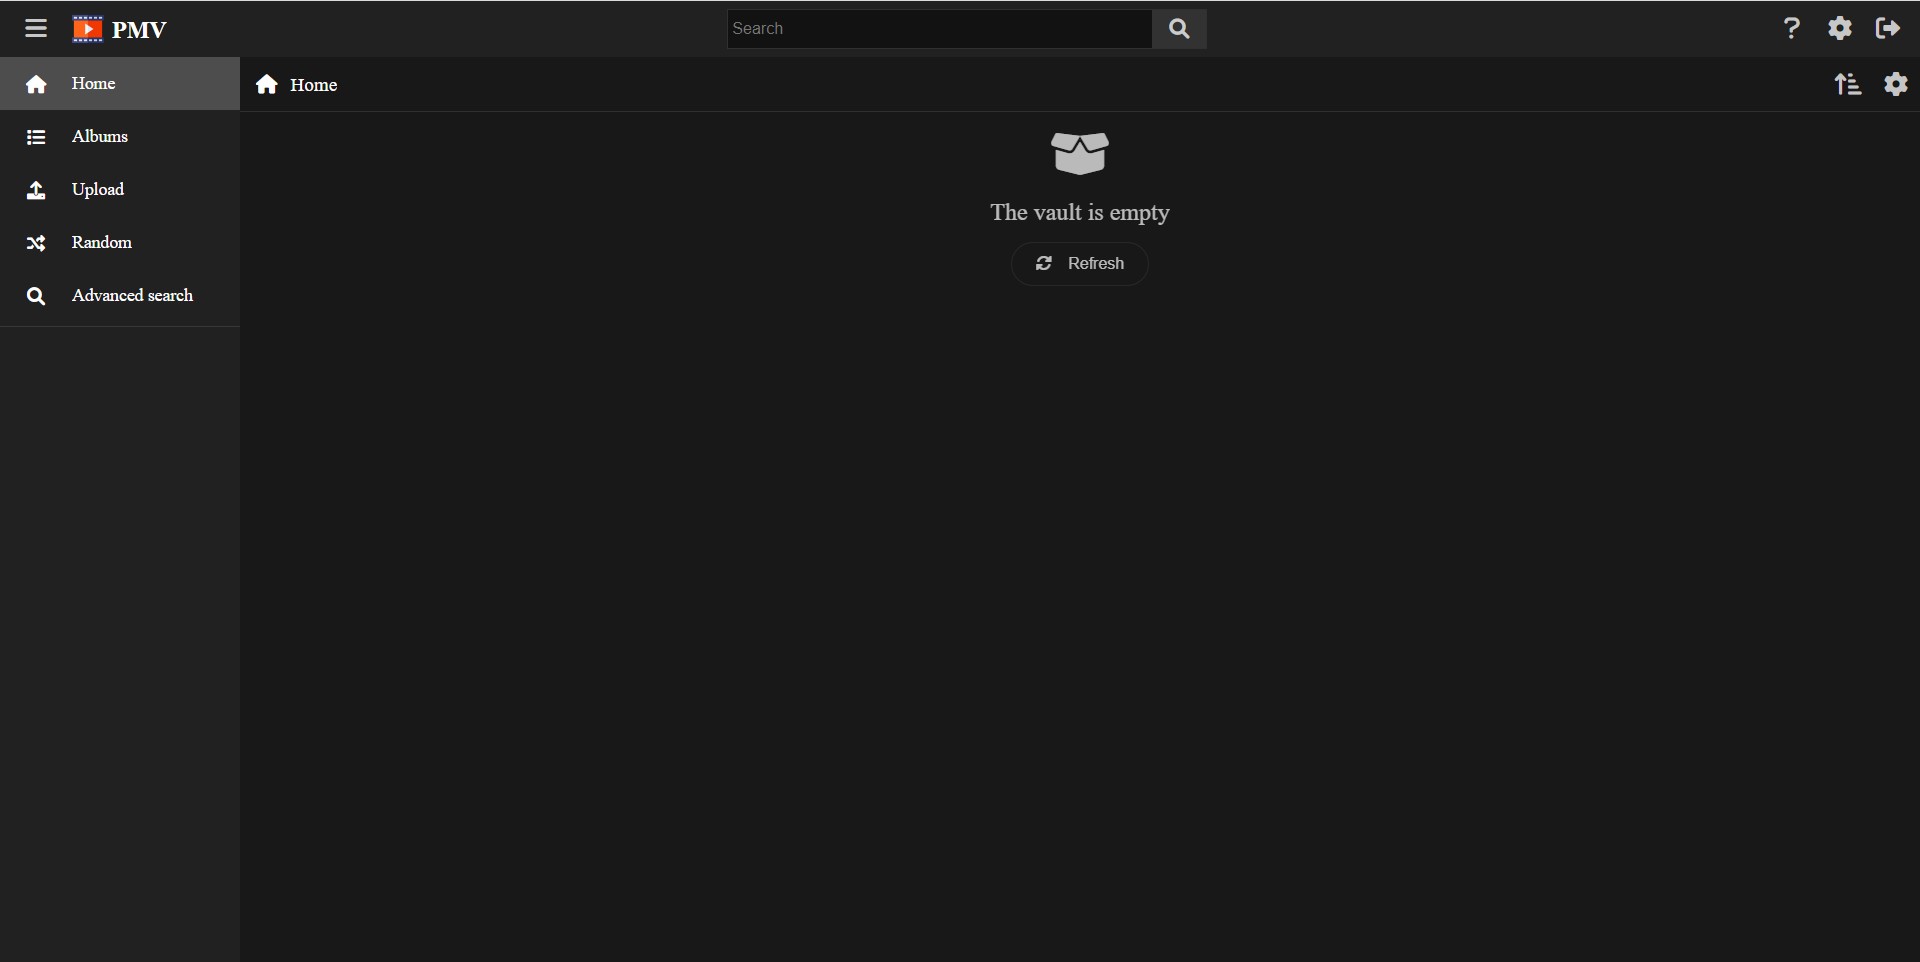
Let’s get familiar with the interface elements!
First, you have sidebar at the left. You can toggle its visibility with the button at the top left corner. The sidebar has the following elements:
Below the main options, a list of albums will be displayed, ordered by usage or preference.
In the top bar you will find a search bar, and three buttons.
The search bar lets you find tags and albums in your vault. You can type the name, or part of it, and filter by a tag or go into an album.
The top bar buttons are the following, from left to right:
The vault settings menu has all the options you need to set your vault up. Let’s dive into them and make the necessary actions.
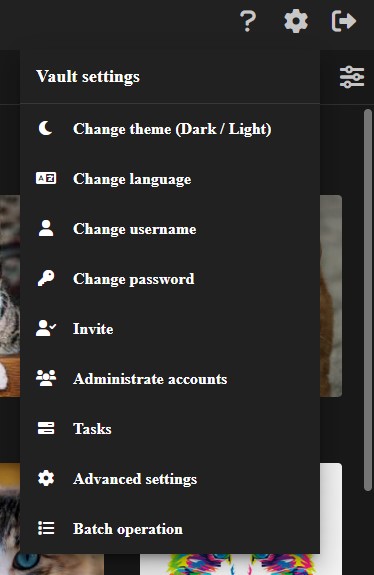
Click in the Change theme (Dark / Light) option in order to select the theme you prefer for the web interface.
By default, PersonalMediaVault will detect your browser theme.
By selecting your preferred theme, PersonalMediaVault will save that preference in the local storage of your browser. In order to remember it in future sessions.
Click in the Change language option to select your language.
By default, PersonalMediaVault will detect your browser language.
By selecting your preferred language, PersonalMediaVault will save that preference in the local storage of your browser. In order to remember it in future sessions.
Isn’t your language yet supported? Feel free to contribute with a pull request to add a new language. In order to add a new language, check the frontend/src/locales folder. Copy
locale-en.jsonand translate every key to your language.
The Tasks option will show you the list of current tasks running for the vault. These tasks and encoding or resizing tasks. They will be created the moment you upload media to your vault.
This option is rarely used, but it can give you a global view of all the tasks running, in case you need to know.
Click in the Advanced settings option to configure your vault advanced settings. This option will show a modal with 3 tabs.
The first tab, called General will allow you to configure the following:
Personal Media Vault.0, meaning it will use as many as optimal. You can set it in order to restrict the CPU usage.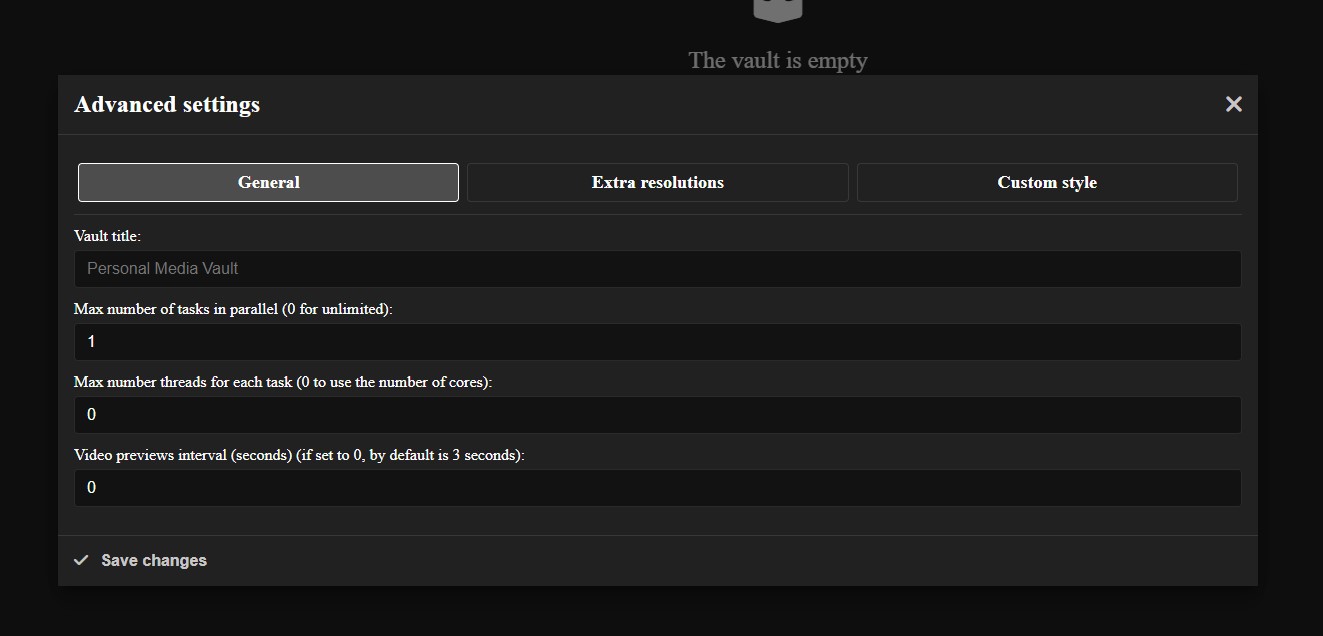
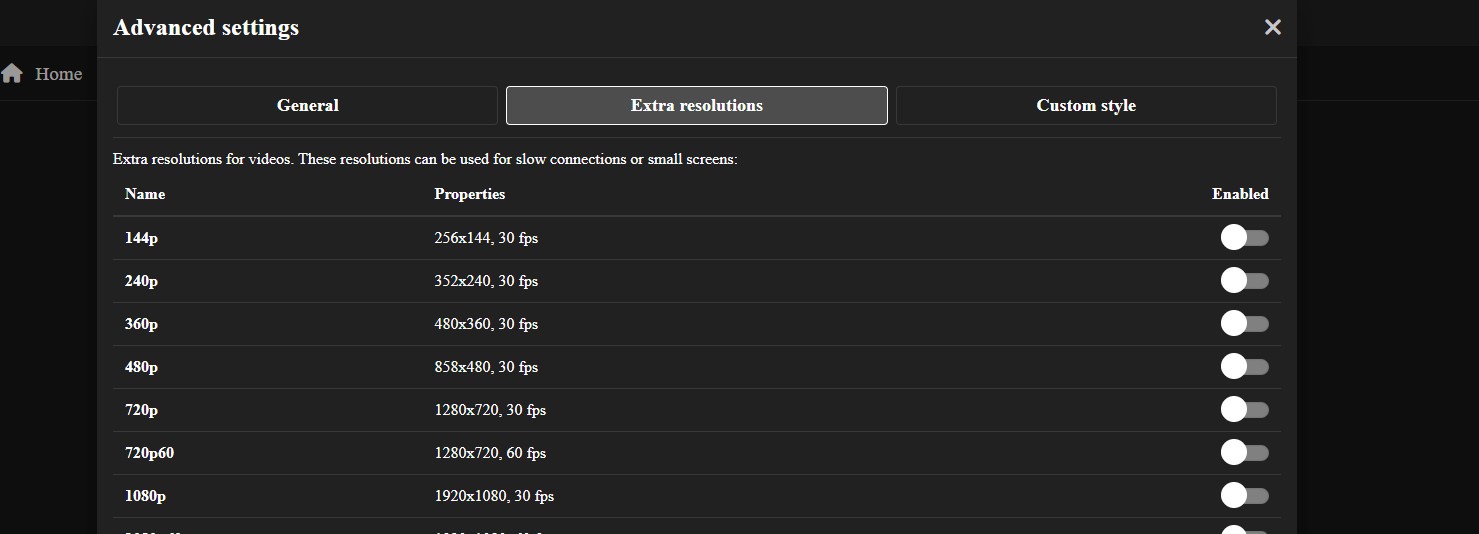
The second tab, called Extra resolutions will allow you to enable certain extra resolutions to use for small screens, in order to save memory and bandwidth. If you plan to use from a tablet or a mobile device, you may want to enable some of them.
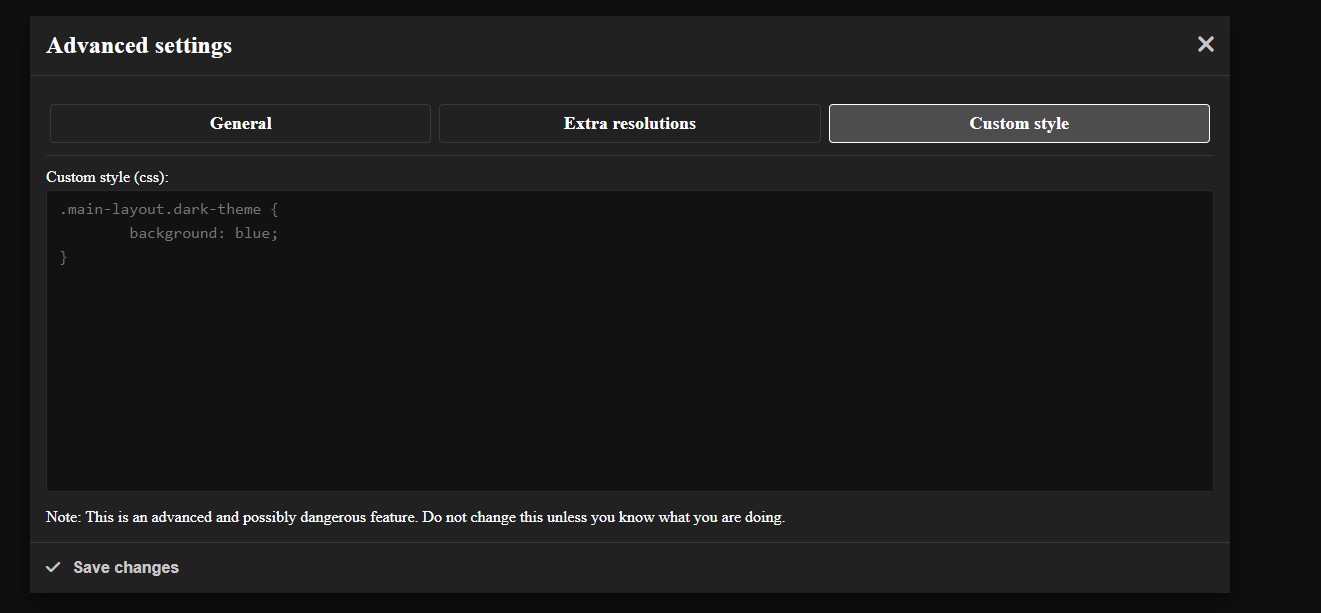
The third tab, called Custom style will let you specify custom CSS code to apply to the web interface. You can use this to make your own theme. However, this option is very advanced and requires CSS knowledge. If you do not have such knowledge or you are not interesting in a custom theme, just ignore this option.
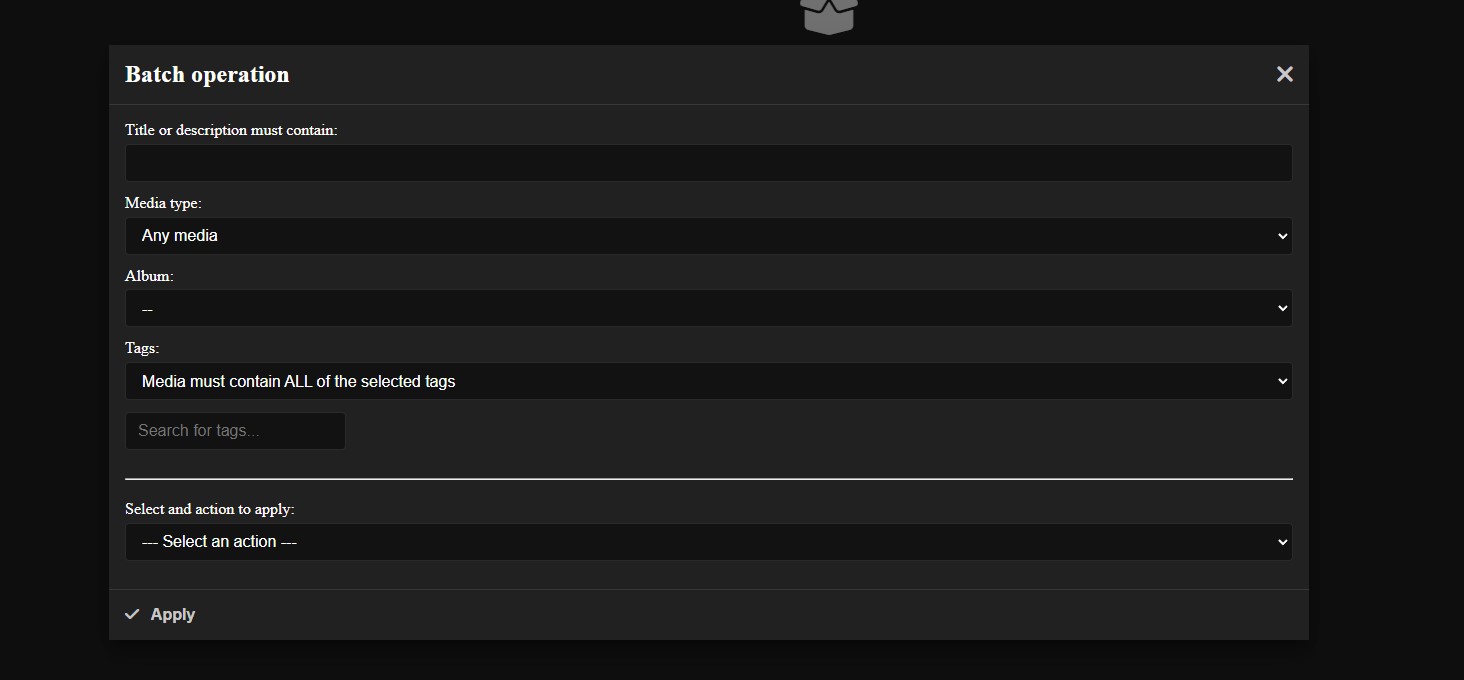
The Batch operation option will let you apply a batch operation to a subset of your vault media assets.
You can filter by title, description, tags or album.
You can apply any of the following operations:
This can be useful if you want to make a change to many media assets, saving you time.
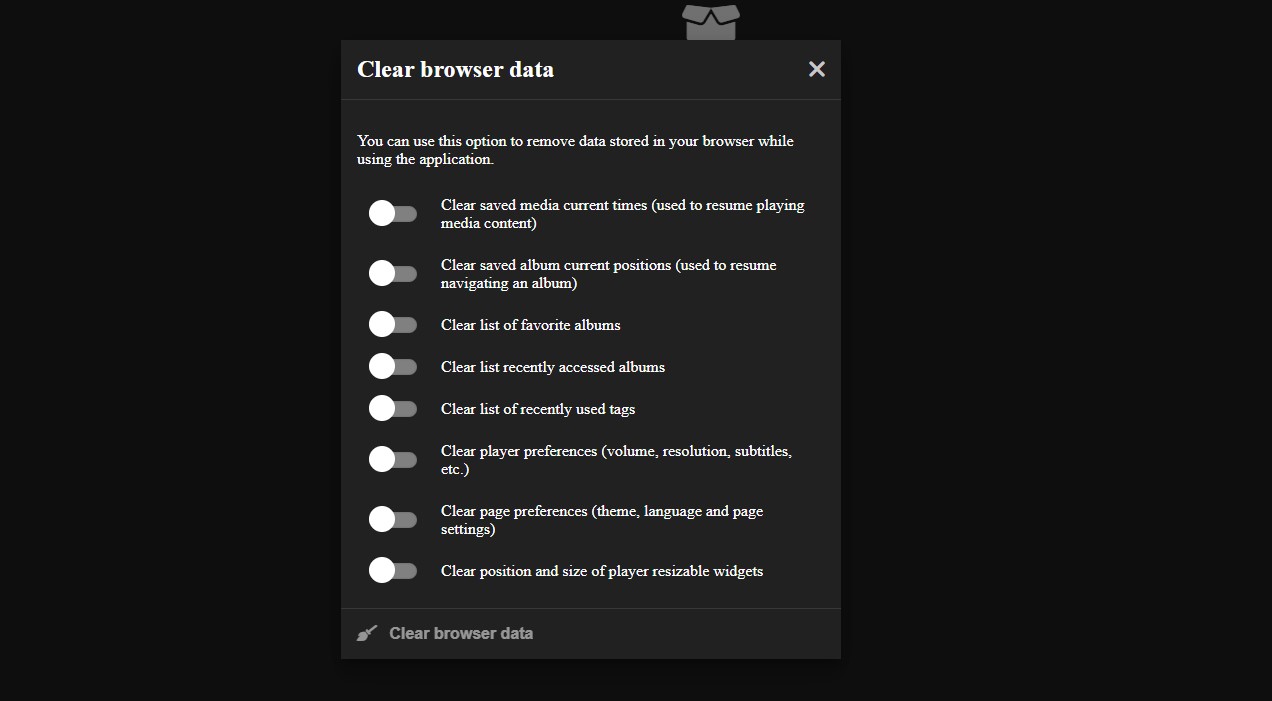
The Clear browser data option will let you clear the data stored in the browser by PersonalMediaVault.
This data is stored for convenience, in order to remember thing like your favorites list, the time you left a media playing at, or the preferences you set (theme, language, sizes, etc.).
You can clear this data in order to reset to the default values or to remove any track of your usage.
The account settings menu has all the options you need to manage the vault account.
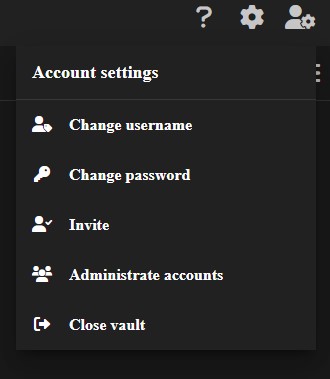
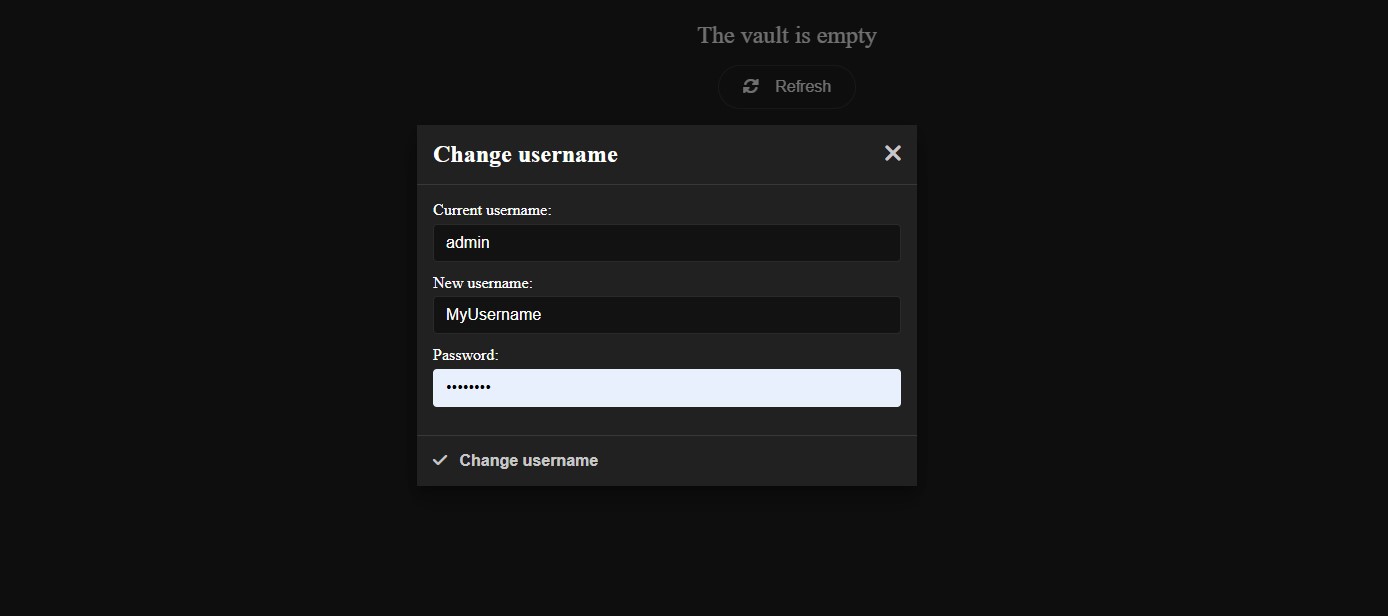
Click in the Change username option in order to change your username. This is the username you use to unlock the vault.
In order to change it, you must also provide your current password.
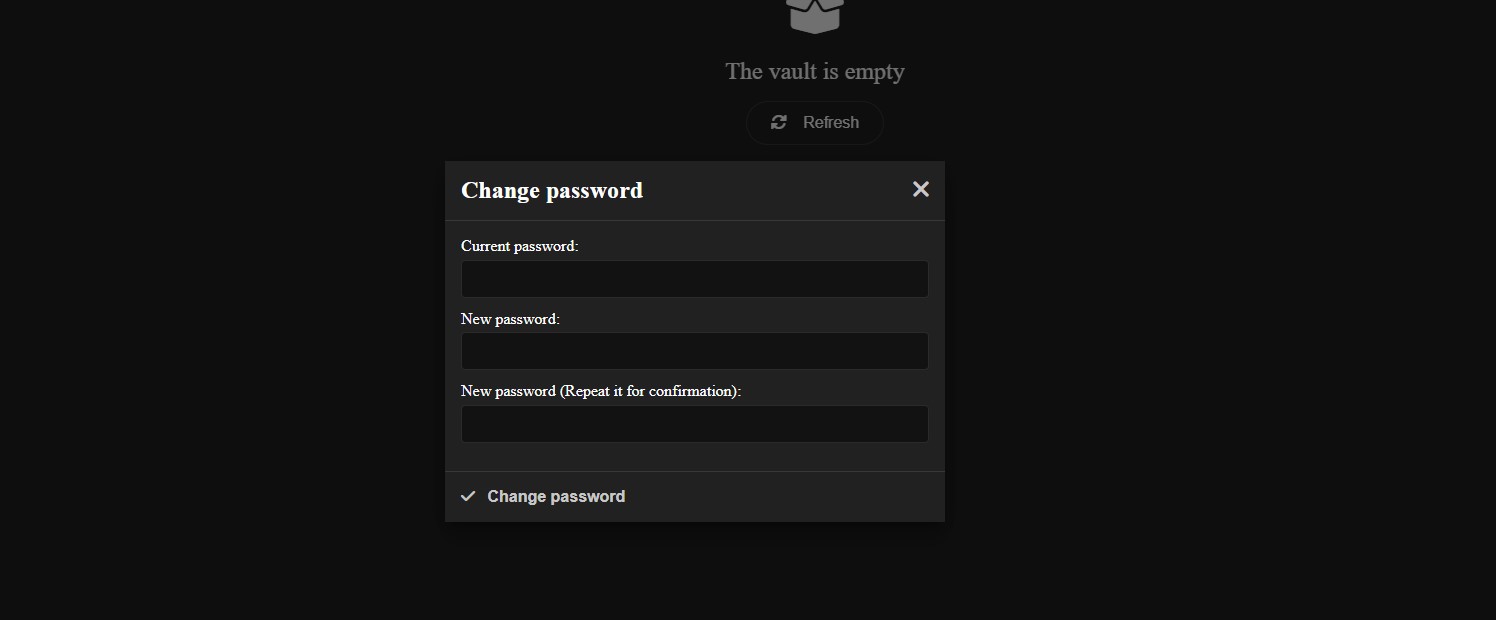
Click in the Change password option in order to change your password. This is the password you use to unlock the vault.
In order to change it, you must also provide your current password.
Make sure to use a very strong password, using letters (uppercase and lowercase), numbers and symbols.
Is it recommended to use a password manager, and making a backup of your password. If you lose your password, it will be impossible to recover the vault content, since it’s encrypted with that password.
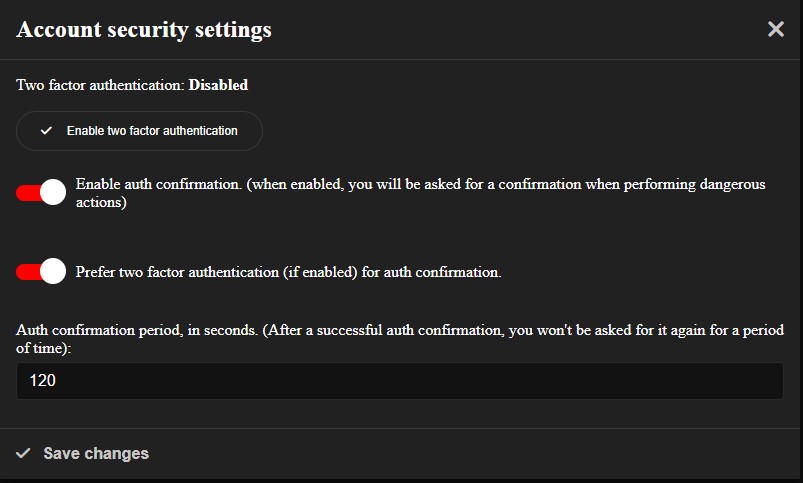
Click in the Account security option in order to change the security settings of your account.
You can configure the following settings:
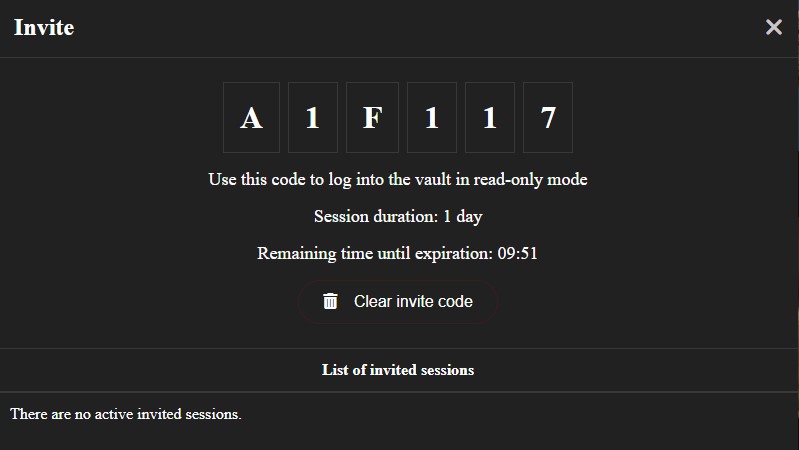
Click in the Invite option in order to invite users or devices to access the vault.
This feature will allow you to generate single-use codes that can be used to access the vault in read-only mode.
The Administrate accounts option will show you a list of extra accounts for your vault, allowing you to create new ones or delete existing ones.
This feature is useful when you have family or friend you want to share the vault with. You can make read-only accounts for them.
If this use case does not fit your needs, you can just ignore this option.
The Close vault option will close the current session, locking the vault and redirecting you to the login screen.
Close the vault when you are not using it to prevent unwanted access.
In order to add media files into your vault, you may use the Upload option in the main menu.
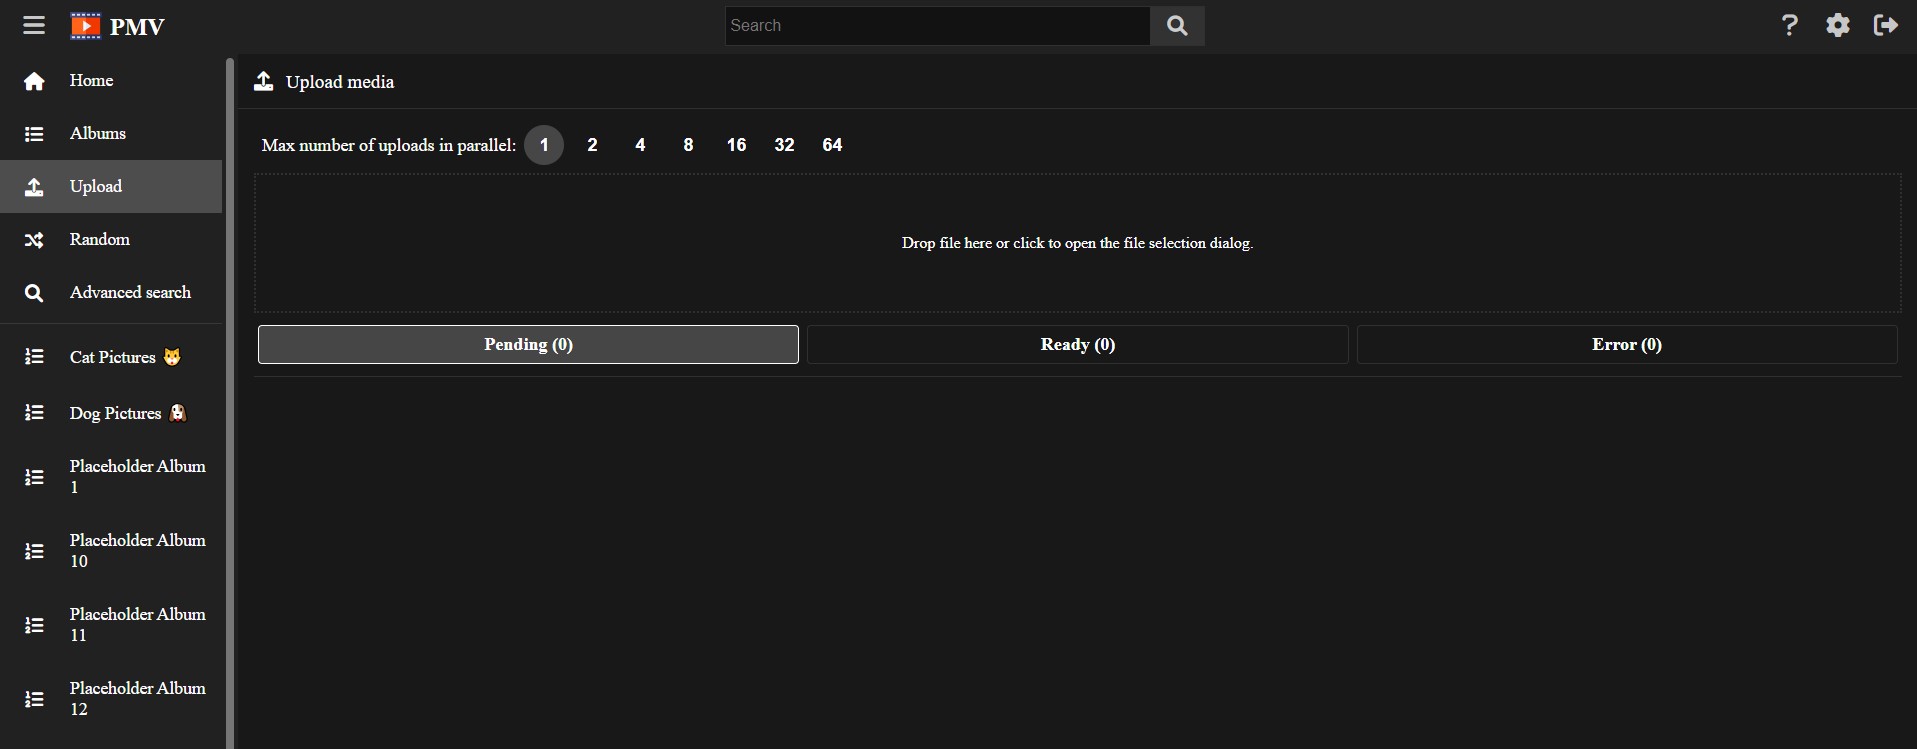
You can drag and drop files into the box with dotted border, or click it to open the file selector.
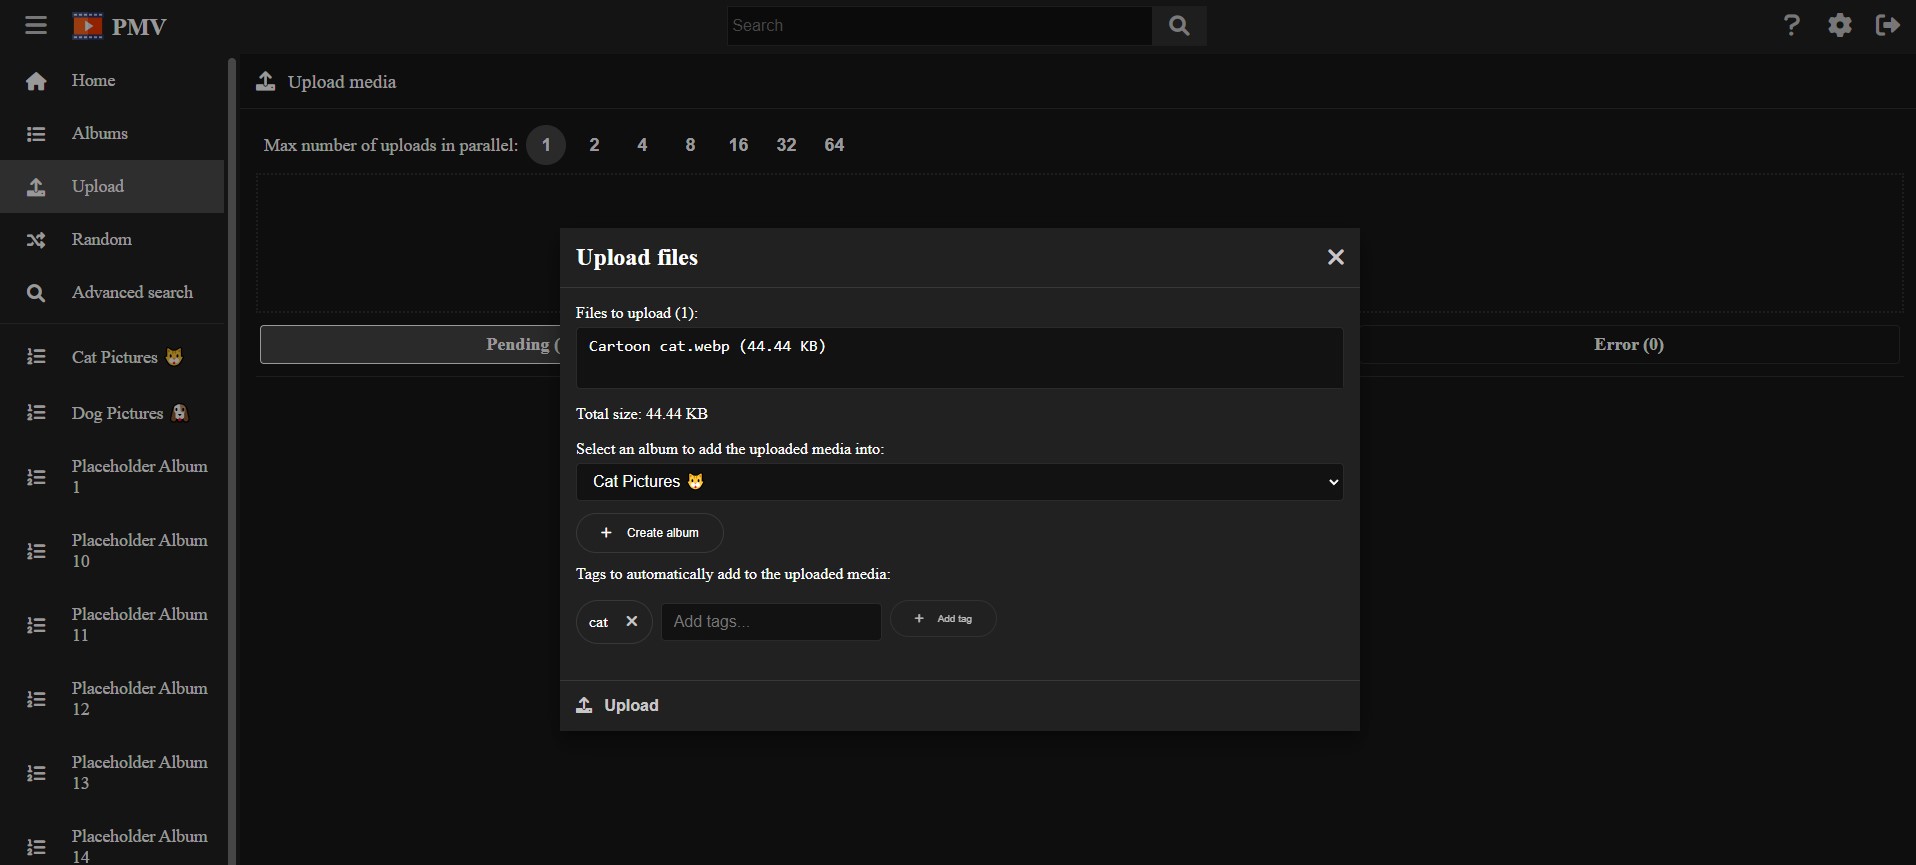
Once you select a file, a modal will open asking you to confirm it, while allowing you to add the media into an album, and add tags. This is very useful when you upload multiple times at once that share some tags.
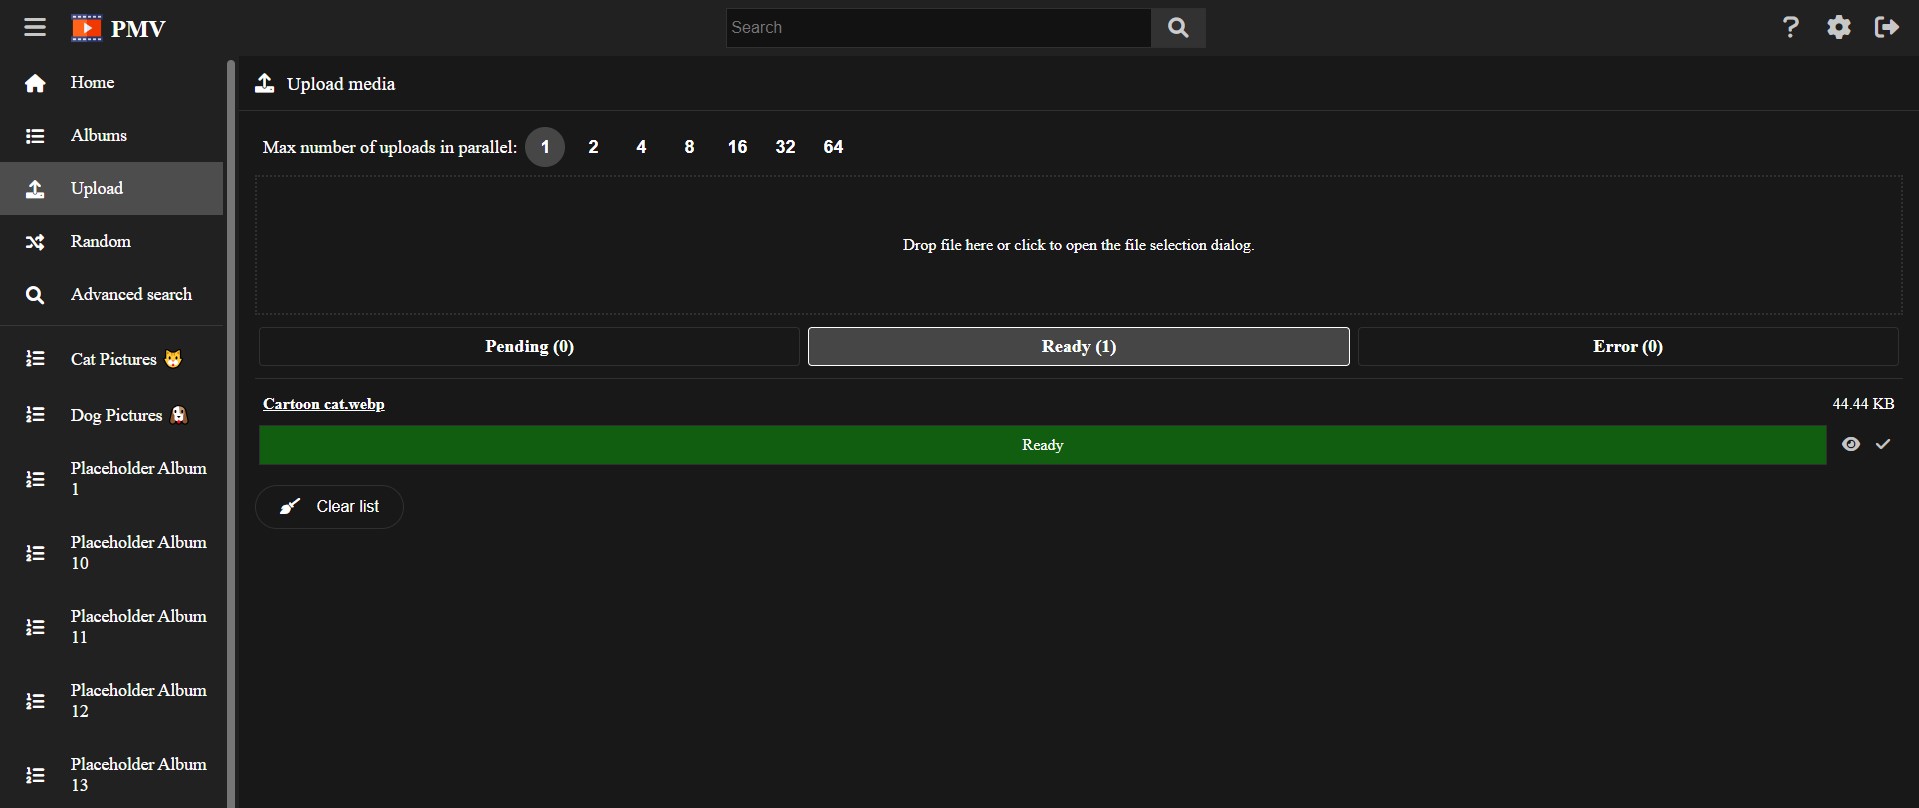
When the upload process finishes, you can check the uploaded media in the Ready tab.
If the upload process fails for some reason, it will be placed in the Error tab.
You can easily change the max number of uploads in parallel to speed up an upload process of many items.
By default it is 1, but you can increase it up to 64, and it will take effect even in the middle of the upload process, so do not worry changing it to upload the speed if you need it.
There is a inconvenience when doing this, when adding into an album, parallel uploads will place the items in an arbitrary order, depending on how fast the upload finishes. Thats is why, when uploading items into an album in order, usually you will prefer uploading one by one.
When selecting a video in the media vault, the video player will be used in order to play it.
The PersonalMediaVault video player is a feature rich player based on the YouTube video player:
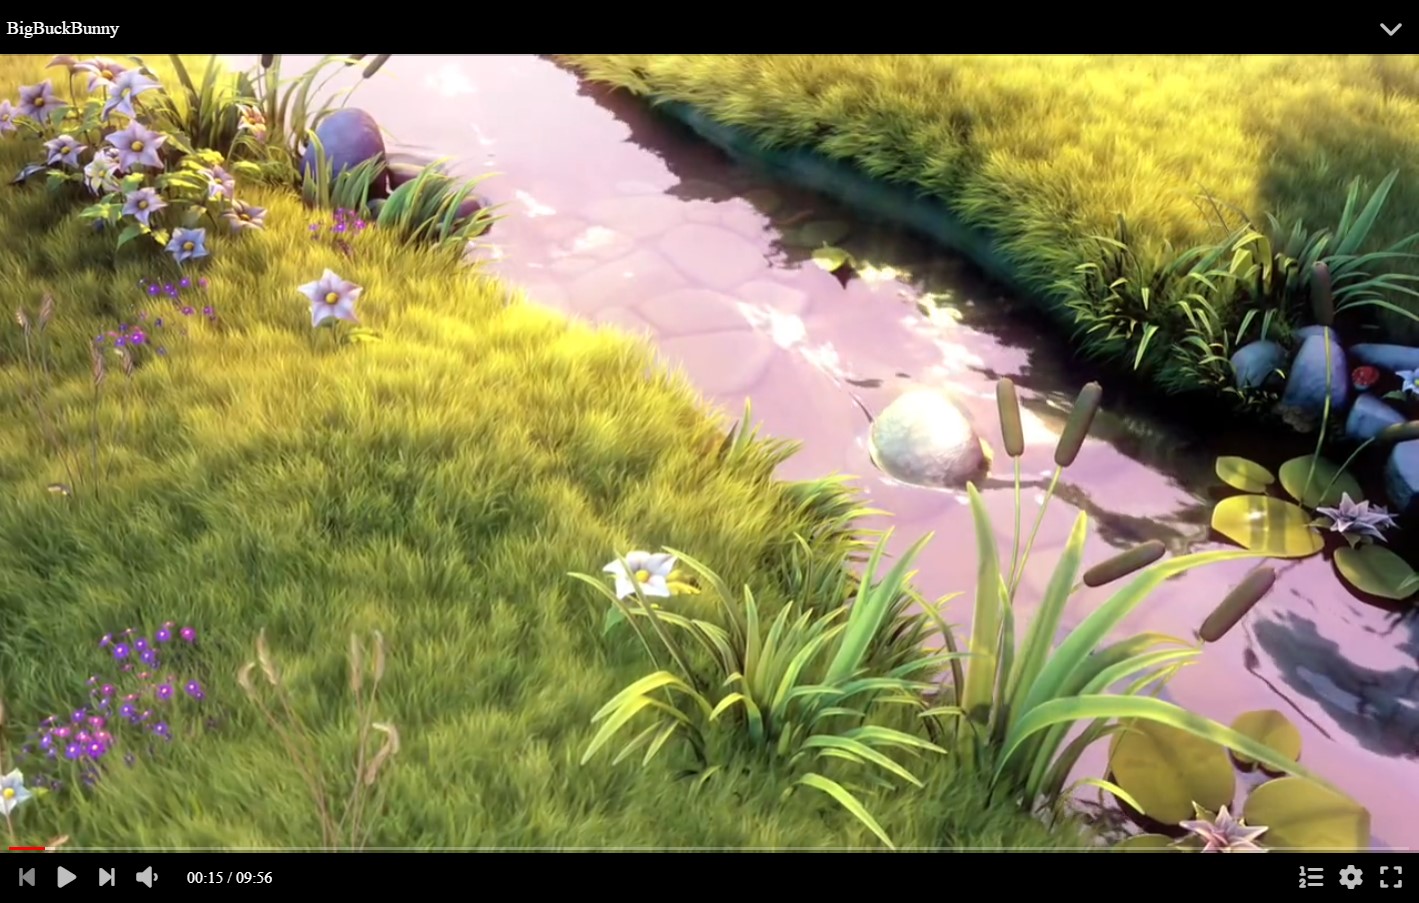
In order to play or pause, you can simply click the player at the center, use the play button in the player controls bar, or using a keyboard shortcut: Space Bar or K.

In order to change the volume, you can use the volume control in the player controls bar, which displays a slider when hovering it or clicking it. You can also use a keyboard shortcut, being the Up and Down arrow keys, which will change the volume by 5%. You can press Shift while using the vertical arrow keys in order to fine-tune the volume by changing it 1% each key press.
You can mute or un-mute the video by clicking on the volume control in the player controls bar, or using the key M.

By pressing the configuration button or the S key, you can open the video player configuration.

By pressing the full screen button, or the F key, you can toggle the full screen mode for the video player.

You can hover the timeline in order to get the timestamp you are hovering into, and an image preview, if available.

You can click the timeline in order to change the current time.
You can use the Home key to go to the beginning of the video. Also, you can use the End key to go to the end of the video.
You can also use the Left and Right arrow keys to go backward or forward by 5 seconds respectively.
Also, if the player is paused, you can use the dot and comma keys to go backward or forward by a single frame respectively.
You can open the player configuration by pressing the configuration button or the S key.
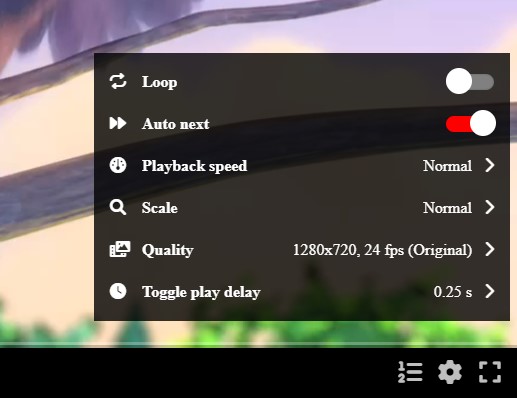
You can find several options:
When right clicking with a mouse, or with a long tap in touch devices, it will open the player context menu, with several options for fast access to them.
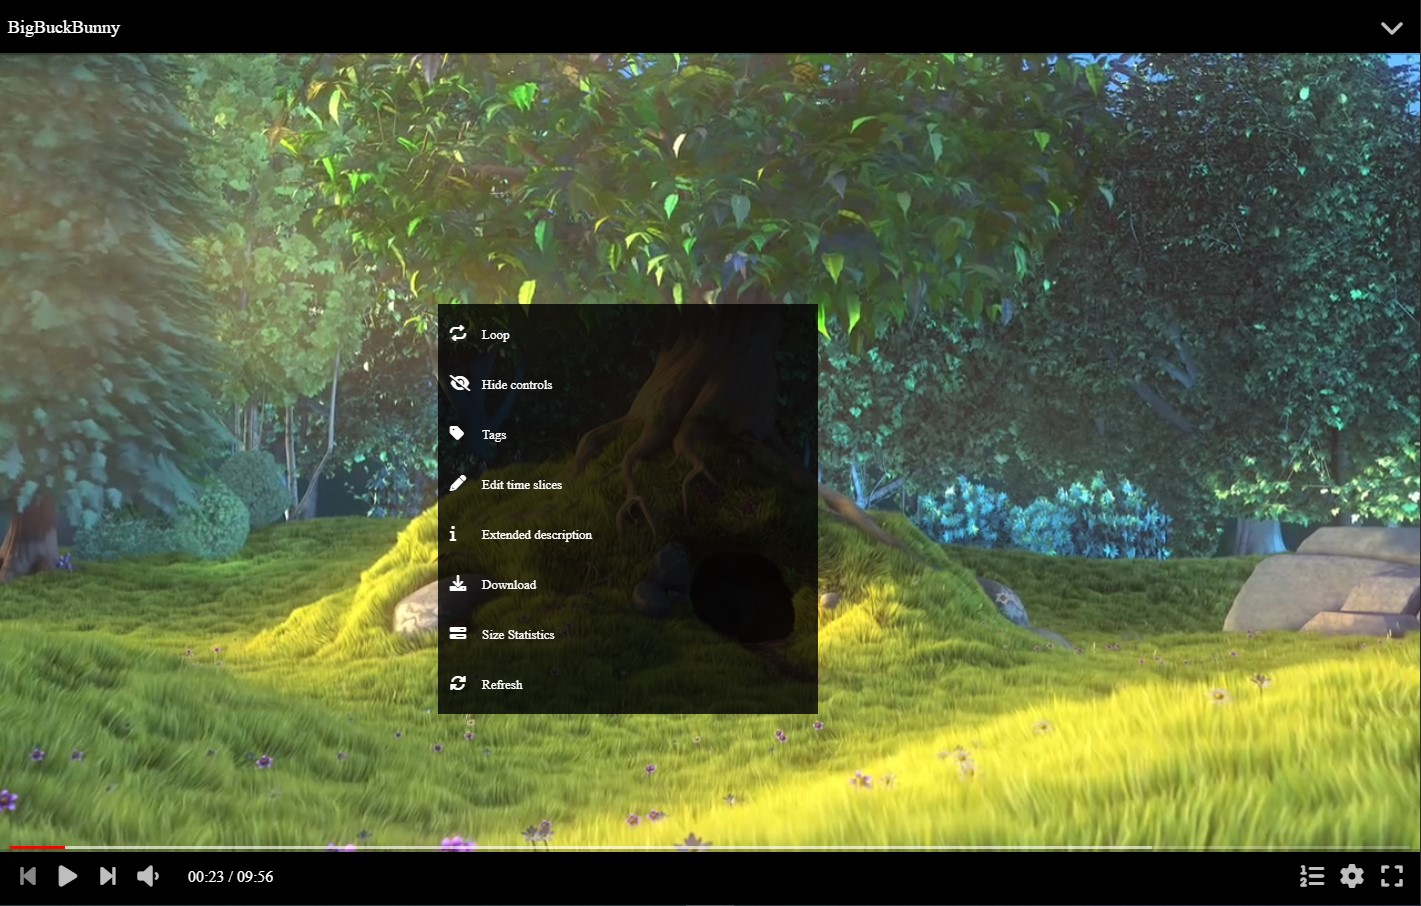
You can find several options:
You can open the player editor by clicking the expand button at the top right corner of the player. Also you can press the E key.
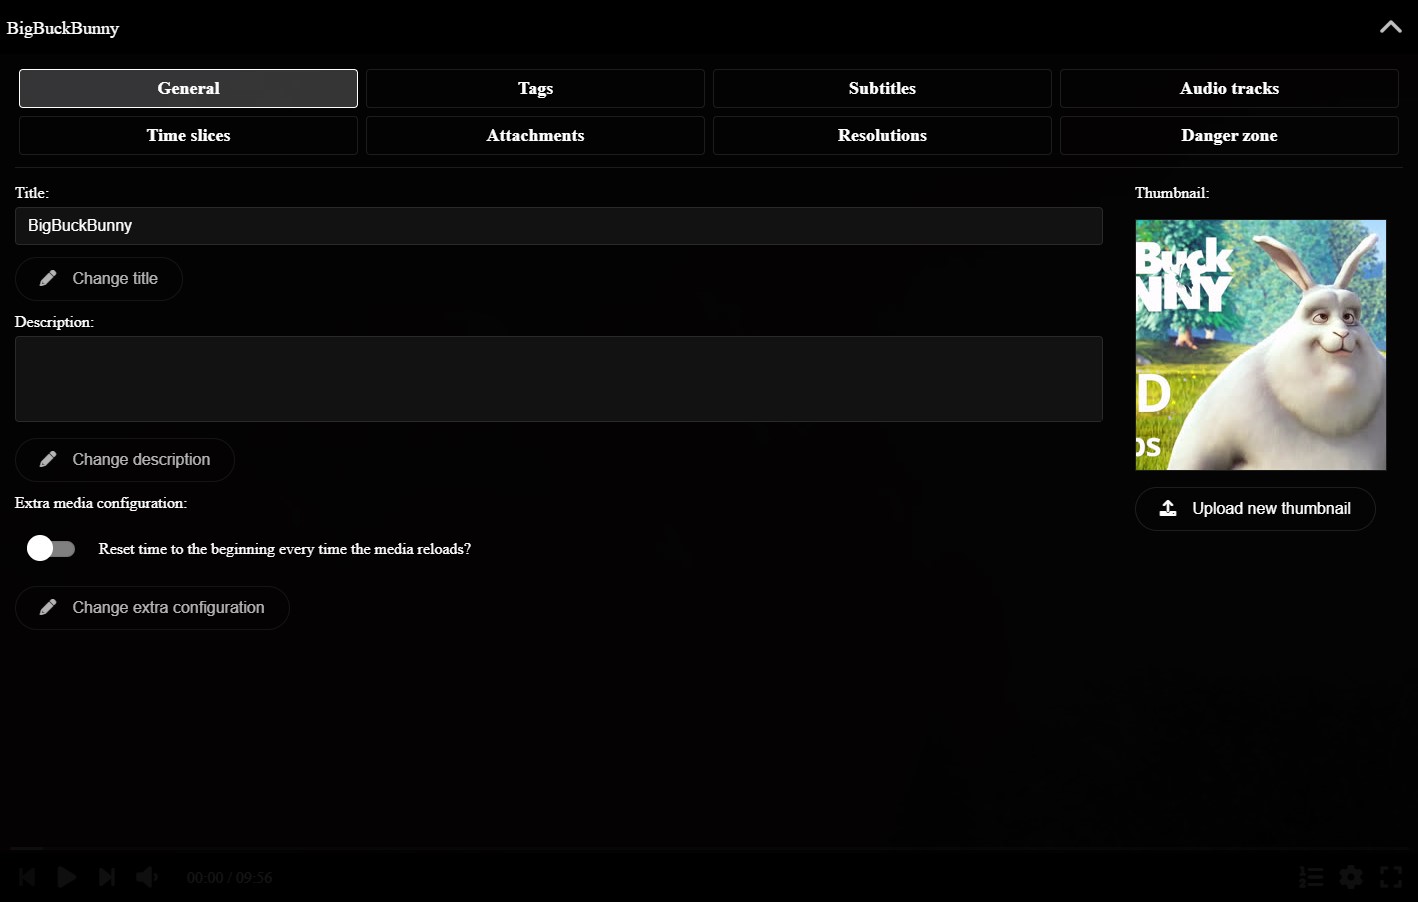
The player editor allows you to change any aspect of the video.
In the General tab you can change the title of the video, its description and thumbnail. You can also enable extra flags, like resetting the time when loading the video every time, instead of restoring the previous time.
In the Tags tab you can change the media tags. You can use the tags to find the media later when searching for it.
You also have other tabs we explain in detail in the sections below.
You can add subtitles to the video in the Subtitles tab of the player editor. You can add them by uploading SubRip files, with .srt extension.
If you upload a Matroska file (.mkv extension) to the vault, the available subtitles will be automatically extracted.
When a video has subtitles, you can select them at the player configuration menu, while also being able to customize their style.
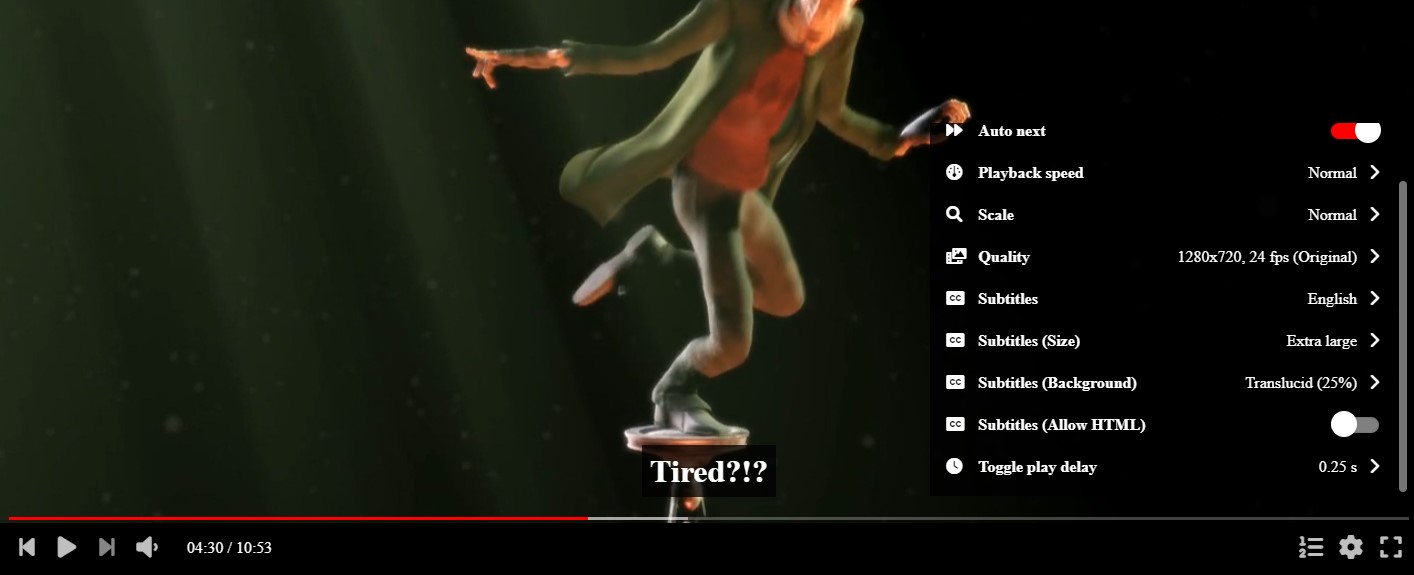
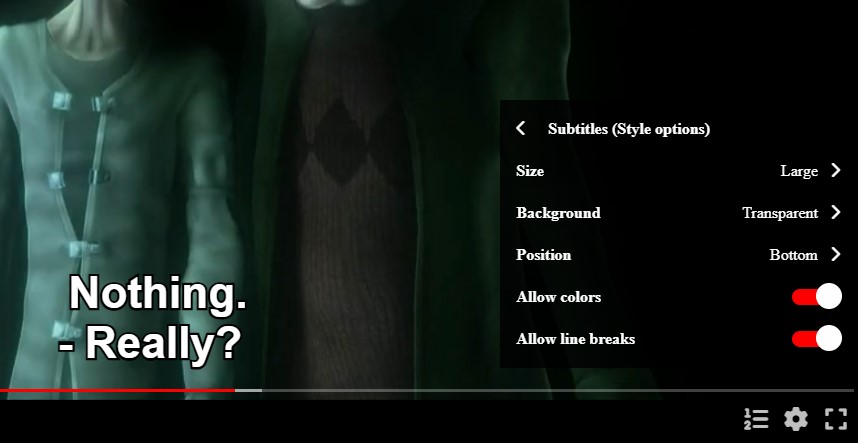
You can add extra audio tracks for the video in the Audio Tracks tab of the player editor. You can add them by uploading audio files, for example with .mp3 extension.
If you upload a Matroska file (.mkv extension) to the vault, the available audio tracks will be automatically extracted.
When a video has extra audio tracks, you can select the one that will play at the player configuration menu.
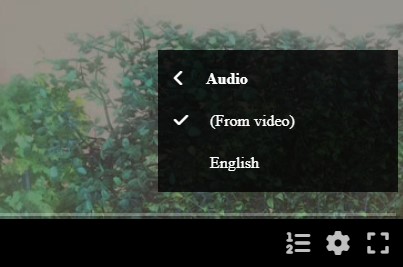
You can split the video in different slices by clicking the option in the context menu, or pressing the N key. This will open an editor where you can add time slices, specifying the start time, and a name.
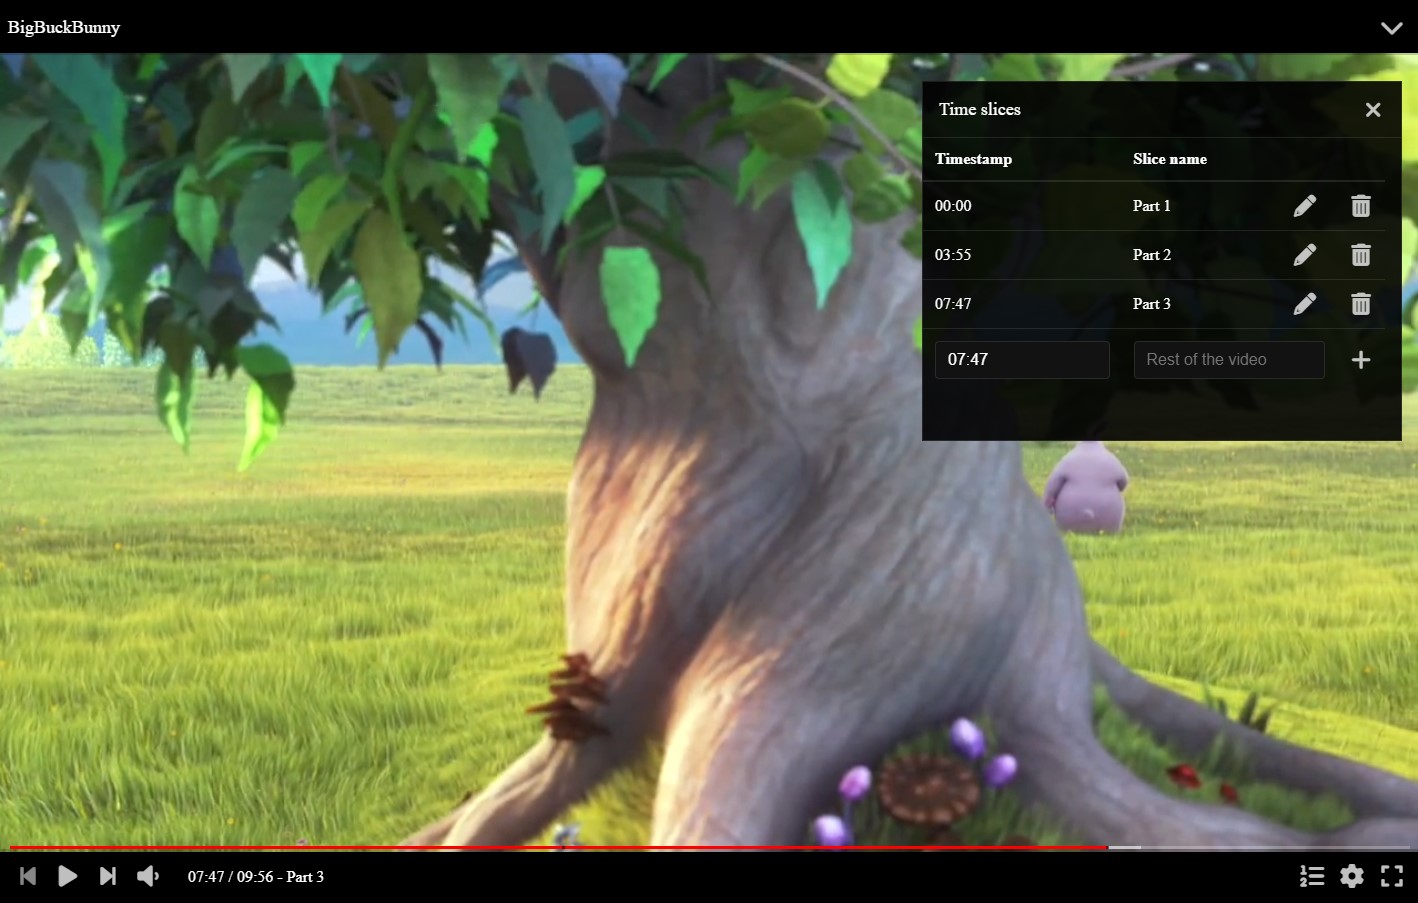
You can also change the time slices in text mode by going to the Time slices tab of the player editor.
You can add attachments to the video by going to the Attachments tab of the player editor.
Attachments are arbitrary files you can store in the vault along with the media file, for example the original uncompressed video or the assets used to make it.
In the Resolutions tab of the player editor, you will be able to resize the video to different resolutions, in order to play it in smaller screens without wasting bandwidth.
Once a resolution is available, you will be able to select it from the player configuration menu.
In the Danger zone tab of the player editor, you can:
When selecting an image in the media vault, the image viewer will be used in order to display it.
The PersonalMediaVault image viewer is very similar to the video player:
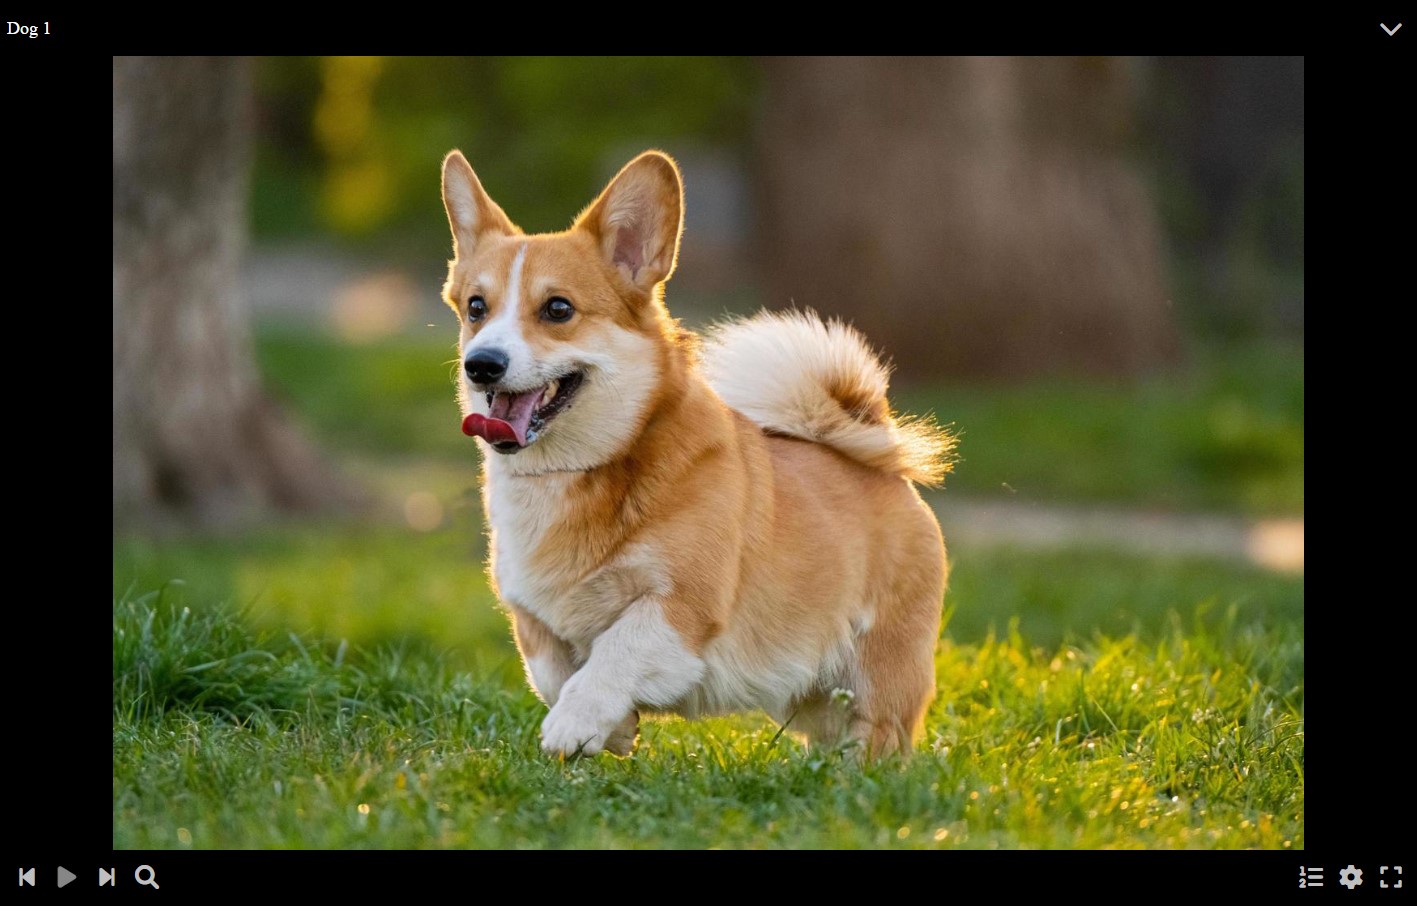
You can change the image scale with the scale control, which displays when hovering or clicking on it. The scale can be a percentage of the display width, or can be set to fit the image into the available space:

By pressing the configuration button or the S key, you can open the image viewer configuration.

By pressing the full screen button, or the F key, you can toggle the full screen mode for the image viewer.

You can open the viewer configuration by pressing the configuration button or the S key.
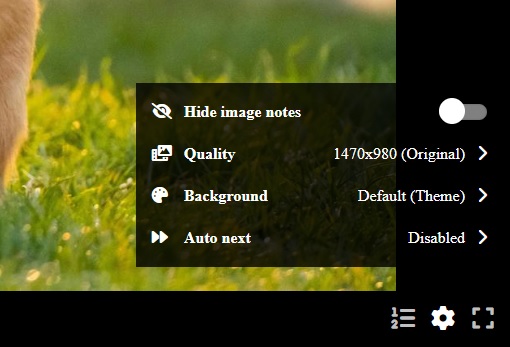
You can find several options:
When right clicking with a mouse, or with a long tap in touch devices, it will open the viewer context menu, with several options for fast access to them.
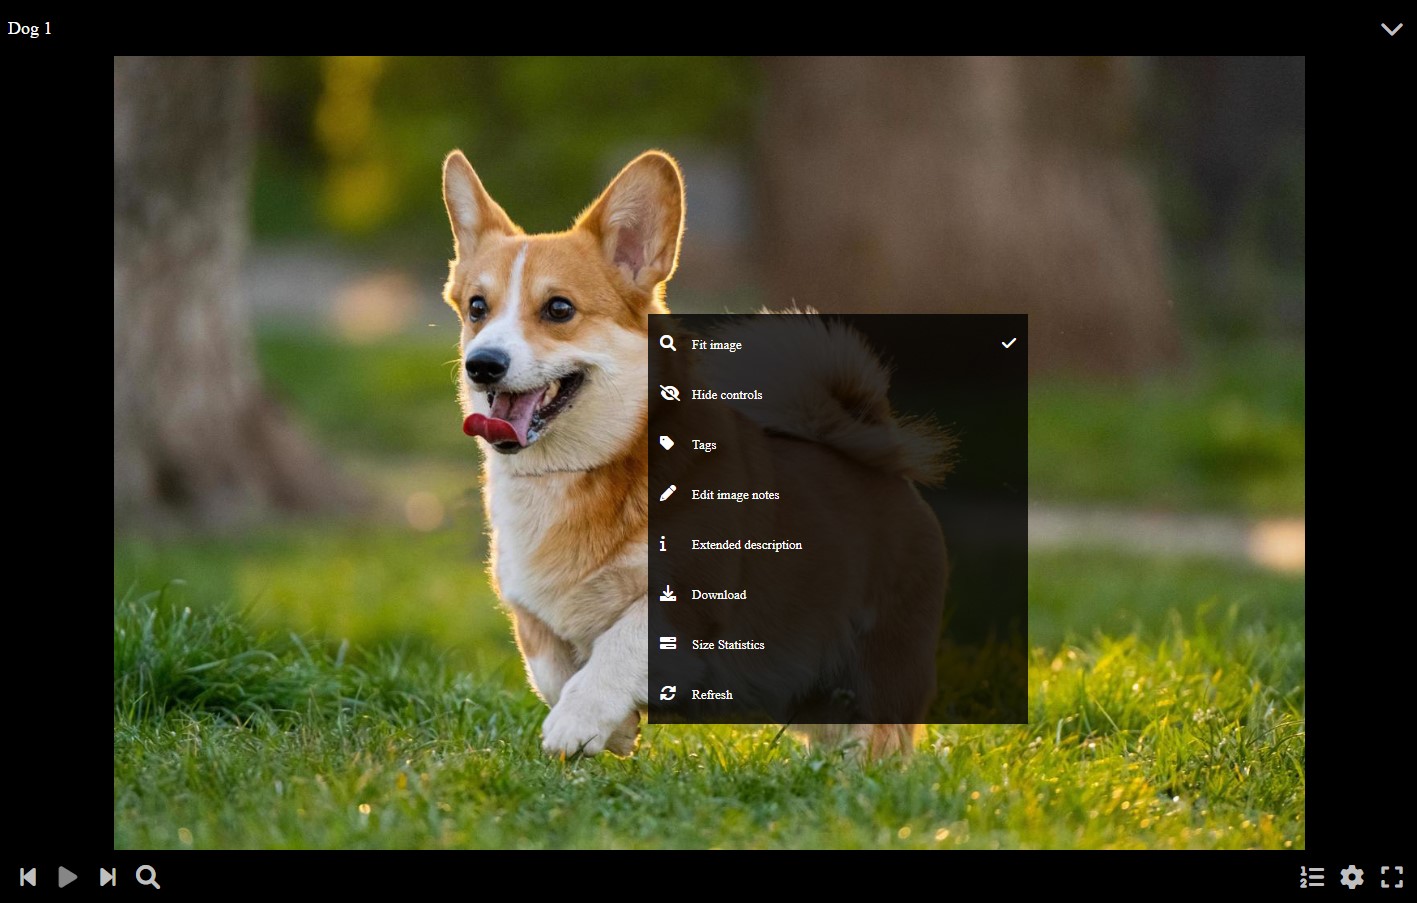
You can find several options:
You can open the viewer editor by clicking the expand button at the top right corner of the viewer. Also you can press the E key.
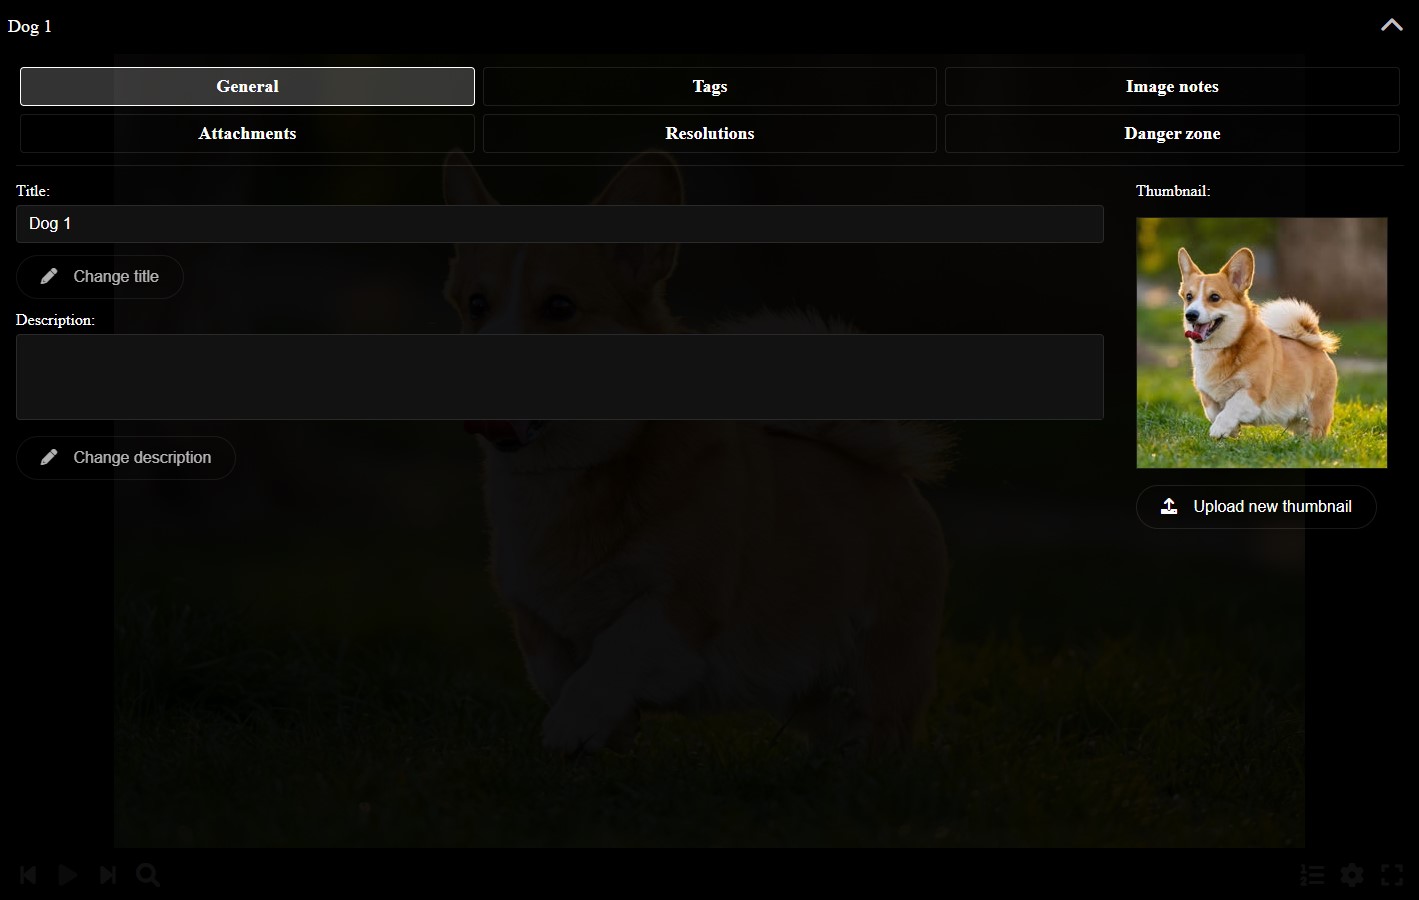
The viewer editor allows you to change any aspect of the image.
In the General tab you can change the title of the image, its description and thumbnail.
In the Tags tab you can change the media tags. You can use the tags to find the media later when searching for it.
You also have other tabs we explain in detail in the sections below.
You can add annotation to the image by clicking the option in the context menu, or pressing the N key. This will toggle a mode where you can drag in order to add notes to the image, while being able to move and resize the existing ones.
When out of the image notes editor mode, they will be displayed as translucid squares that will display its corresponding text by hovering or clicking on them.
You can use image notes, for example, to name elements of the image, add extra information or translate texts in a foreign language.
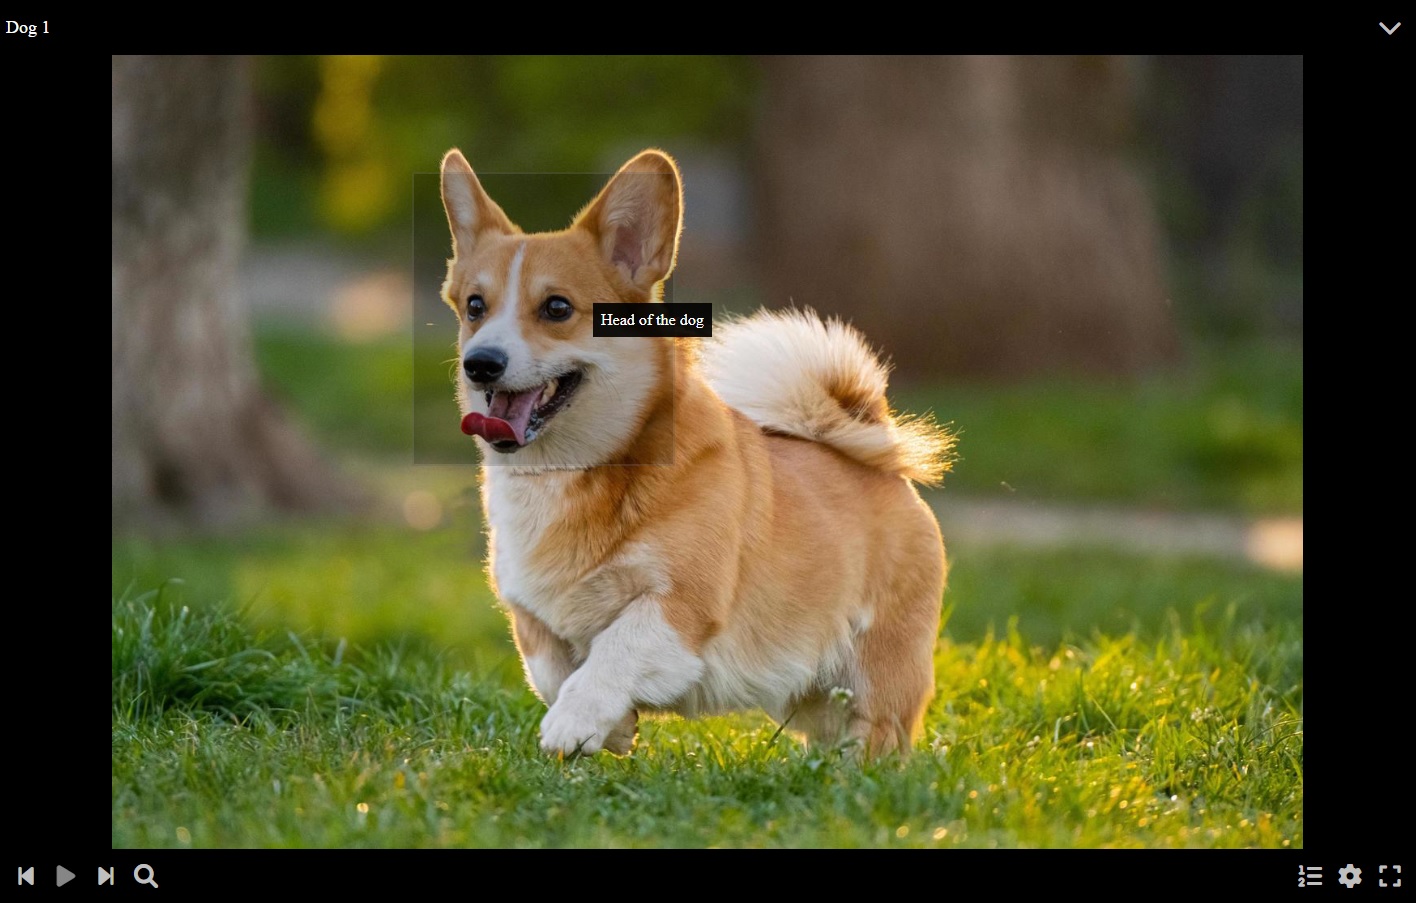
You can also change the image notes in text mode by going to the Image Notes tab of the viewer editor, very useful to import and export notes.
You can add attachments to the video by going to the Attachments tab of the viewer editor.
Attachments are arbitrary files you can store in the vault along with the media file, for example the original uncompressed image or the assets used to make it.
In the Resolutions tab of the viewer editor, you will be able to resize the image to different resolutions, in order to display it in smaller screens without wasting bandwidth.
Once a resolution is available, you will be able to select it from the viewer configuration menu.
In the Danger zone tab of the viewer editor, you can:
When selecting an audio in the media vault, the audio player will be used in order to play it.
The PersonalMediaVault video player is very similar to the video player, adapted for audio files:
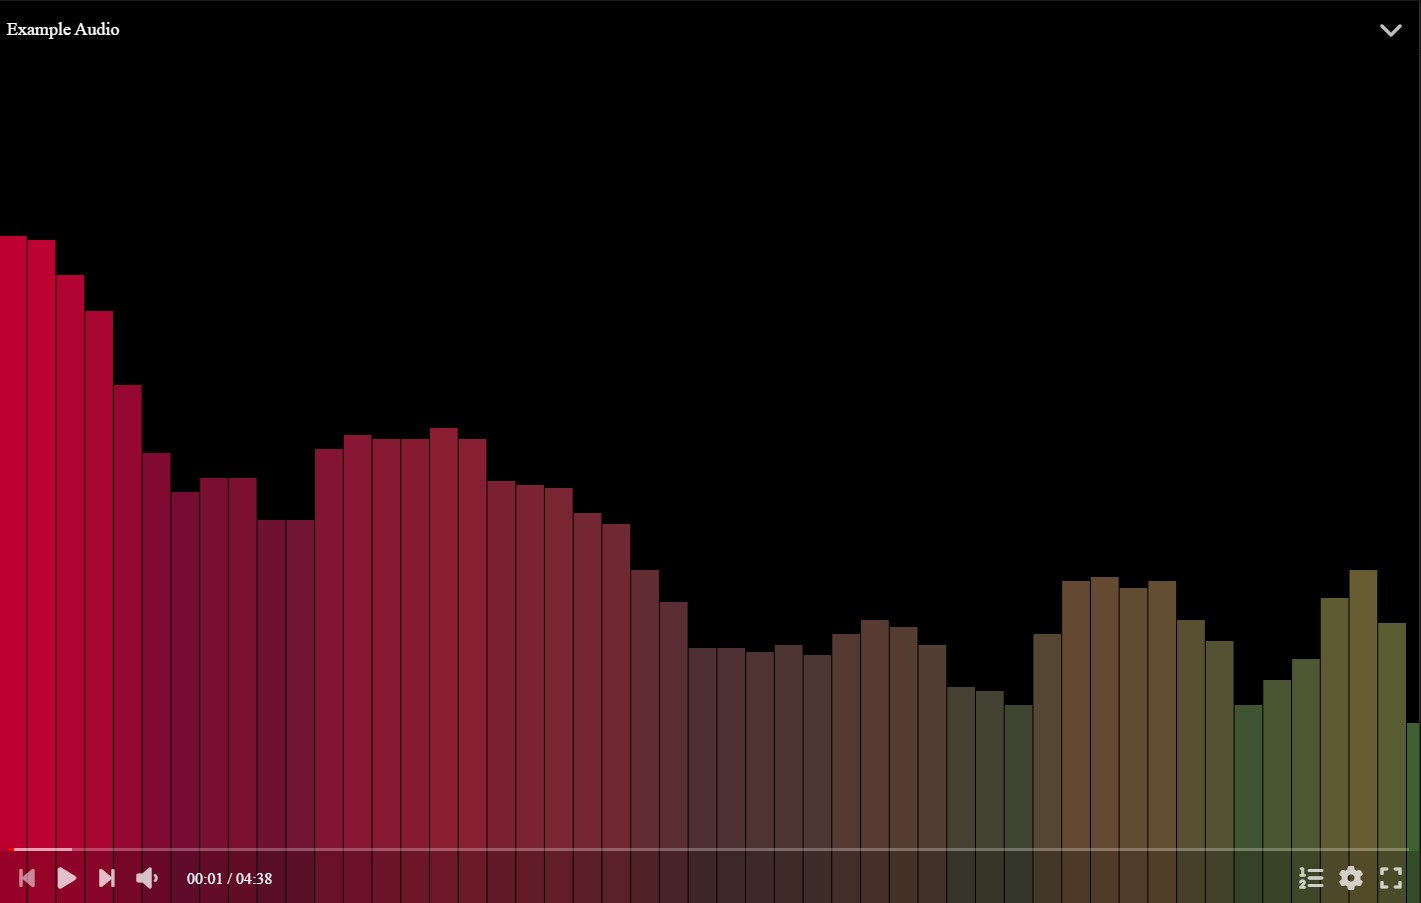
In order to play or pause, you can simply click the player at the center, use the play button in the player controls bar, or using a keyboard shortcut: Space Bar or K.

In order to change the volume, you can use the volume control in the player controls bar, which displays a slider when hovering it or clicking it. You can also use a keyboard shortcut, being the Up and Down arrow keys, which will change the volume by 5%. You can press Shift while using the vertical arrow keys in order to fine-tune the volume by changing it 1% each key press.
You can mute or un-mute the audio by clicking on the volume control in the player controls bar, or using the key M.

By pressing the configuration button or the S key, you can open the audio player configuration.

By pressing the full screen button, or the F key, you can toggle the full screen mode for the audio player.

You can hover the timeline in order to get the timestamp you are hovering into.

You can click the timeline in order to change the current time.
You can use the Home key to go to the beginning of the audio. Also, you can use the End key to go to the end of the audio.
You can also use the Left and Right arrow keys to go backward or forward by 5 seconds respectively.
Also, if the player is paused, you can use the dot and comma keys to go backward or forward by a single frame respectively.
You can open the player configuration by pressing the configuration button or the S key.
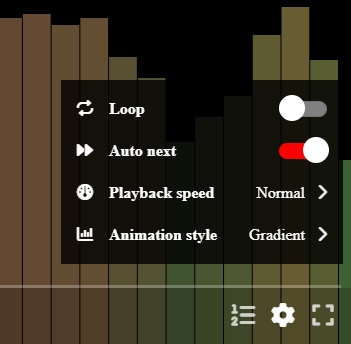
You can find several options:
When right clicking with a mouse, or with a long tap in touch devices, it will open the player context menu, with several options for fast access to them.
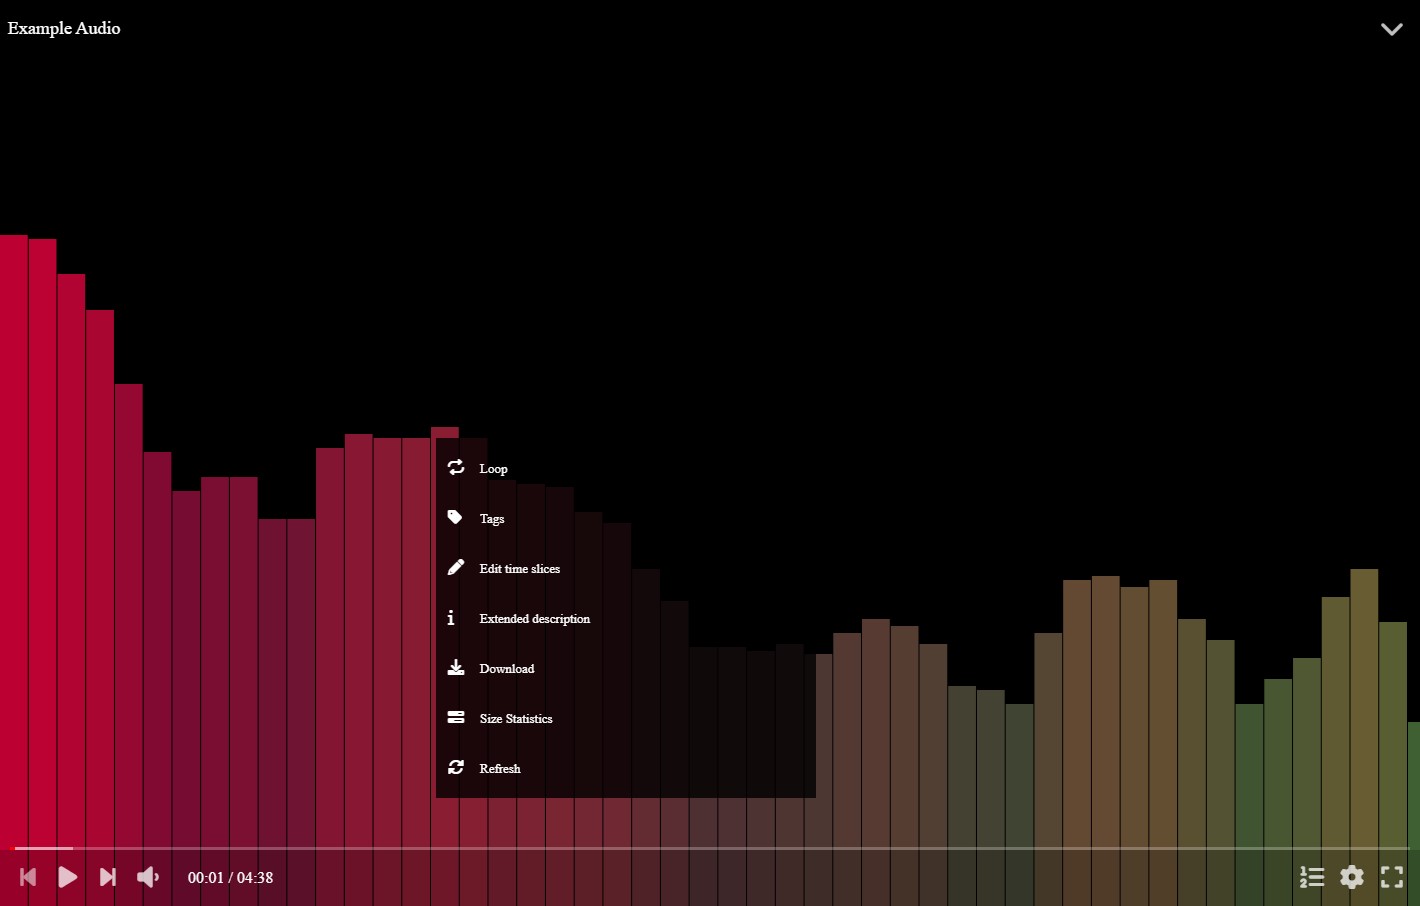
You can find several options:
You can open the player editor by clicking the expand button at the top right corner of the player. Also you can press the E key.
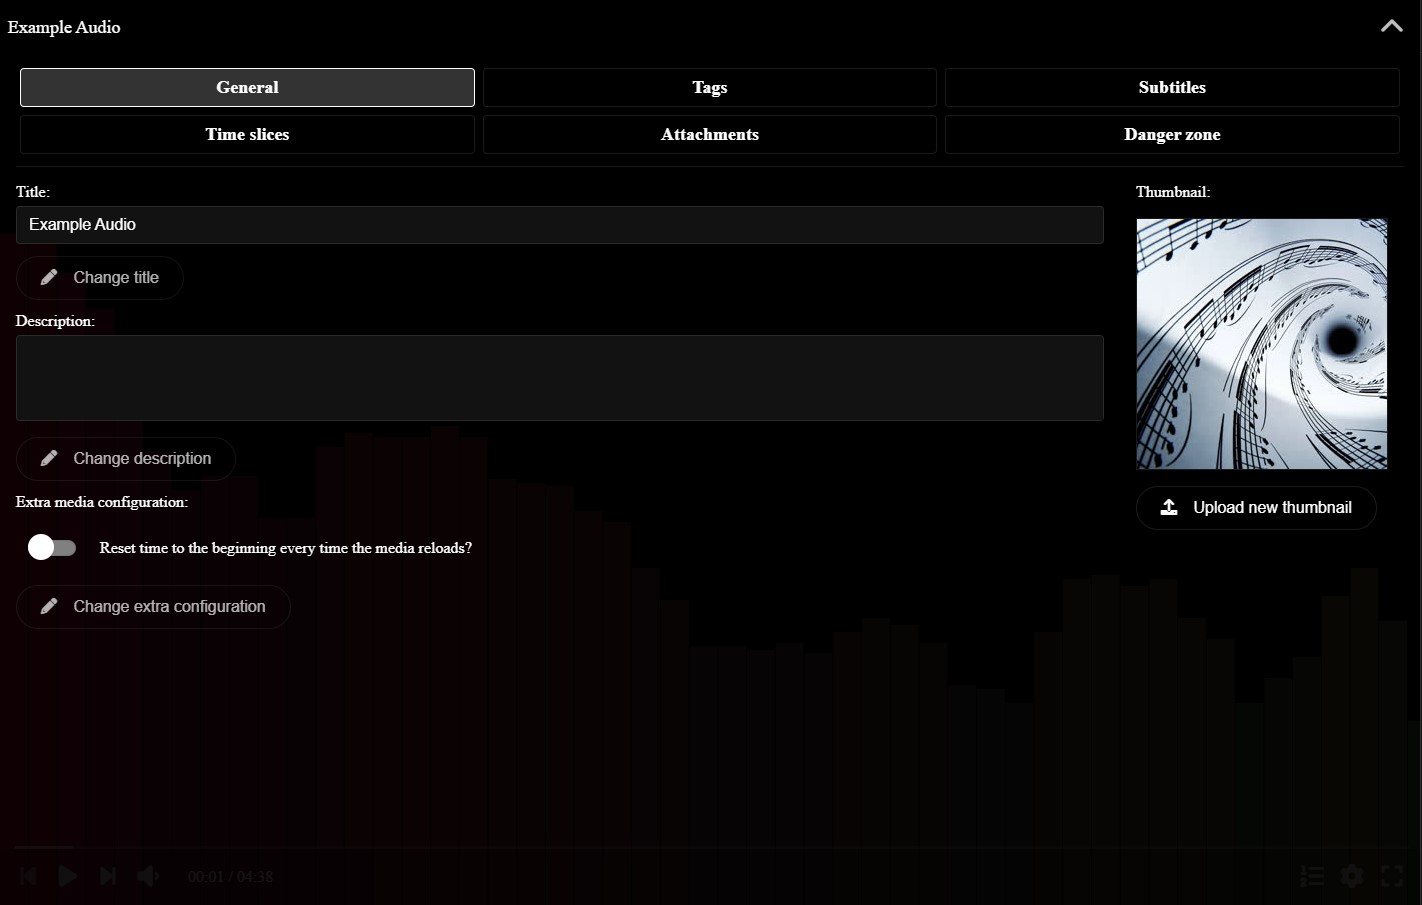
The player editor allows you to change any aspect of the audio.
In the General tab you can change the title of the audio, its description and thumbnail. You can also enable extra flags, like resetting the time when loading the audio every time, instead of restoring the previous time.
In the Tags tab you can change the media tags. You can use the tags to find the media later when searching for it.
You also have other tabs we explain in detail in the sections below.
You can add subtitles to the audio in the Subtitles tab of the player editor. You can add them by uploading SubRip files, with .srt extension.
When an audio has subtitles, you can select them at the player configuration menu, while also being able to customize their style.
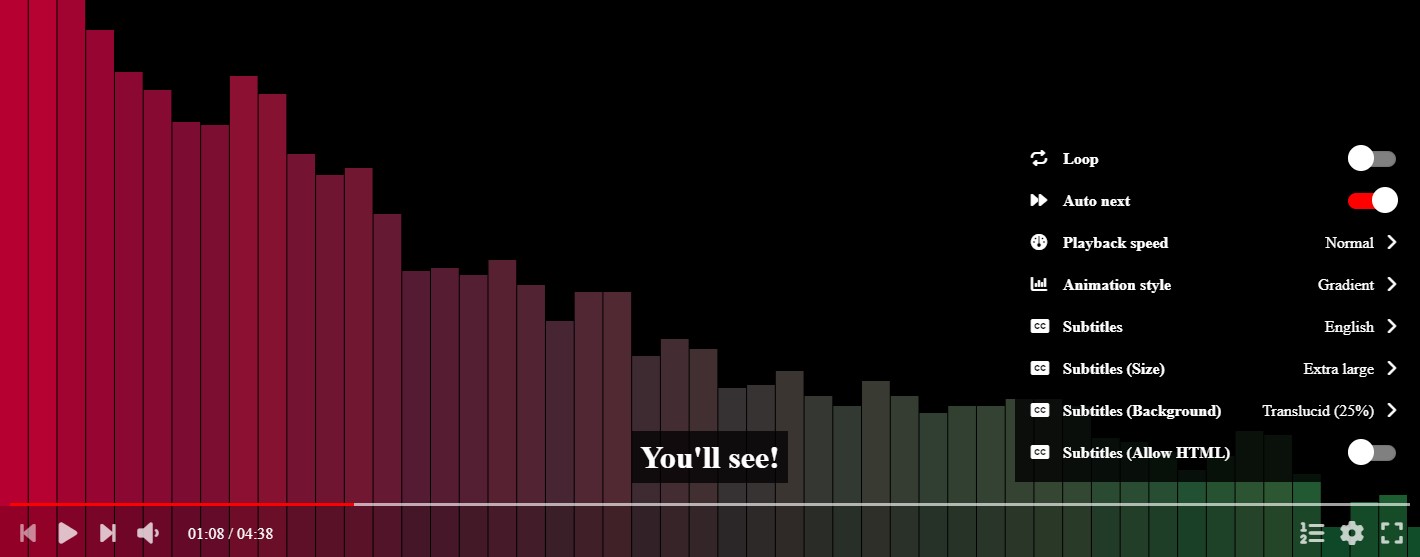
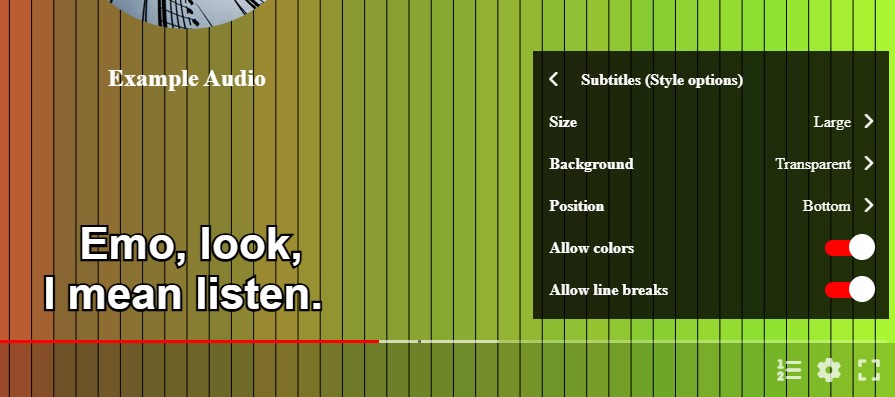
You can split the audio in different slices by clicking the option in the context menu, or pressing the N key. This will open an editor where you can add time slices, specifying the start time, and a name.
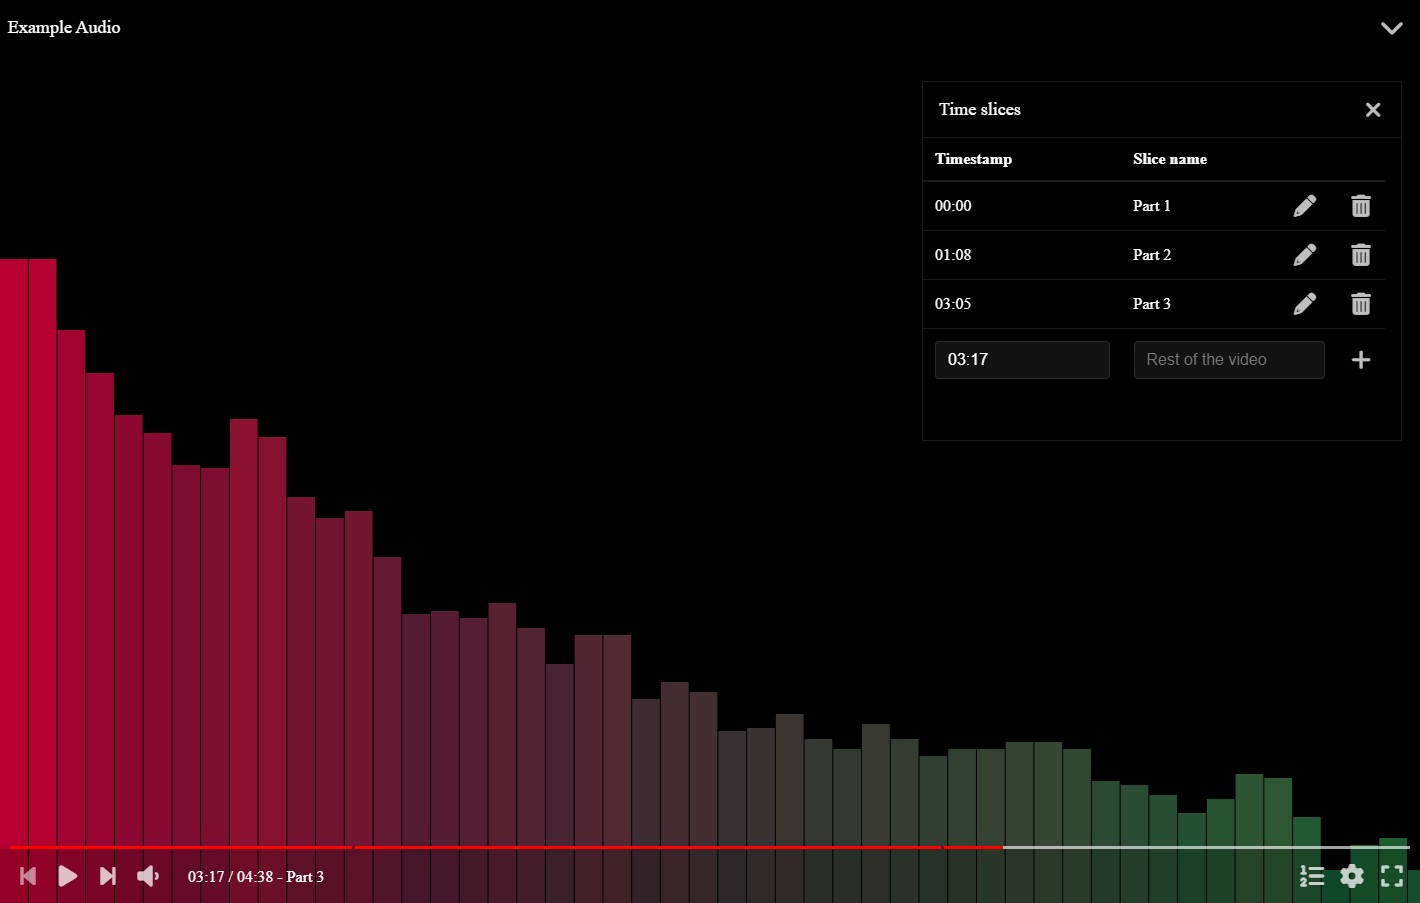
You can also change the time slices in text mode by going to the Time slices tab of the player editor.
You can add attachments to the audio by going to the Attachments tab of the player editor.
Attachments are arbitrary files you can store in the vault along with the media file, for example the original uncompressed audio or the assets used to make it.
In the Danger zone tab of the player editor, you can:
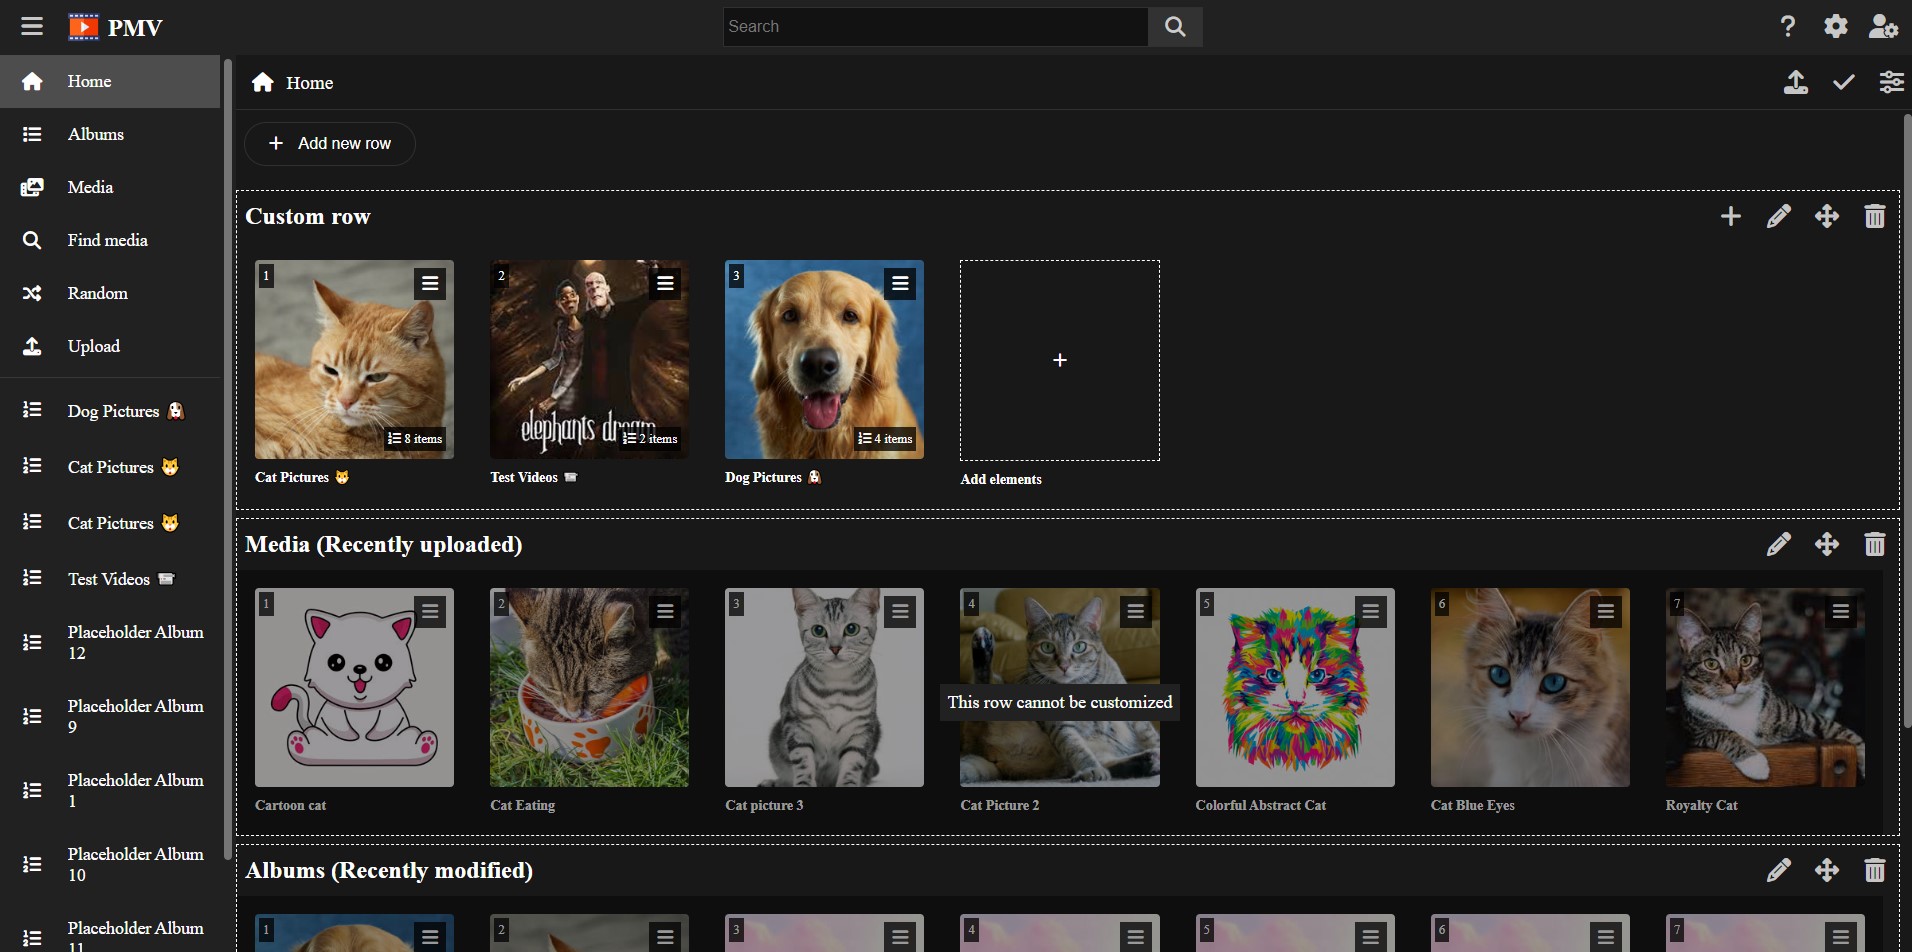
When you unlock the vault, the first page you will see is the Home page.
By default, the home page will show you the most recent media element you added to the vault, along with the most recently updated albums.

This page is very customizable. Click in the pencil icon in order to add custom rows and create your own custom home page for your vault.
The Media page consists on a paginated gallery containing all the media files you stored in your vault.
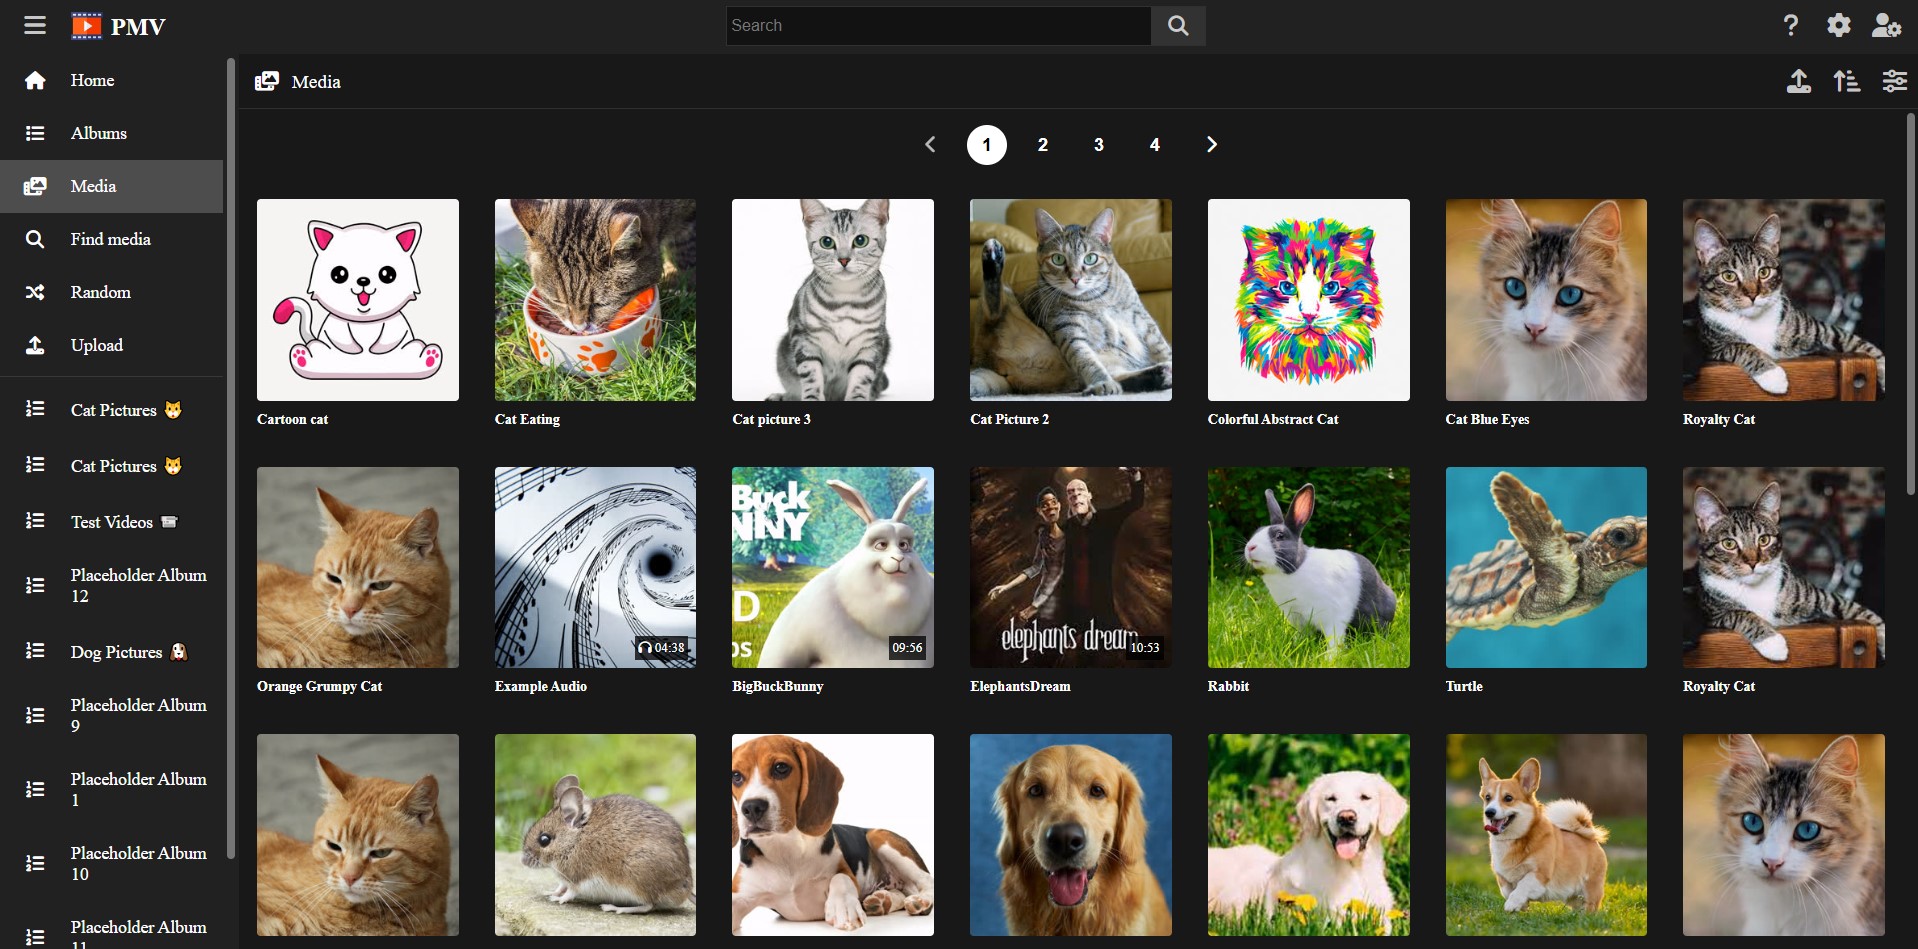
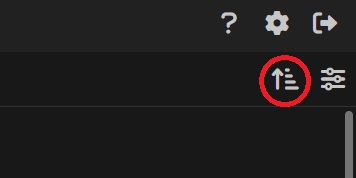
By default, it will show the most recent media files first. You can change this clicking on the arrow icon at the top-right, in order to show the oldest media files first.
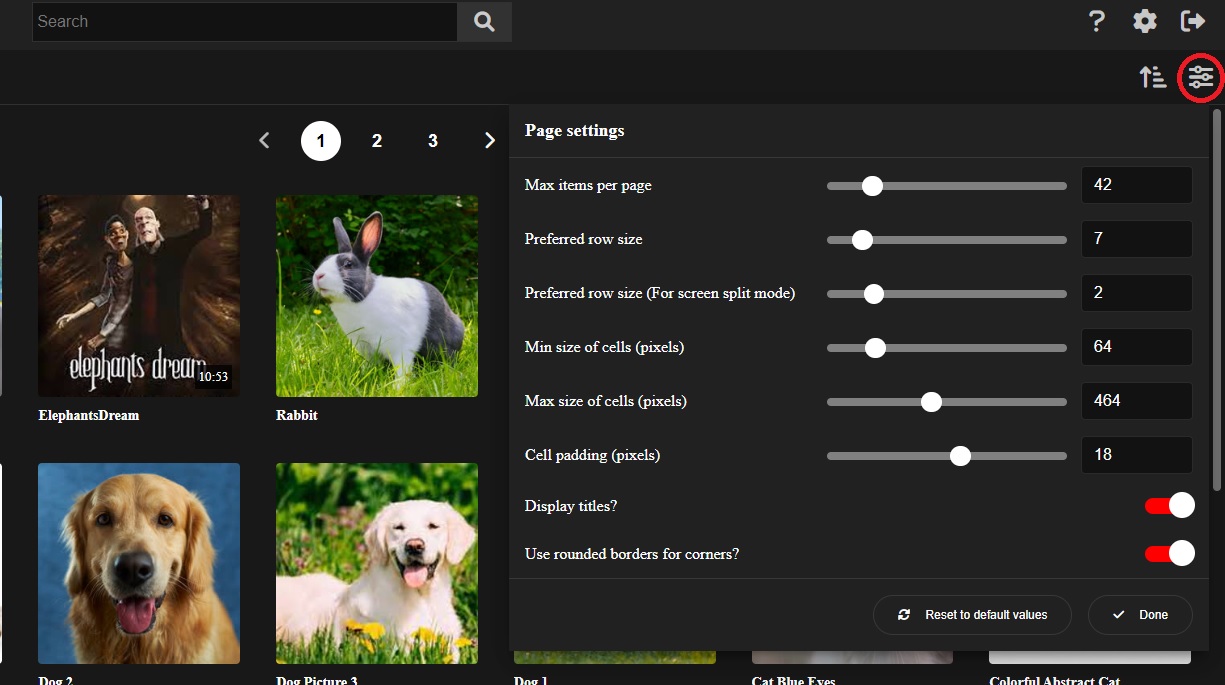
You can also customize the page by clicking in the cog button at the top-right. This will open a modal where you can change:
By typing in the search bar at the top, you can find any album or tag in the vault.
When selecting a tag, it will filter by that tag, showing you a filtered Media page, only showing the media files containing the tag.
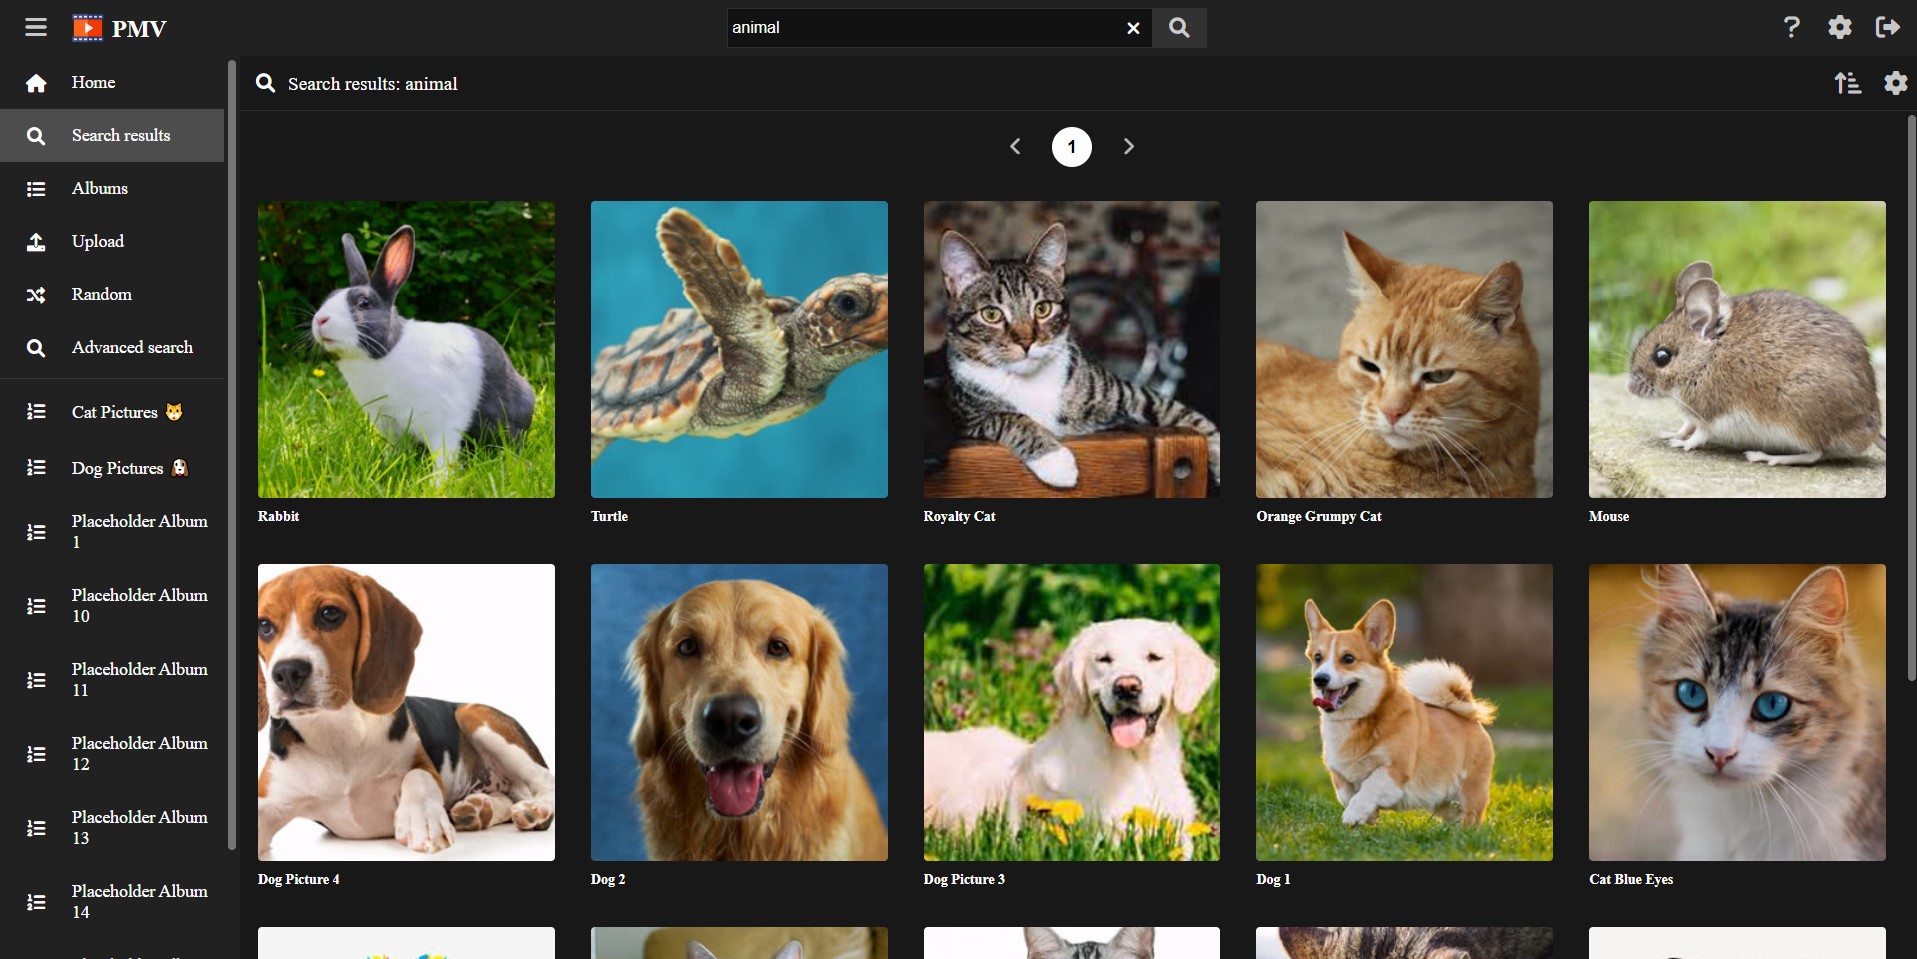
This filter also applies to the Random page, in order to get random, filtered results.
You can clear the filter by clicking on the X button that appears in the search bar when there is an active filter.
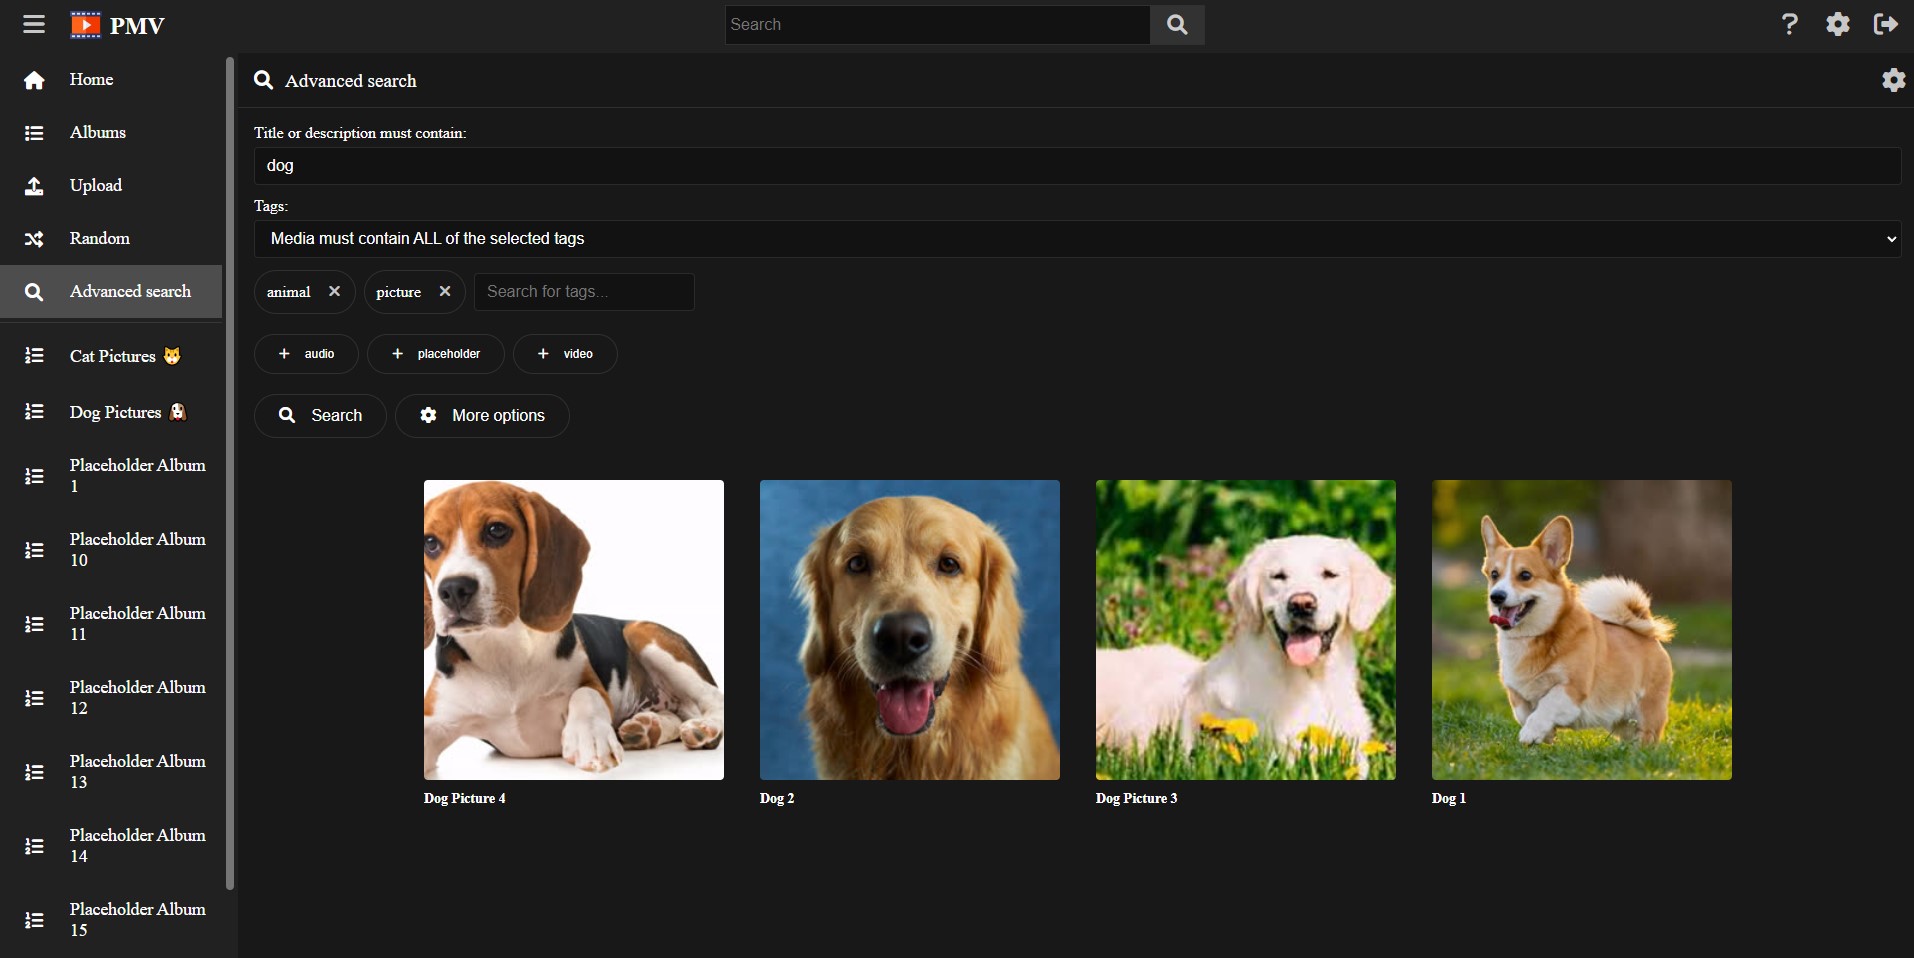
If you want a more advanced search system, in order to find a particular file in your vault, you can use the Find media page. This page will offer you a variety of options like:
Once your filter is set, you can scroll down until you find what you’re looking for.
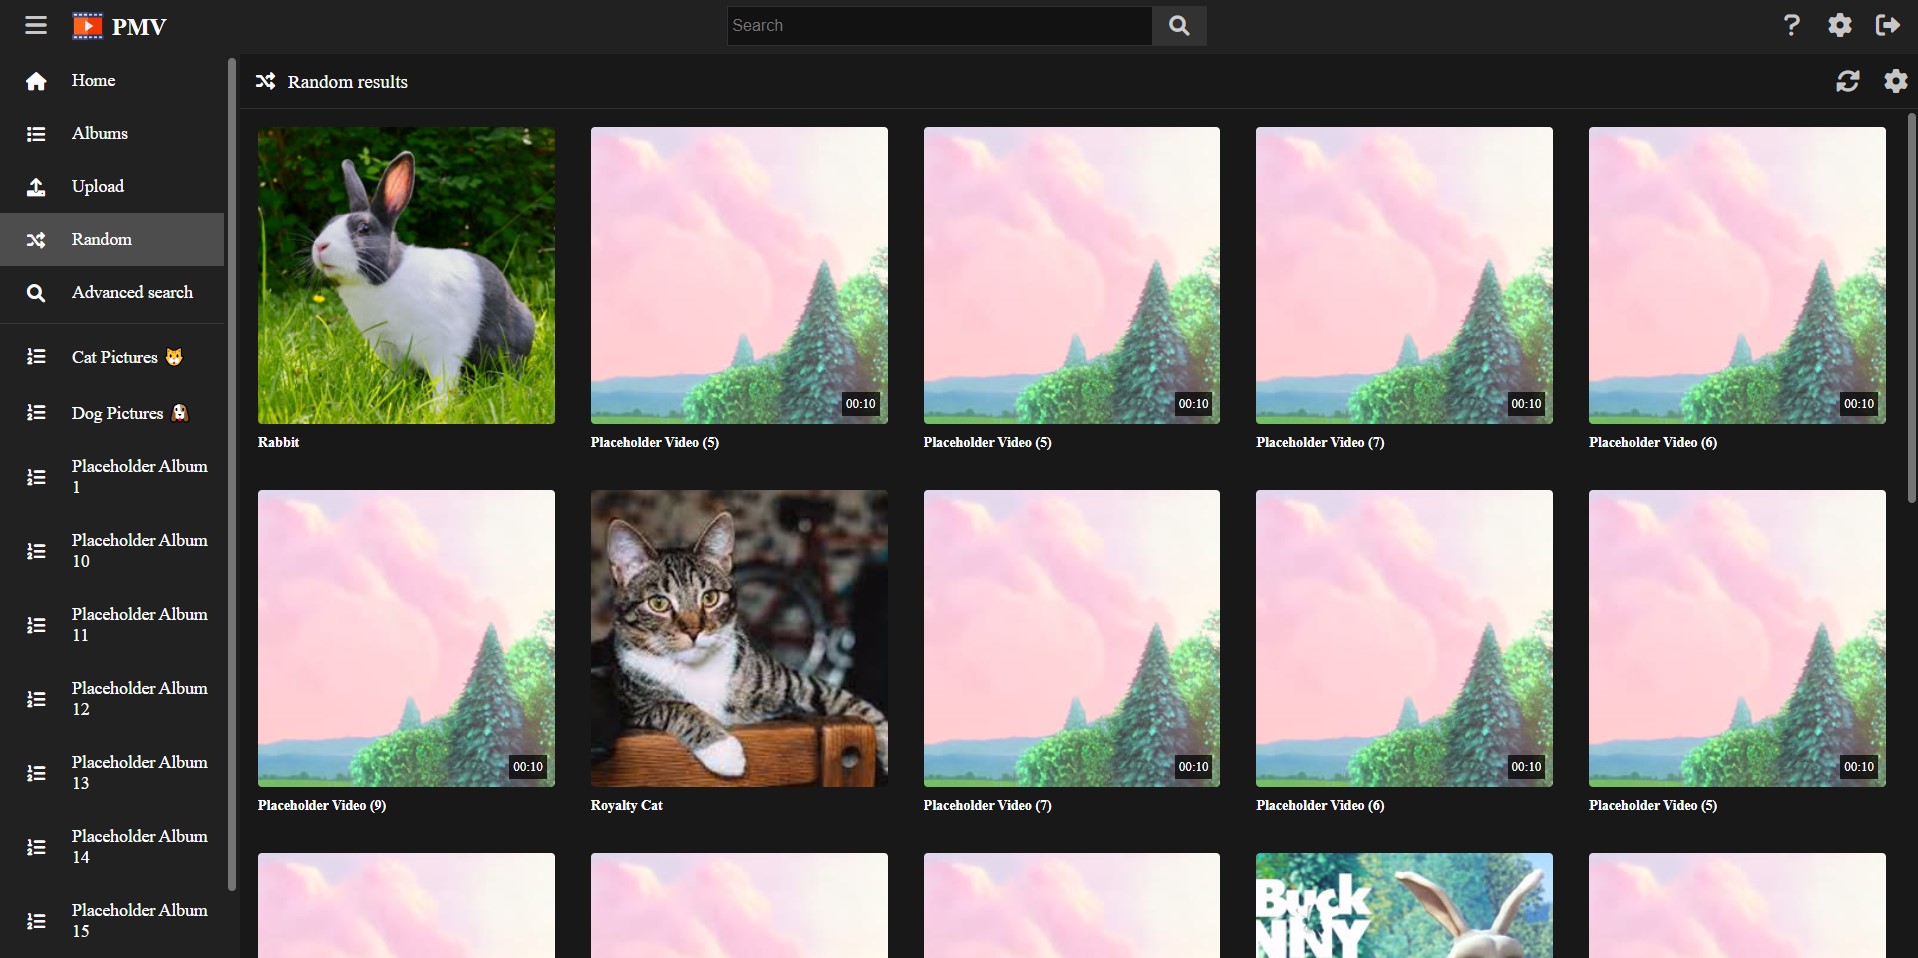
In case you want to load random media files from your media vault, you can try the Random page. This page works similar to the Media page, without the menu.
Each time you reload, a new seed is used, giving you a new set of random results.
You can use albums in order to keep ordered lists of media files in your vault.
In this tutorial we will explain how to create and use them.
If you visit the Albums page, you will see the full list of albums existing in your vault.
You can filter by name, and also create new ones from this page.
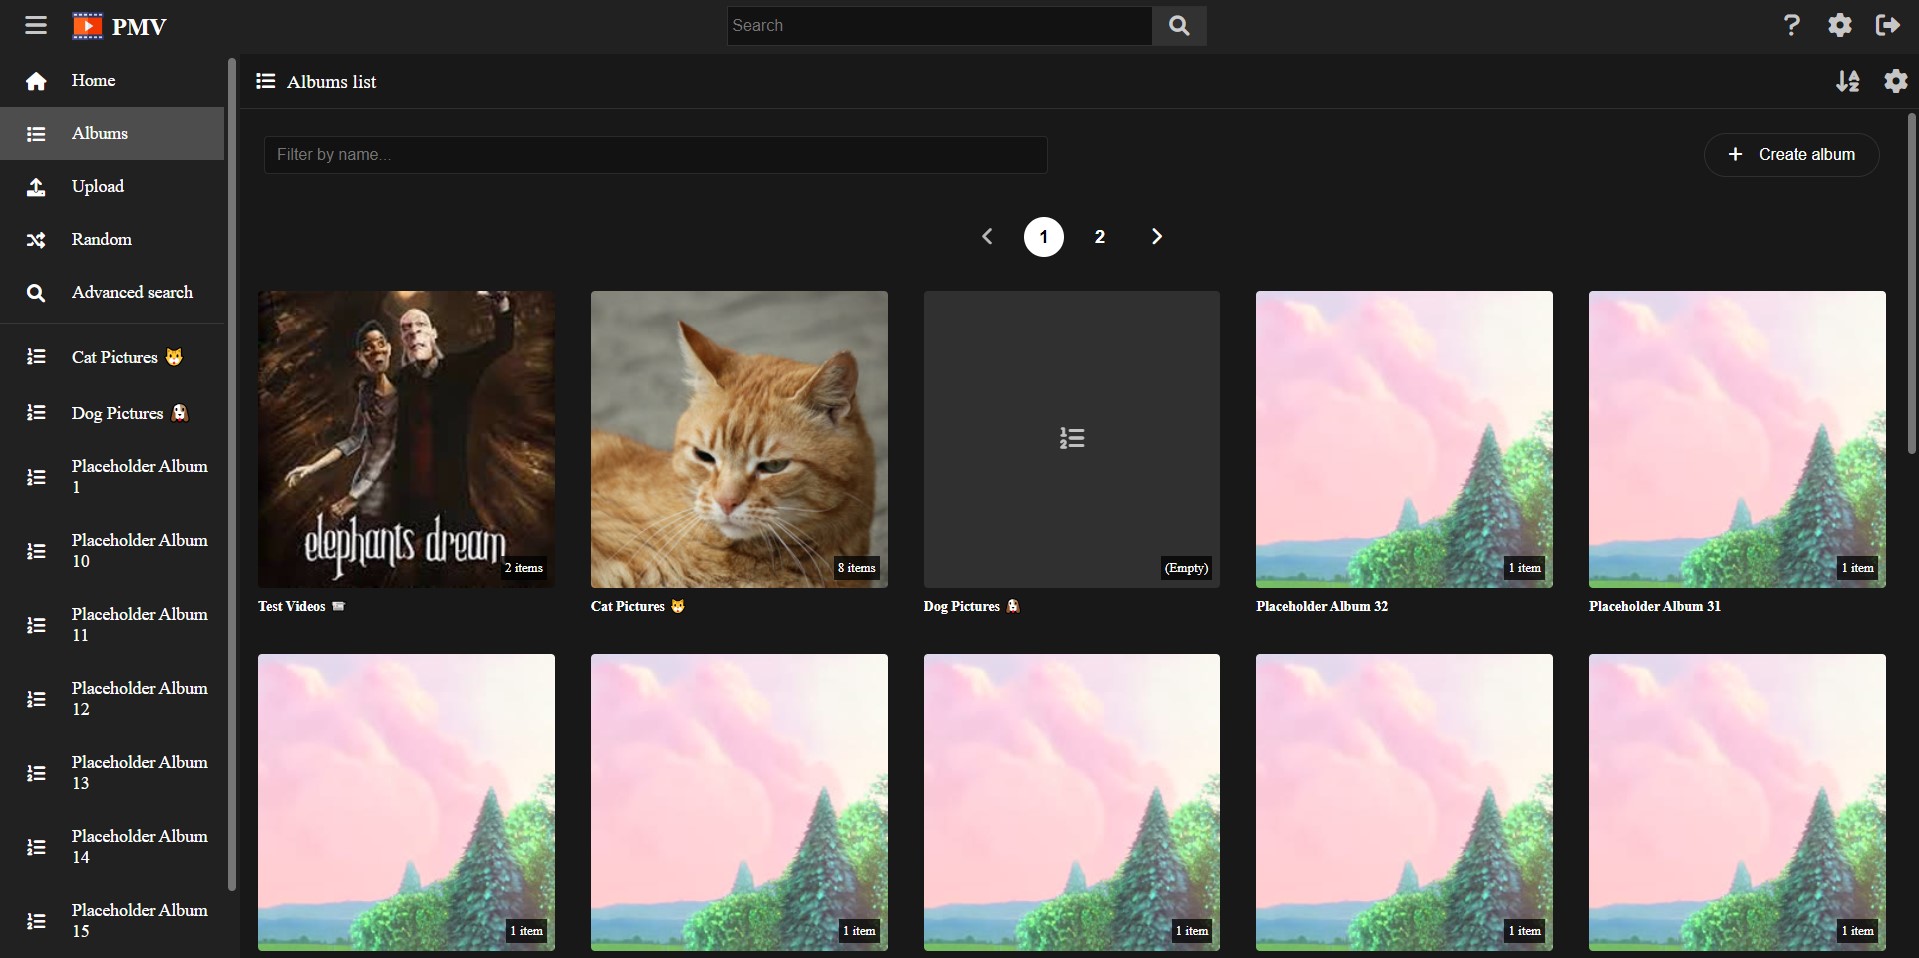
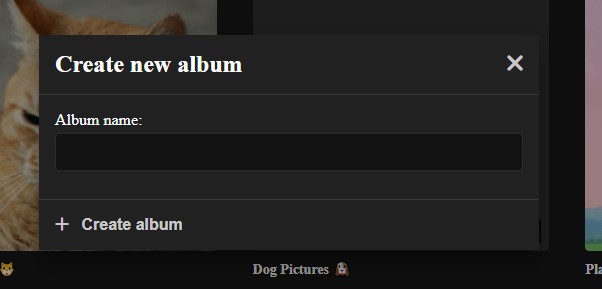
From the Albums page, click the Create album button in order to create a new album.
You must provide a name for the album and proceed.
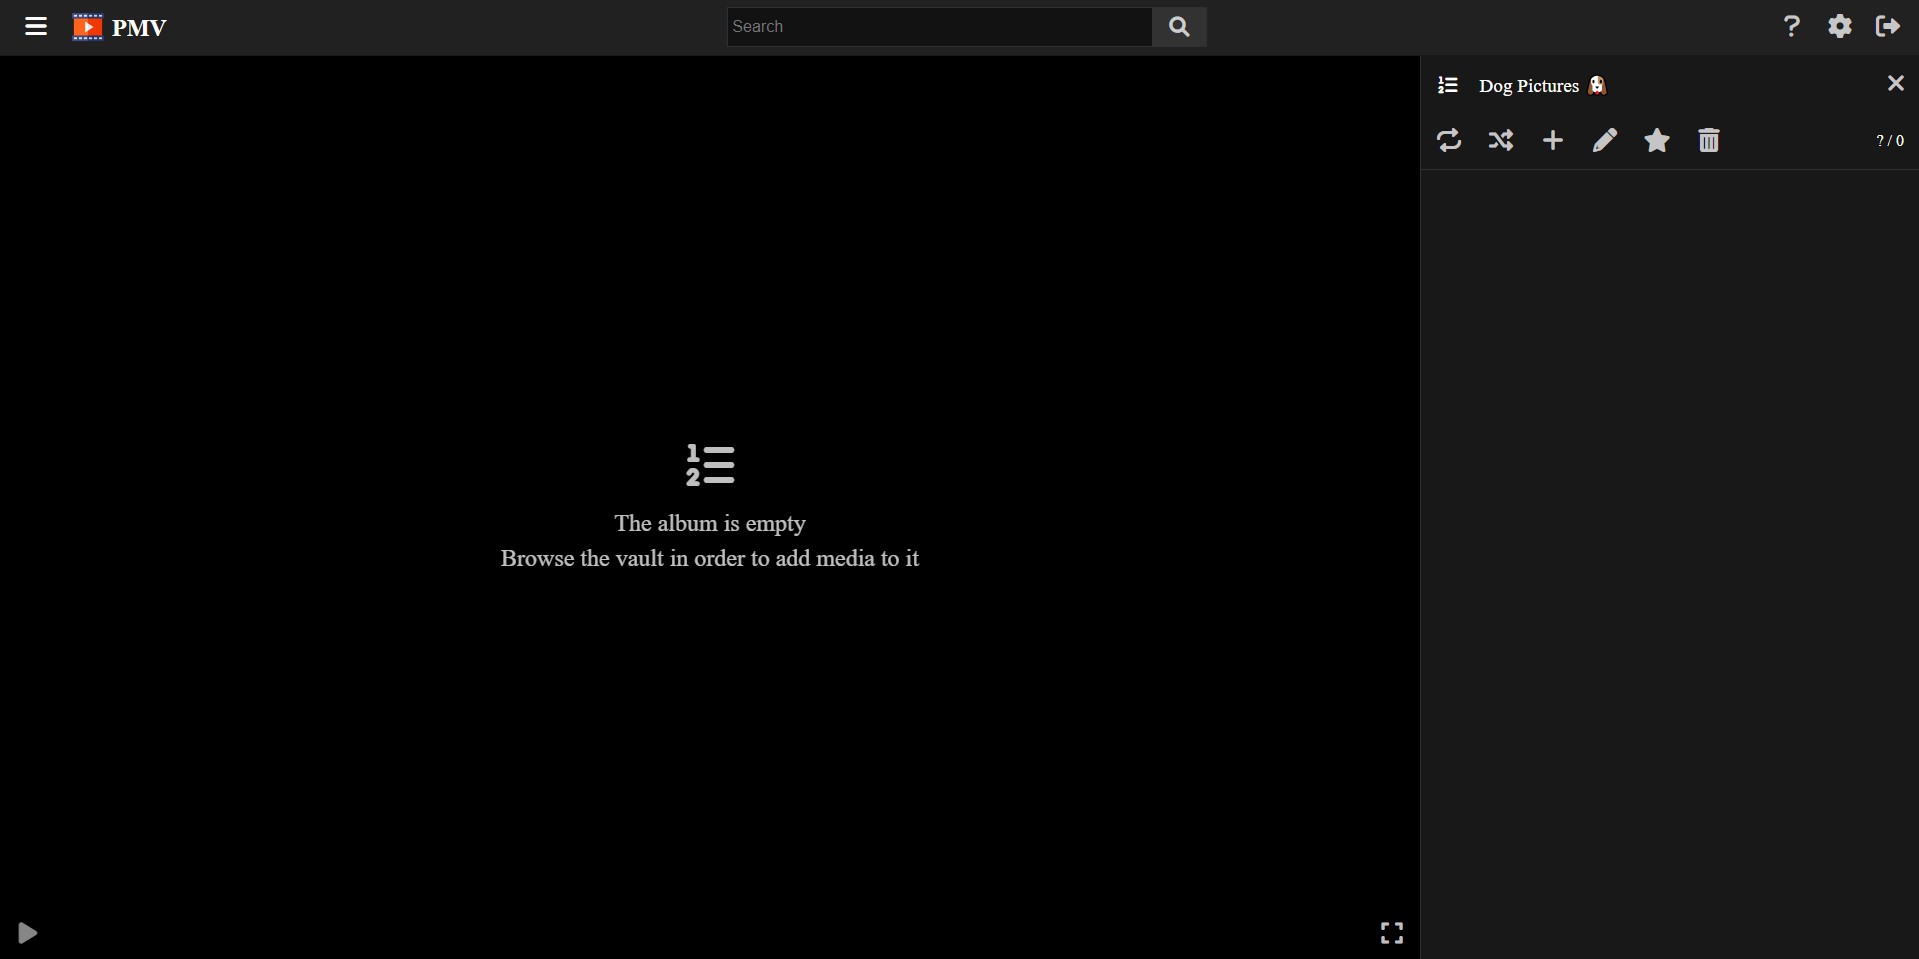
After the album is created, you will be redirected to it, being an empty album since it was just created.
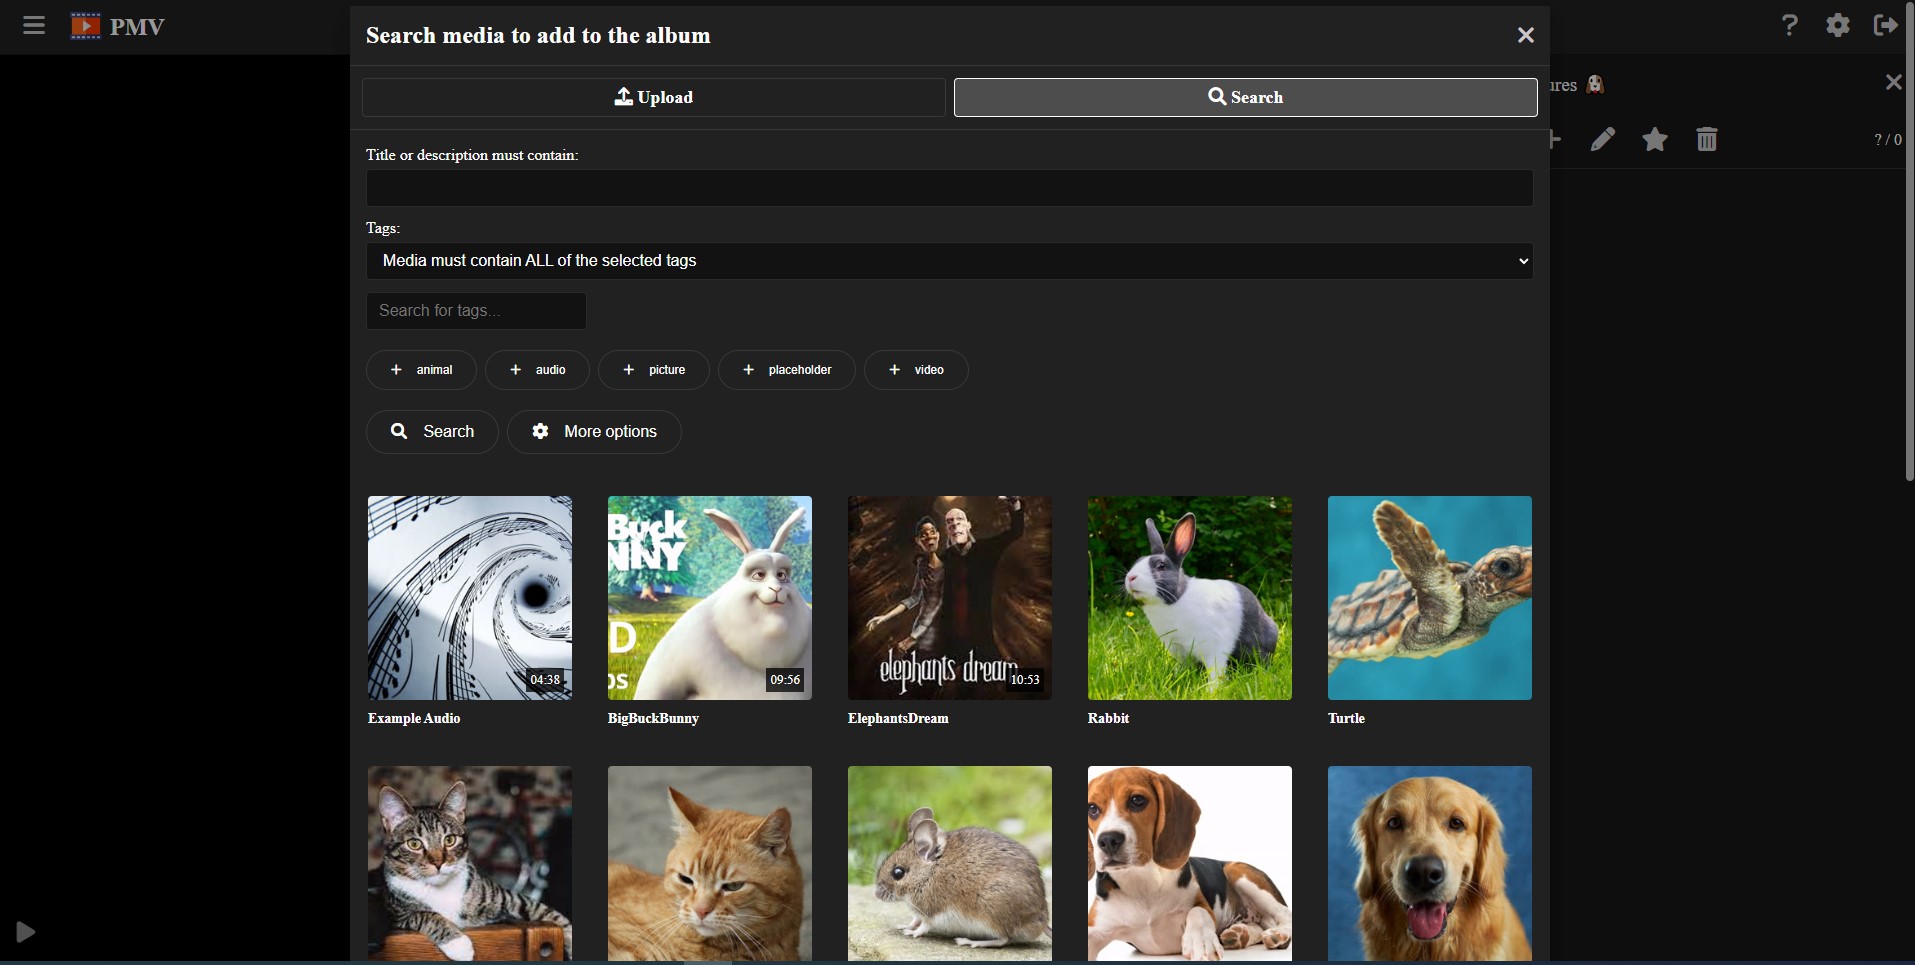
The first step after creating the album is adding the media files we want inside it.
In order to do this, you have two alternatives:
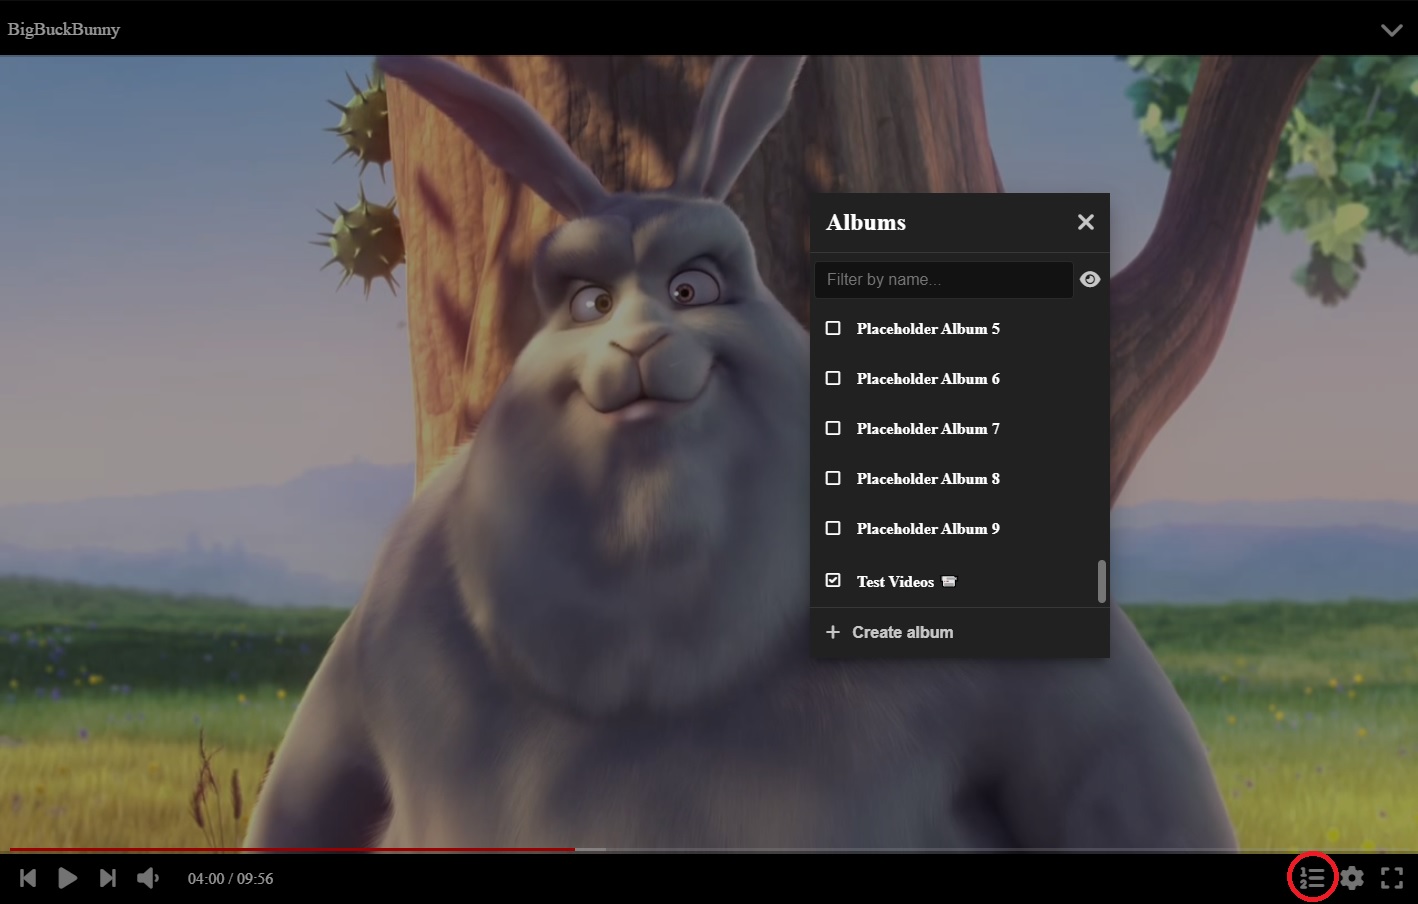
Once you have multiple media files inside an album, you can navigate using multiple methods:
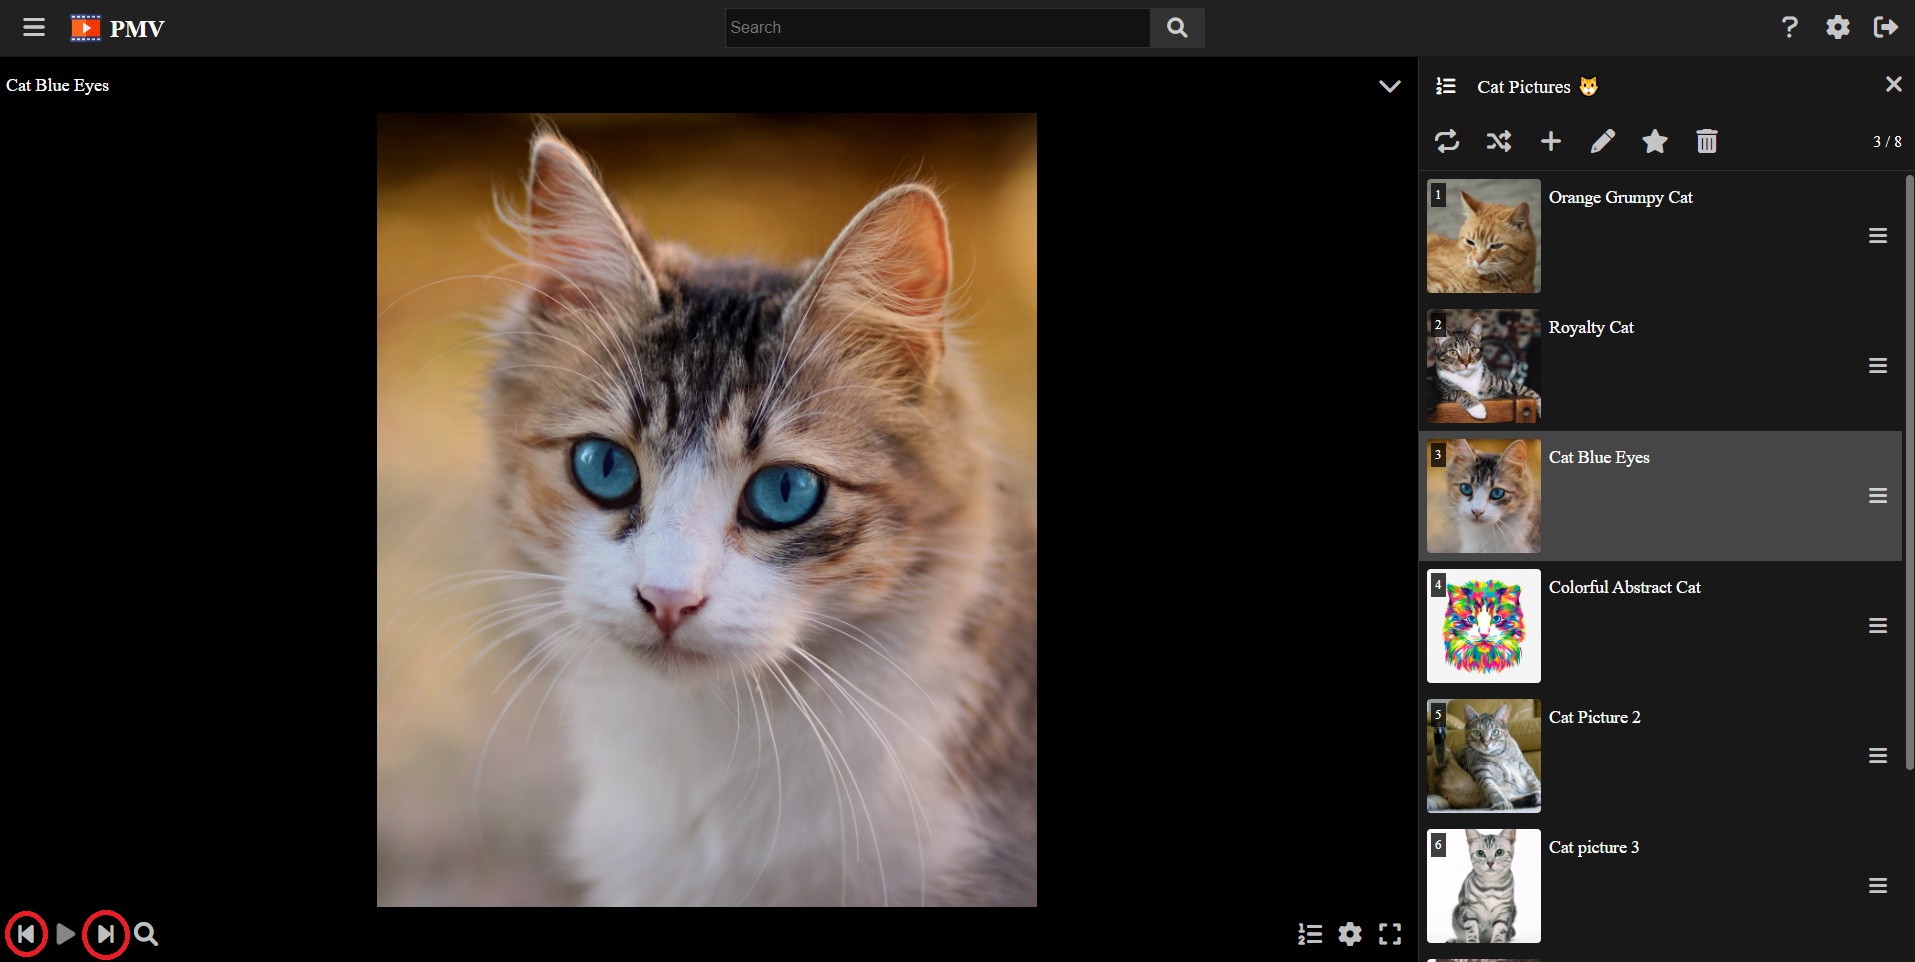
In the player configuration you can set the Auto next option, in order to automatically navigate to the next media when the video / audio ends or after a certain amount of time in the case of pictures.

You can set the Loop option for the album by clicking in the corresponding button in the album options. When enabled, the next media of the last element will be the first element, and the previous media of the first element will be the last element.

You can set the Random option for the album by clicking in the corresponding button in the album options. When enabled, the next media will be randomly chosen, and the previous media will be disabled.

By clicking in the Options button of a media file inside the vault, you will get a menu where you can change the position of the media file inside the album, and also delete it from the album.
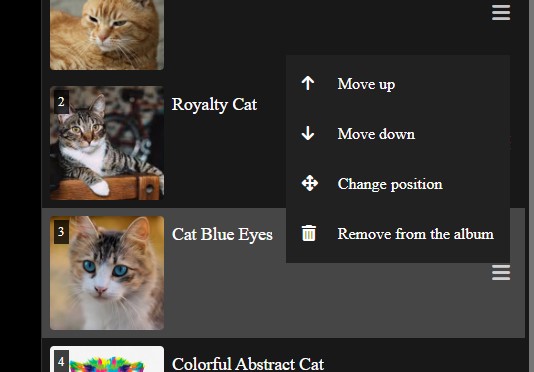
Also, if you are using a computer, you can drag and drop the elements in order to re-order them in a mode efficient way.
You can add the album into favorites by clicking the star button in the album options.

If the album is in favorites, it will appear at the top of the menu sidebar, in order to easily access it.
In order to rename the album, click in the pencil button in the album options.

In order to change the thumbnail of an album, click the image button in the album options.

By default, the album will use as its thumbnail, the thumbnail of the first element.
In order to delete the album, click in the trash button in the album options.

Note: Deleting the album will not delete any media file inside of it.
In order to make backups of your vault, you can just make regular copies of the vault folder. Due to its design, it’s always in a consistent status and spreads the data into multiple files, so any external backup tool will work.
Here is the list of alternatives you can use:
In this tutorial we’ll explain how to use the backup tool provided by the PersonalMediaVault installation.
When opening a vault from the launcher, you get a CLI interface with multiple commands.
In order to make a backup, use the backup command:
backup /path/to/backup/folder
In case the destination path is not empty, it will only copy the new files and update the ones that have been modified.
You can also use the backup tool from the terminal, running the pmv-backup binary:
pmv-backup backup /path/to/vault /path/to/backup/folder
In case you got the encryption key leaked, and it’s no longer secure, you can make a backup re-encrypting everything with a brand new randomly generated encryption key.
In order to do that, use the re-encrypt option:
pmv-backup re-encrypt /path/to/vault /path/to/backup/folder
Note: The re-encryption process may take a very long time. Make sure to always use a secure password in order to prevent data leaks in the first place.
Since restoring backup can take a long time, you may want a method to recover access to your vaulty fast in case you lose access to your credentials.
You can use the key-export option of the backup tool in order to export the vault encryption key:
pmv-backup key-export /path/to/vault
Make sure to back it up in a secure and private place.
In case you lose access to your vault, and want to recover the key, you can use the key-recover option of the backup tool:
pmv-backup key-recover /path/to/vault